


We get asked how to create fake participants in a call fairly often. It’s on par with herding cats to coordinate three real-live human devs to each open four Chrome tabs to simulate twelve call participants. “Oh, wait, this test is running on localhost, let me set up an ngrok tunnel… 10 min later ok, try now. Oh, now Vanessa is at lunch. Great, we’ll pick it back up when she’s back.” Three hours later, you have almost confirmed half of your app works with six participants, if all participants are on your machine. This is where Robots (our affectionate name for automated WebDriver instances) step in and save the day, or at the very least, a non-trivial number of hours.
The W3C working draft spec defines WebDriver as “a remote control interface that enables introspection and control of user agents.” a.k.a. a Robot. Most browsers implement this spec, with chromedriver, safaridriver, and geckodriver (Firefox) being the most common examples. There are quite a few libraries and frameworks out there leveraging these drivers to automate browsers for testing, fun, and profit.
This post will go over how to spin up WebRTC-friendly headless Chromium instances, locally or in “the cloud”, to create fake participants. Skip to the But I want to use Node section for a Selenium example (implemented in, you guessed it, NodeJS).
Just the facts, ma’am
If testing in Chrome is all you need and you are CLI inclined, here’s the TL;DR:
if MACOS
chromerobot = “/Applications/Google Chrome.app/Contents/MacOS/Google Chrome”
else
chromerobot = google-chrome-stable

chromerobot \
	--headless \
	--no-sandbox \
	--disable-gpu \
	--disable-sync \
	--no-first-run \
	--disable-dev-shm-usage \
	--user-data-dir=/tmp/chrome \
	--remote-debugging-port=9222 \
	--use-fake-ui-for-media-stream \
	--use-fake-device-for-media-stream \
	--autoplay-policy=no-user-gesture-required \
	--allow-file-access-from-files \
	--use-file-for-fake-video-capture=/full/path/to/daily.y4m \
	--use-file-for-fake-audio-capture=/your/favorite/file.wav \
	'https://your-domain.daily.co/roomname'
All explanations can be found here but for the highlights:
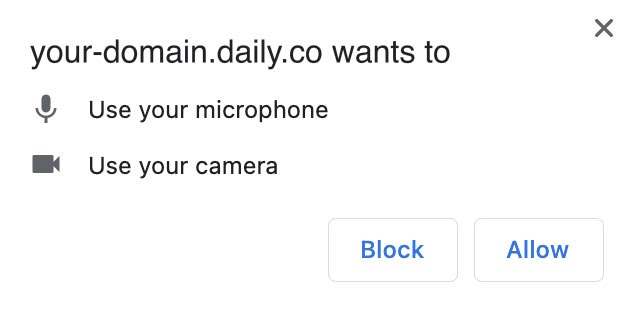
--headless: no UI & no display dependencies--disable-gpu: disable hardware acceleration--disable-sync: don't sync browser data to a user account--disable-dev-shm-usage: useful in docker containers--use-fake-ui-for-media-stream: bypasses this Chrome cam/mic permissions dialog
--use-fake-device-for-media-stream: use Chrome's fake media streams; video looks like this and audio is aboop boop boop

- optional: pass in your own custom media like a cool kid.
--allow-file-access-from-files \
--use-file-for-fake-video-capture=video.y4m \
--use-file-for-fake-audio-capture=audio.wav
The accepted video format is a bit arcane, so feel free to use the daily.y4m file found here if your ffmpeg skills are a bit rusty. Any .wav file will do for audio. If these are not passed in, Chrome’s green pac-man and boop boop audio are used.
Head(less) in the cloud(s)
For extra credit you can dream big and build off of the above by creating an AMI that runs Chromium on EC2 instances. This can be achieved, step by step, like so
- Launch EC2 instance (perhaps an Amazon Linux 2 AMI-flavored instance)
- Install Chrome (for example, via
curl https://intoli.com/install-google-chrome.sh | bash) - Create AMI from EC2
- Launch instances with:
aws ec2 run-instances \\
    --region us-east-2\\
    --image-id ami-SHA \\
    --count 25 \\
    --instance-type 'c5.large' \\
    --user-data '#!/bin/sh\google-chrome-stable \\
    --headless \\
    --no-sandbox \\
    --disable-gpu \\
    --disable-sync \\
    --no-first-run \\
    --remote-debugging-port=9222 \\
    --remote-debugging-address=$(ifconfig | head -n2 | tail -n1 | awk '"'"'{ print $2 }'"'"') \\
    --autoplay-policy=no-user-gesture-required \\
    --use-fake-ui-for-media-stream \\
    --use-fake-device-for-media-stream \\
    --user-data-dir=/tmp/chrome "https://your-domain.daily.co/room"
But I want to use Node
Fret not, here is the gist of the basic chromedriver-using-selenium-webdriver-npm-module setup. This includes the custom fake media video file and requires the ChromeDriver program, which can be found here.
Gotcha 1: Chrome and ChromeDriver’s versions must match. You'll see the error SessionNotCreatedError: session not created: This version of ChromeDriver only supports Chrome version __ otherwise.
Protip 1: Check your version of Chrome via chrome://version and download the corresponding driver.
Gotcha 2: “Help! I spun up a bunch of headless robots and they have taken over my machine.” It is true that browser instances without heads are a bit more difficult to catch and kill.
Protip 2: This one liner will find and kill all WebRTC-friendly ChromeDriver processes and return CPU usage to its rightful owner: the GUI Chrome instance.🙃
kill -9 $(ps | grep -i 'use-fake-ui-for-media-stream' | awk '{print $1}')
In conclusion
There are many ways to automate all the things(™) and these are just a few ways to start. After things run smoothly with chromedriver, try leveling up by using geckodriver and safaridriver with selenium-webdriver. Extra points are awarded to those who run multiple different WebDrivers at the same time.
Happy Roboting!
Never miss a story
Get the latest direct to your inbox.