


At Daily, we're always excited to showcase new ways to easily integrate video calls into all kinds of apps using our video and audio APIs.
If you’re looking to build an app but prefer to start with a "no-code" development platform, chances are you've heard of Bubble. Bubble is a powerful no-code platform, which means it provides a graphical user interface to configure app UI building blocks into functional software. It's a great option for anyone who wants to build an app, especially if you're not interested in coding an app from scratch.
To help you take your no-code apps to the next level, you can now quickly add video chat to your Bubble apps using the new Daily plugin for Bubble. 🎉
In this tutorial, we're going to build a simple Bubble app—"Quick Huddle"— using the Daily Bubble plugin.
Getting started
Before we get started, let's take a look at Quick Huddle's planned functionality:
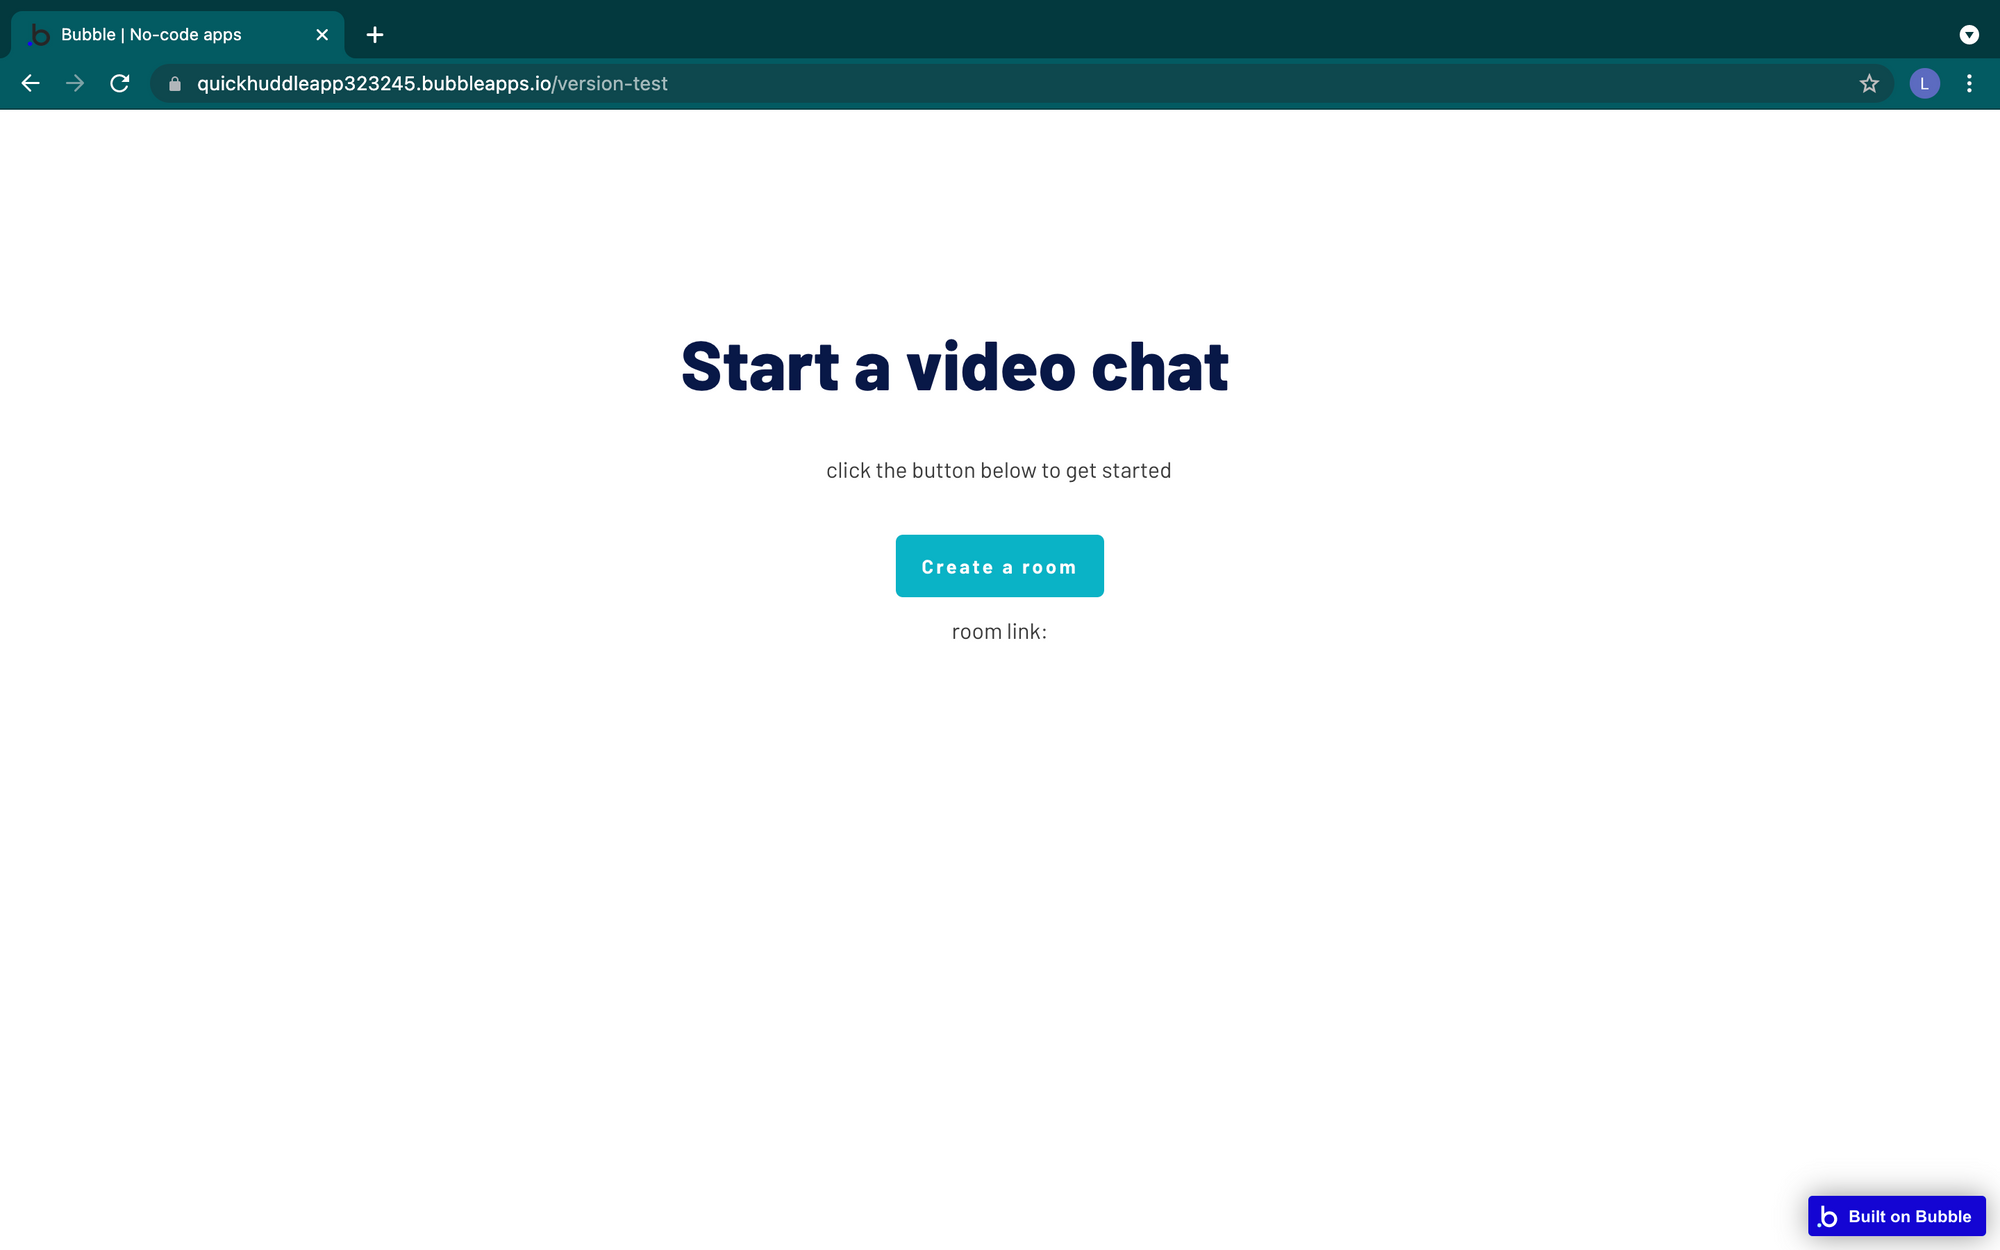
- Quick Huddle is a video chat app specifically designed for quickly jumping into calls with others.
- Users can create a video room and share it with their friends without having to use any authentication forms and without having to create a Daily account. Just click and start chatting!
- Quick Huddle video rooms will only be accessible for 10 minutes. After that time is up and everyone has left the call, the room will be unavailable. (We weren't joking when we said "quick chats".)
If you would like to see the final results before learning how we built this demo app, check out our live demo of Quick Huddle to give it a test. Alternatively, you can view it in the Bubble editor, as well.
What you'll need to add Daily video chat to your Bubble app
To build your own version of Quick Huddle, you'll need to sign up for two accounts:
- A Daily account. Specifically, you'll need a developer API key, which can be found on the Developers page.
- A Bubble account
Once your Bubble account is set up, sign into Bubble and select New app to initialize a blank project.
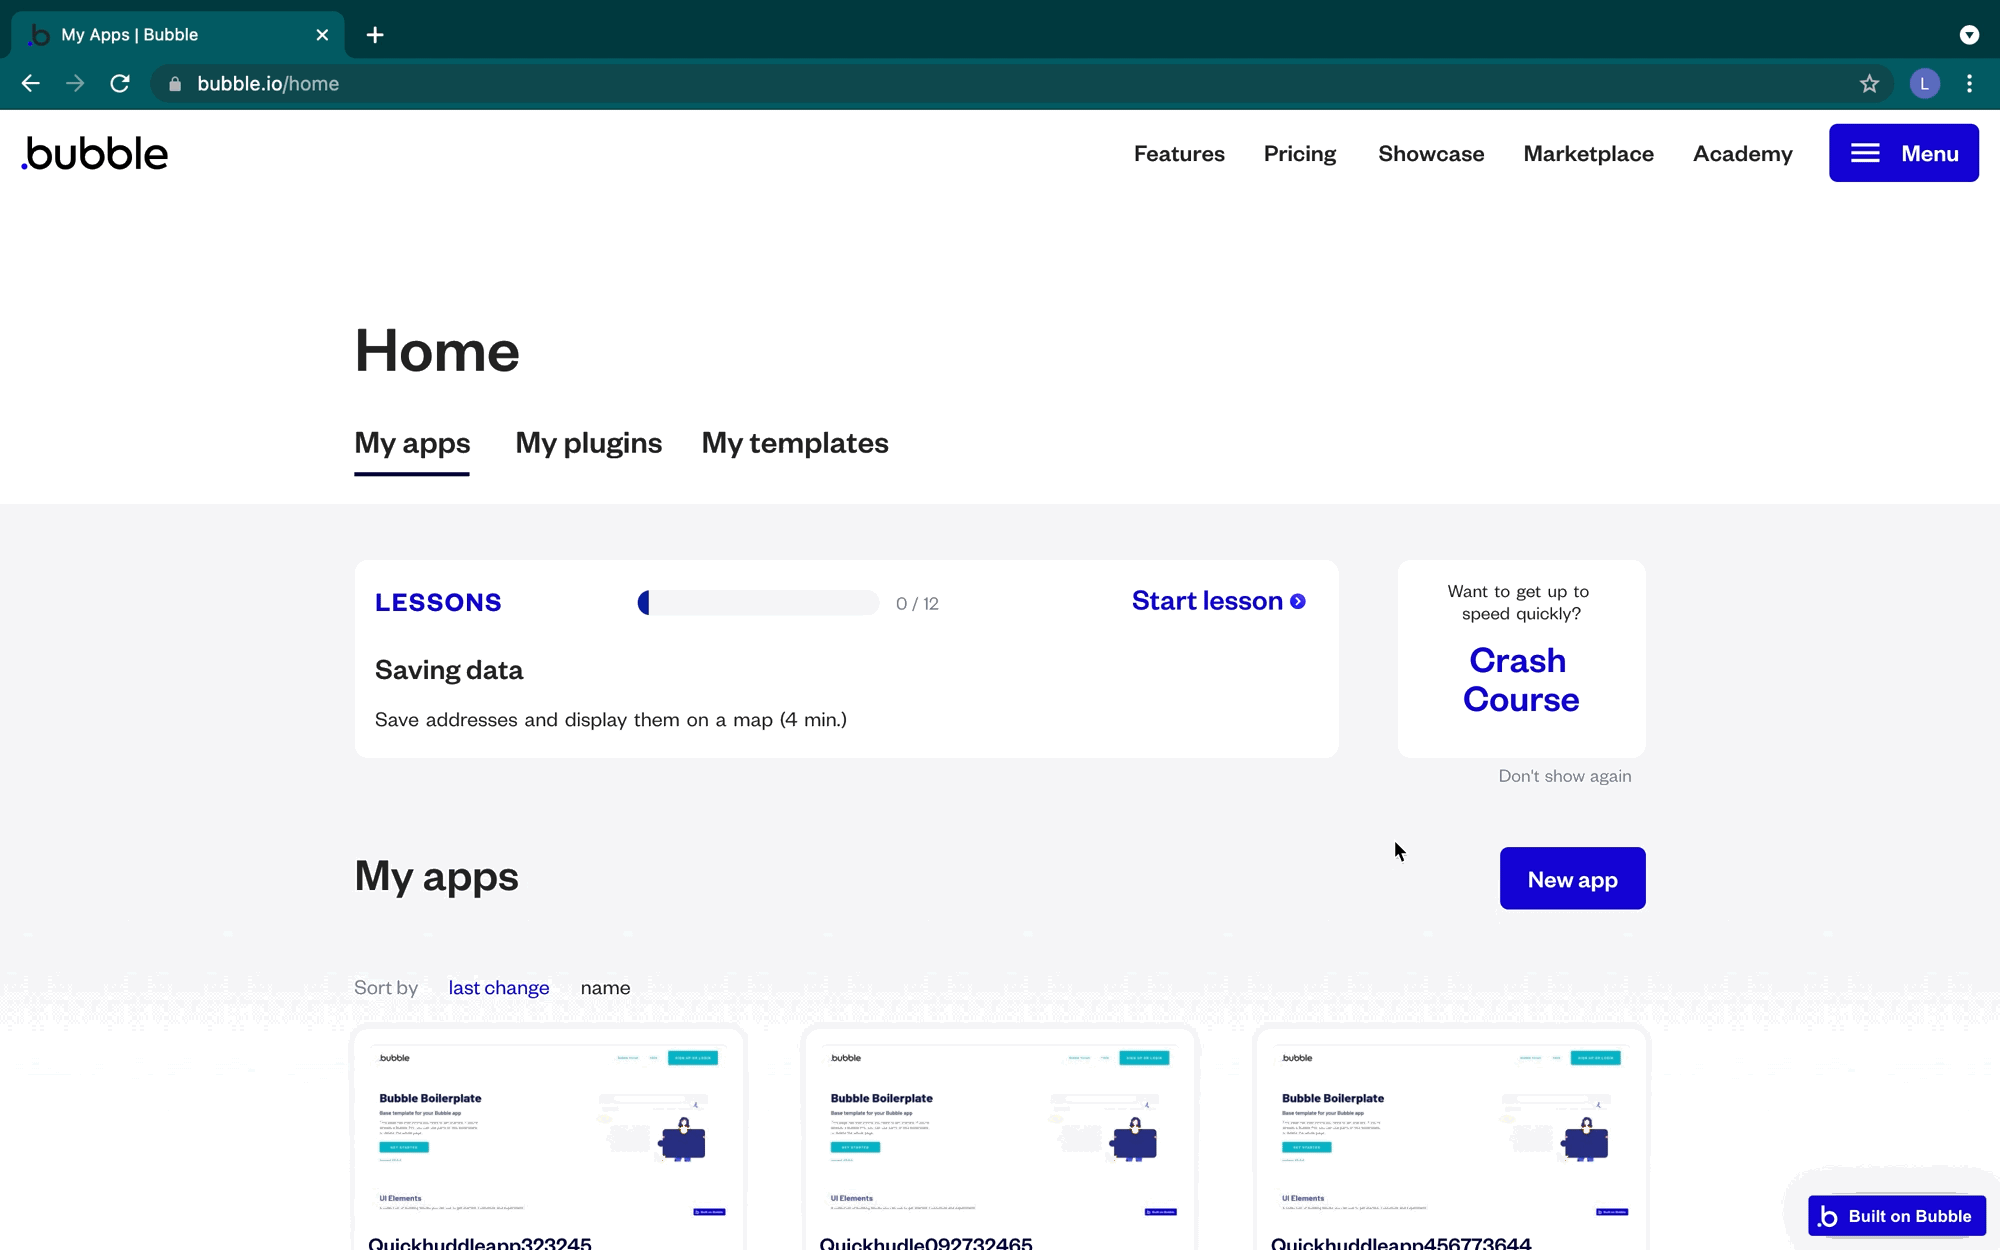
If you haven't created a Bubble app before, you'll select Create a new app near the bottom of the page.
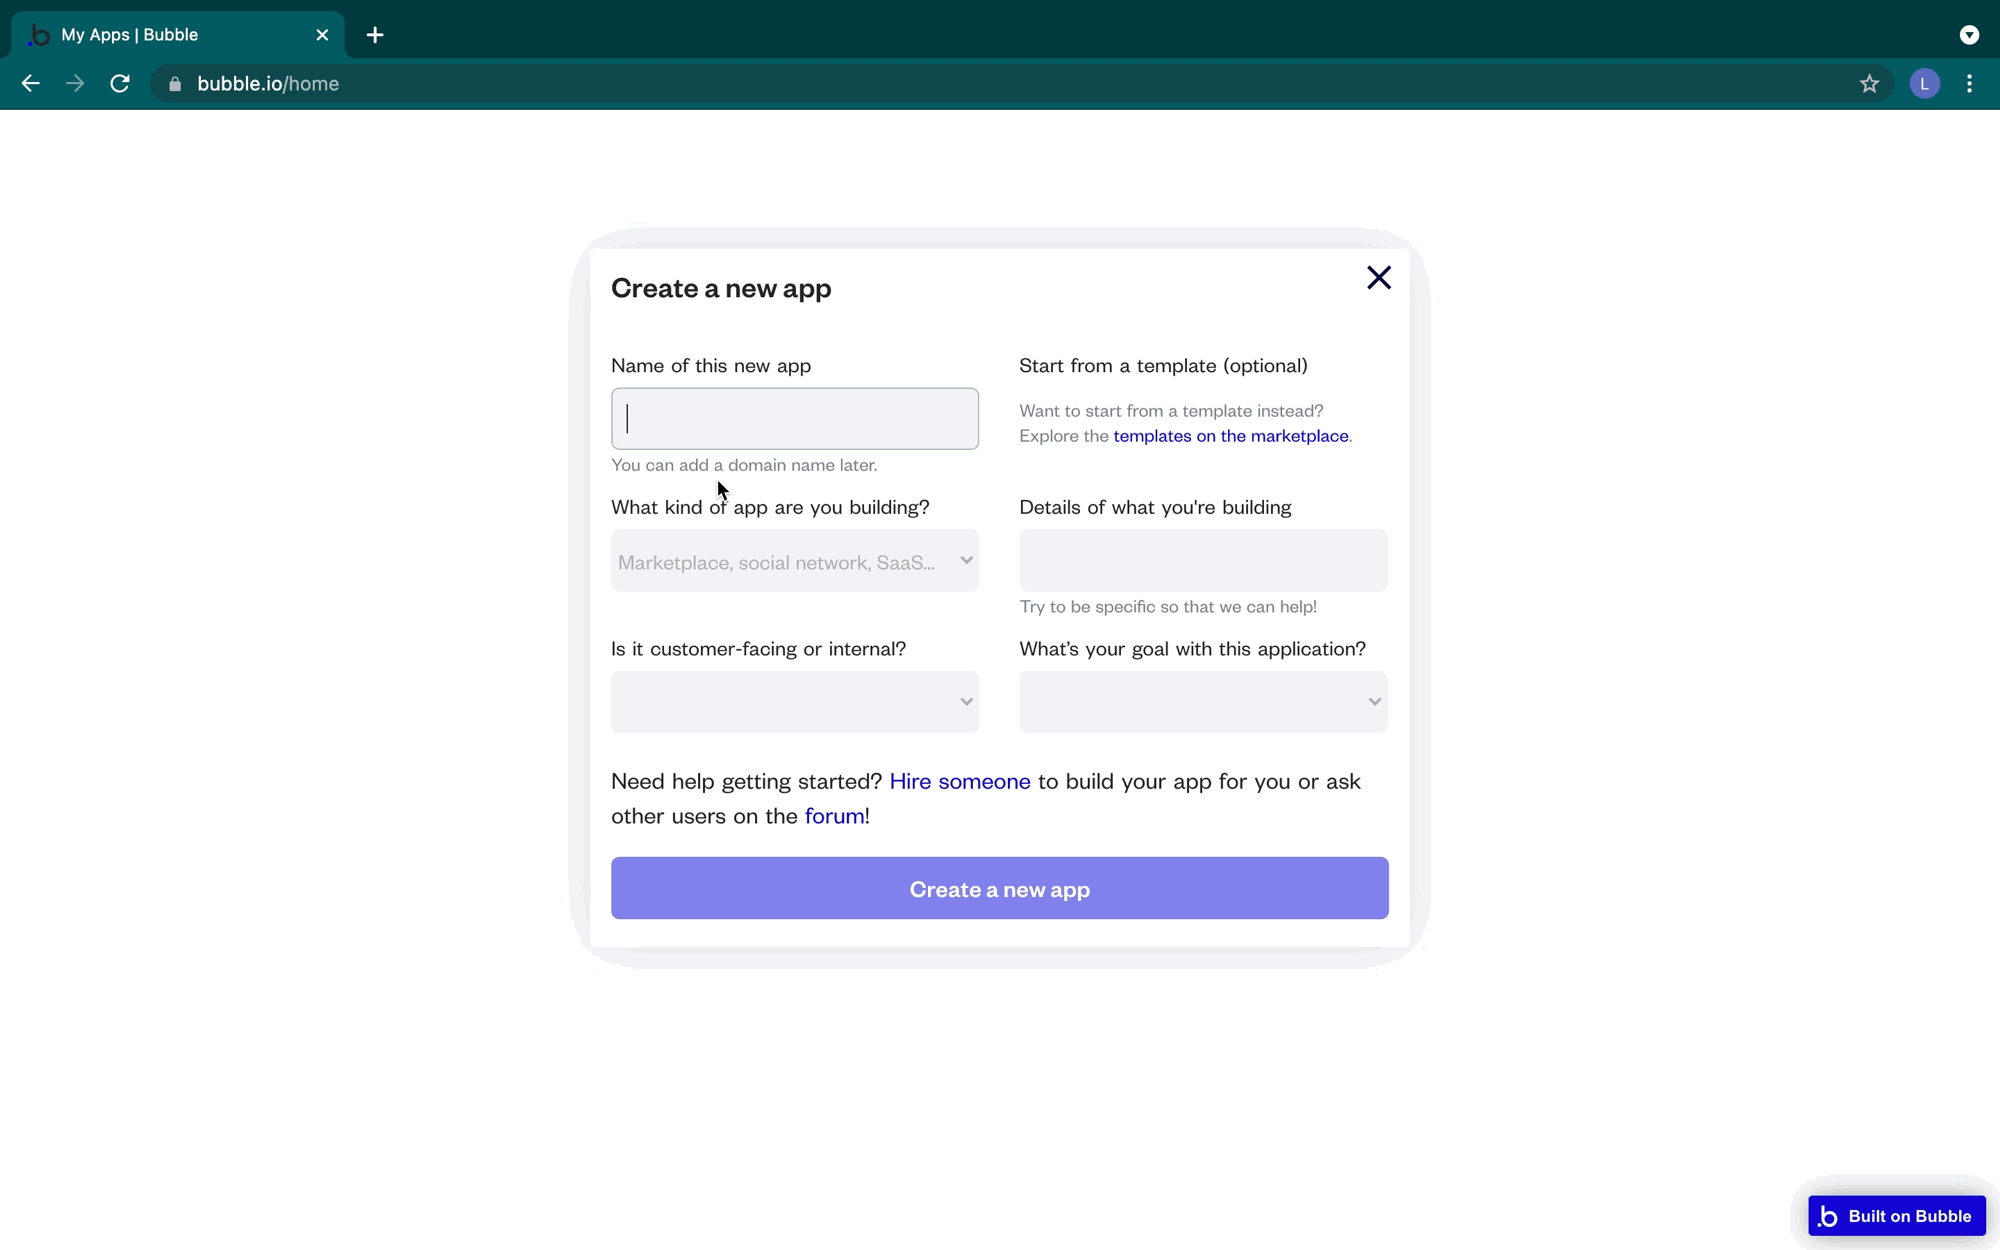
In the popup form, we'll fill out some basic information about the app (these details are up to you) and select Create a new app . The app name will need to be a name that isn't already taken by another Bubble user, but you'll be able to add a custom domain to the app later.
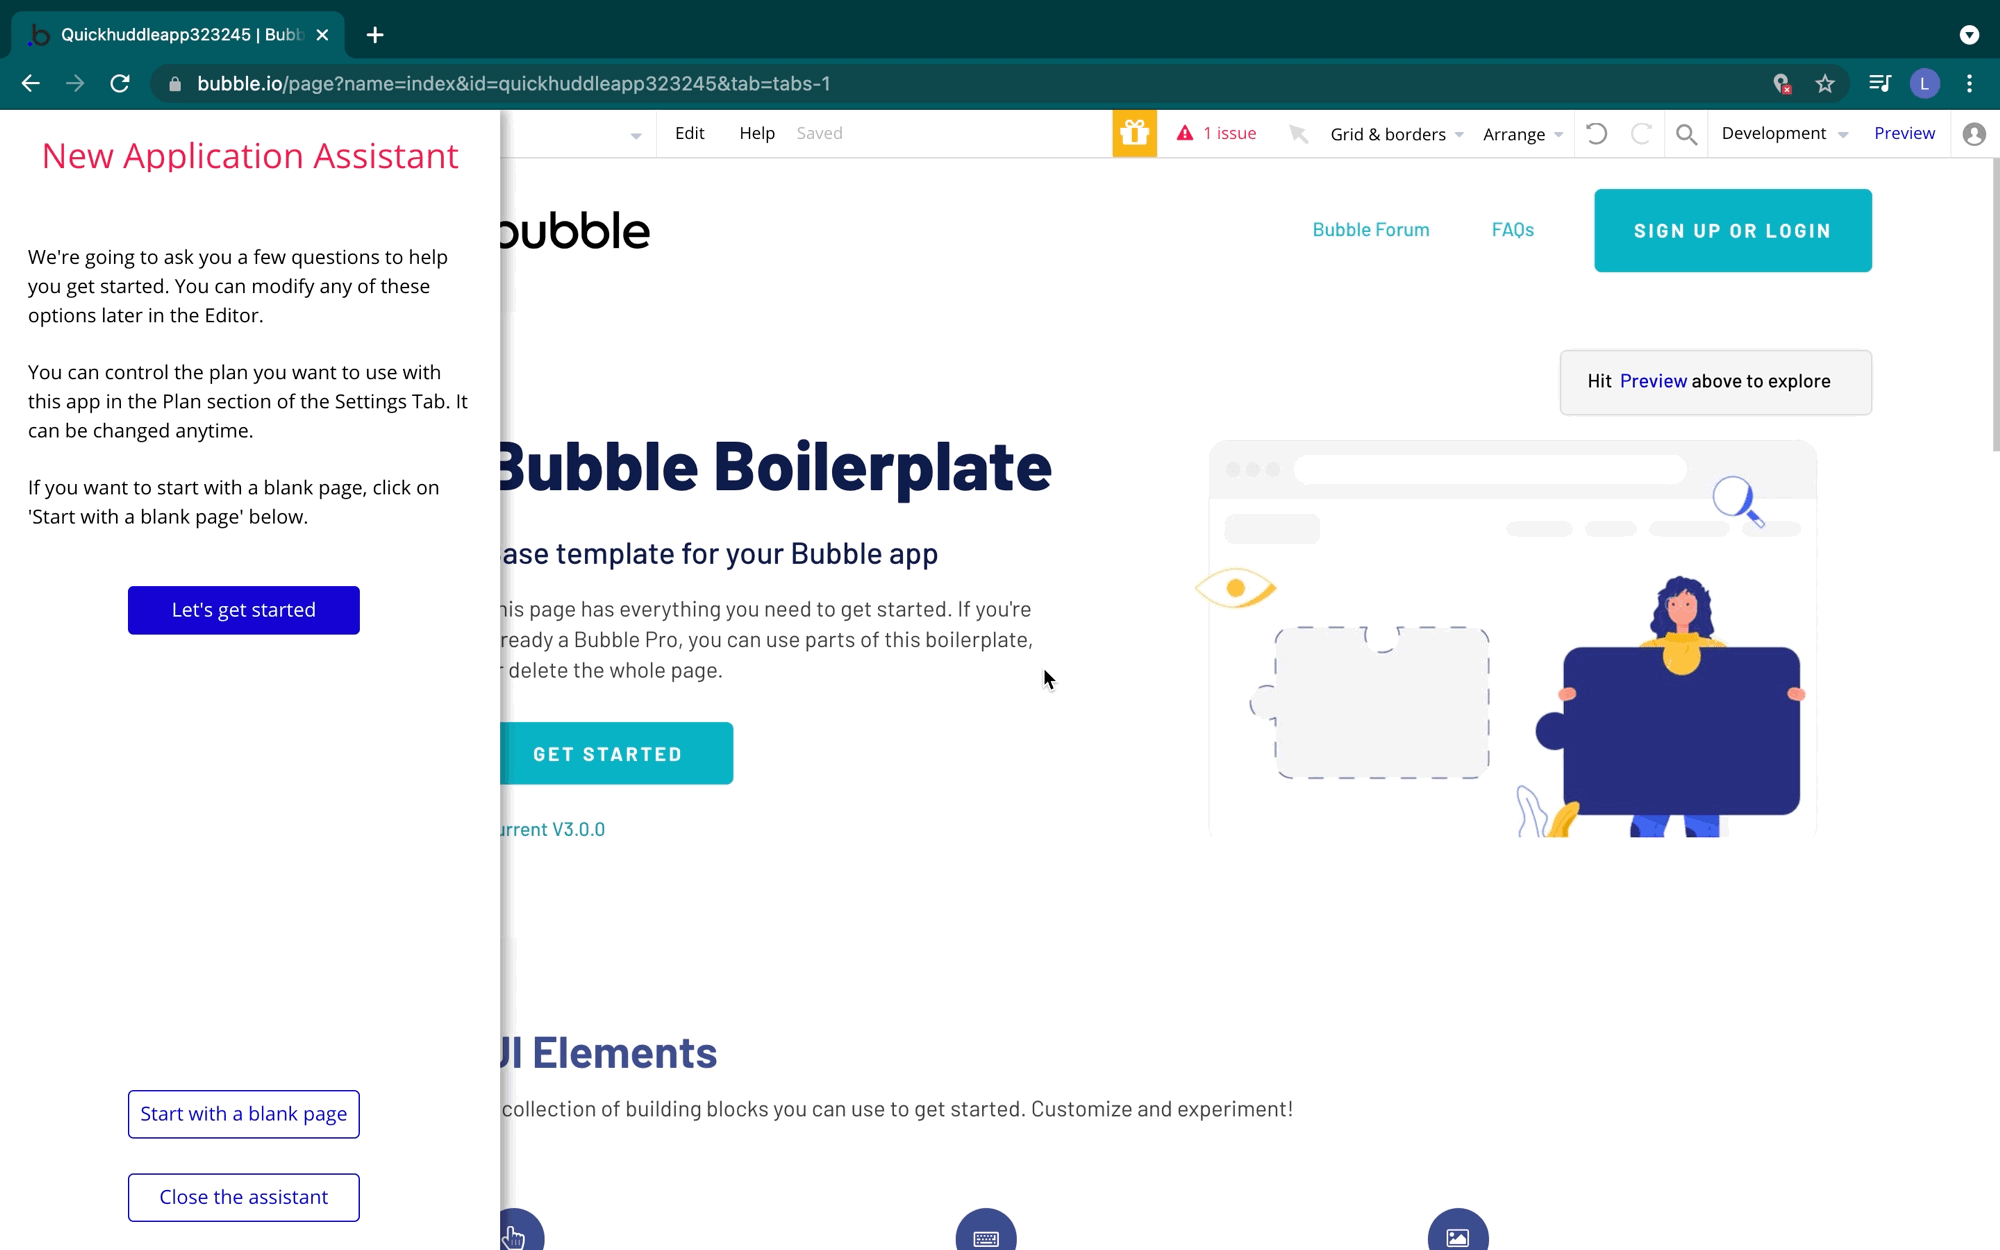
Once we're in our Bubble editor, click Start with a blank page and close the application assistant.
From within the editor, you'll click on Plugins and Add plugins. Search for "Daily Video Conferencing & Chat", then click Install. Once installed, click Done to return to the editor.
Note: The Daily plugin will your browser access to your webcam(s) and microphone(s) for video and audio calls.

Once the plugin is installed, we'll need to provide Bubble with our Daily API key, which we can get from the Daily developer dashboard. From the Installed Plugins view, drop the API key into the API key input. Add "Bearer" in front of the API key, too, to ensure our API requests are authenticated successfully.
It should look something like this:
Bearer 7748c2e1a58f9701ea2c031c9c99e79eb6bb1016a0b7582a046695ge93612335

That's it for the initial setup of the plugin. Daily plugin actions and data sources will be accessible in our Bubble app. Below is a list of the actions and data calls that are included with the plugin. Click the links to explore the relevant API calls the data calls or actions make.
Data calls
Actions
- Daily - Join Room
- Daily - Leave Room
- Daily - Start Livestream
- Daily - Stop Livestream
- Daily - Create Room
- Daily - Create Meeting Token
- Daily - Update Room
- Daily - Delete Room
Note: To see which parameters are available for these actions view the action in your Bubble editor.
In the next section, we'll modify the designs.
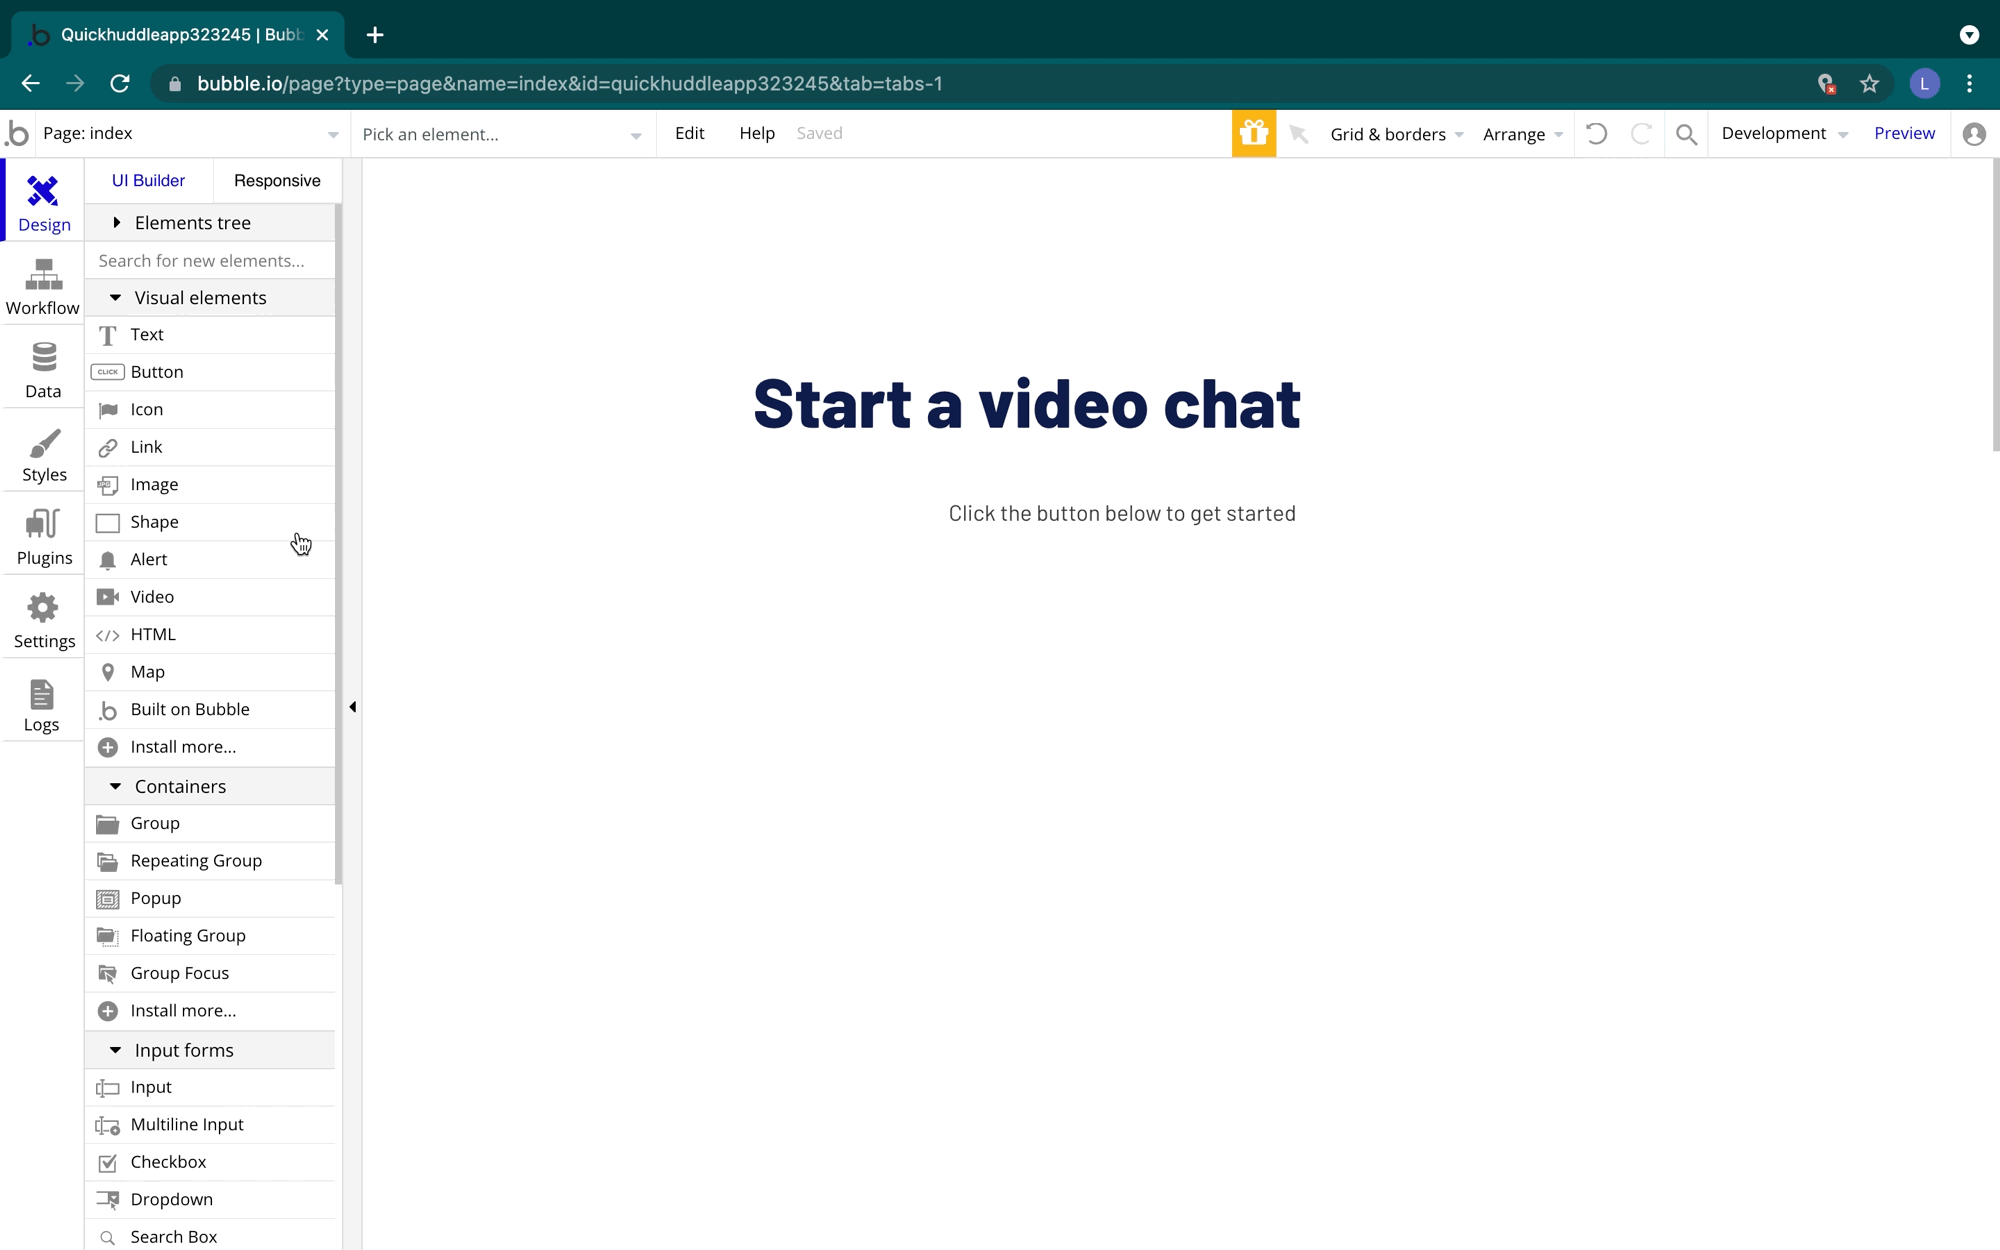
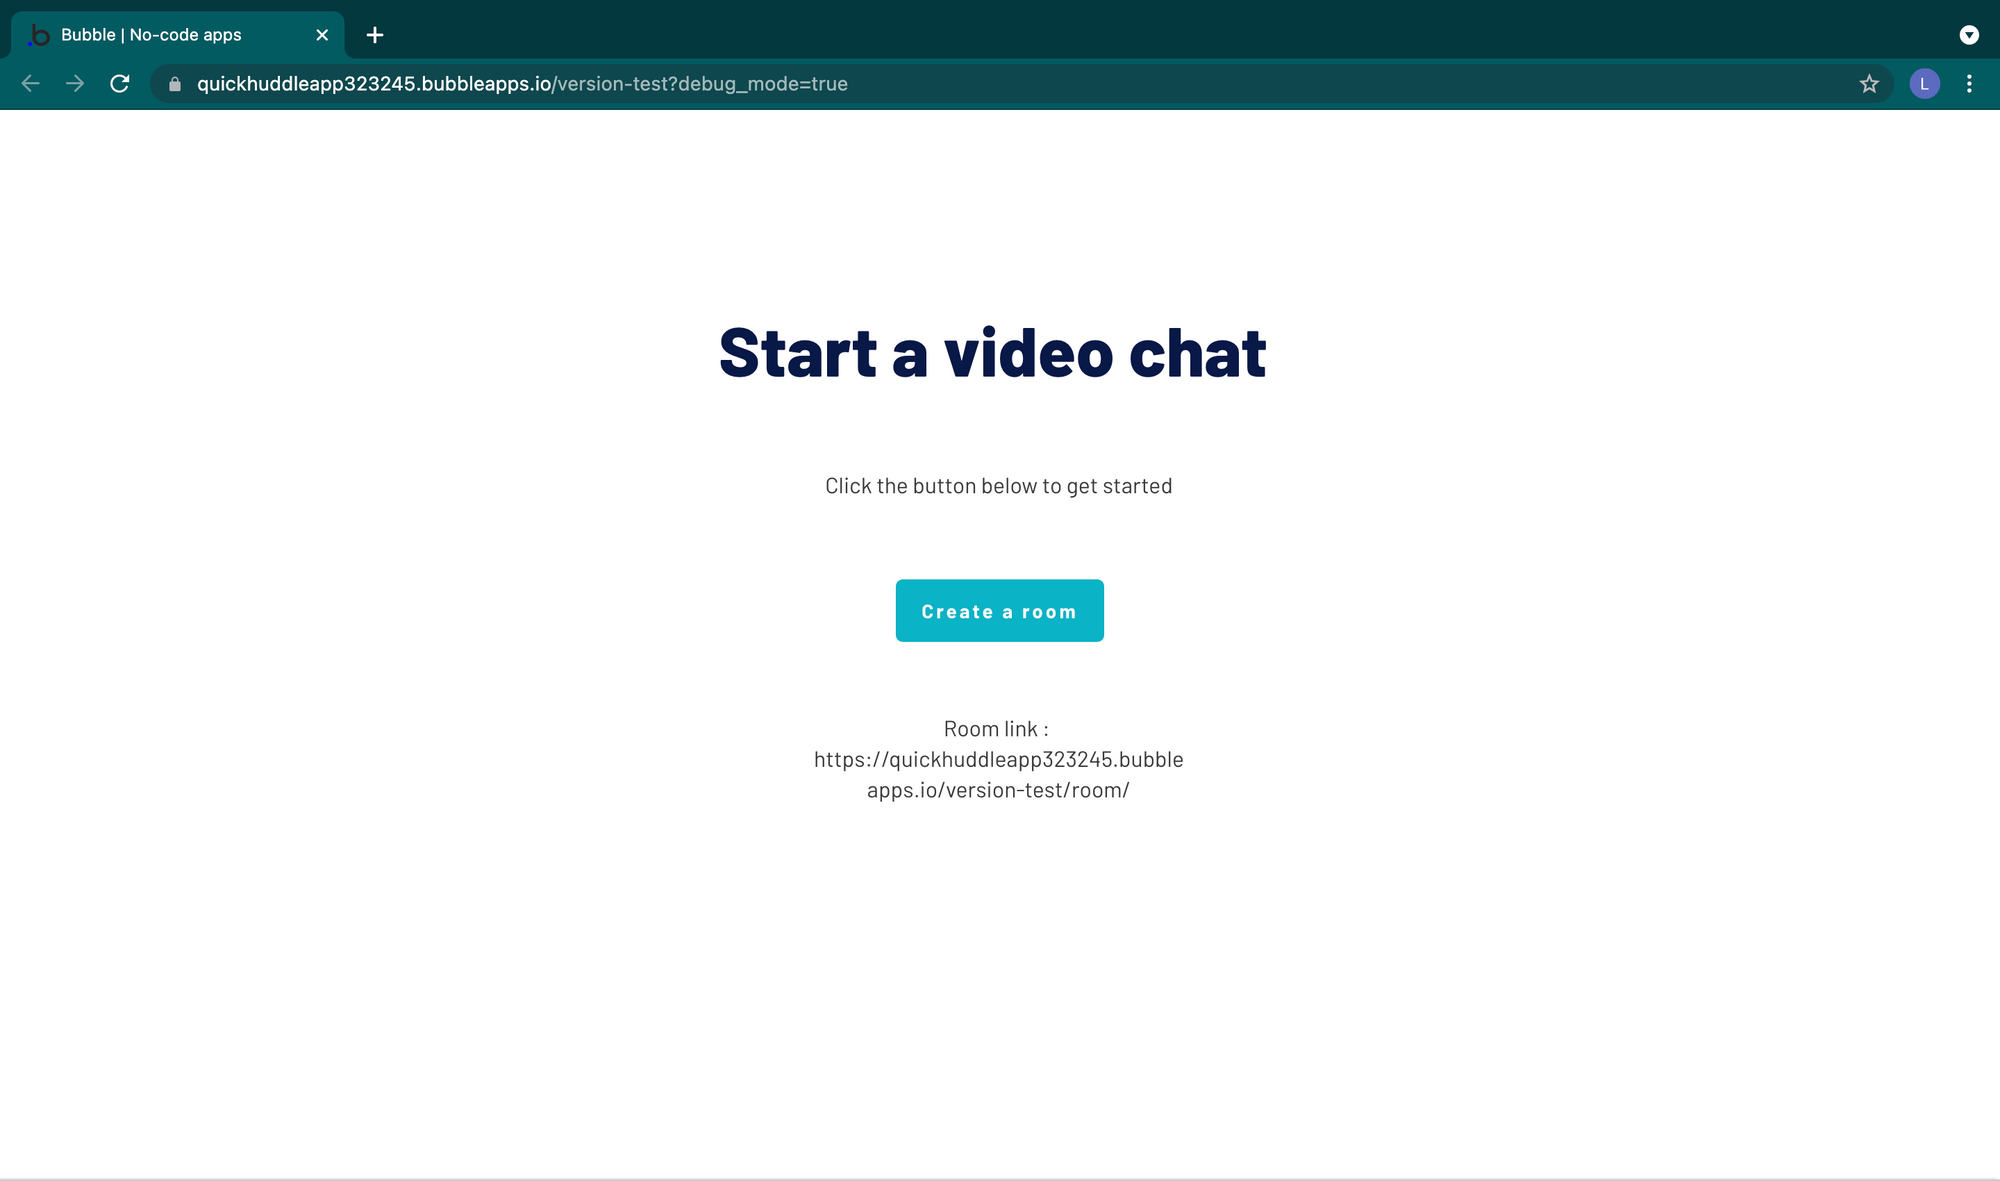
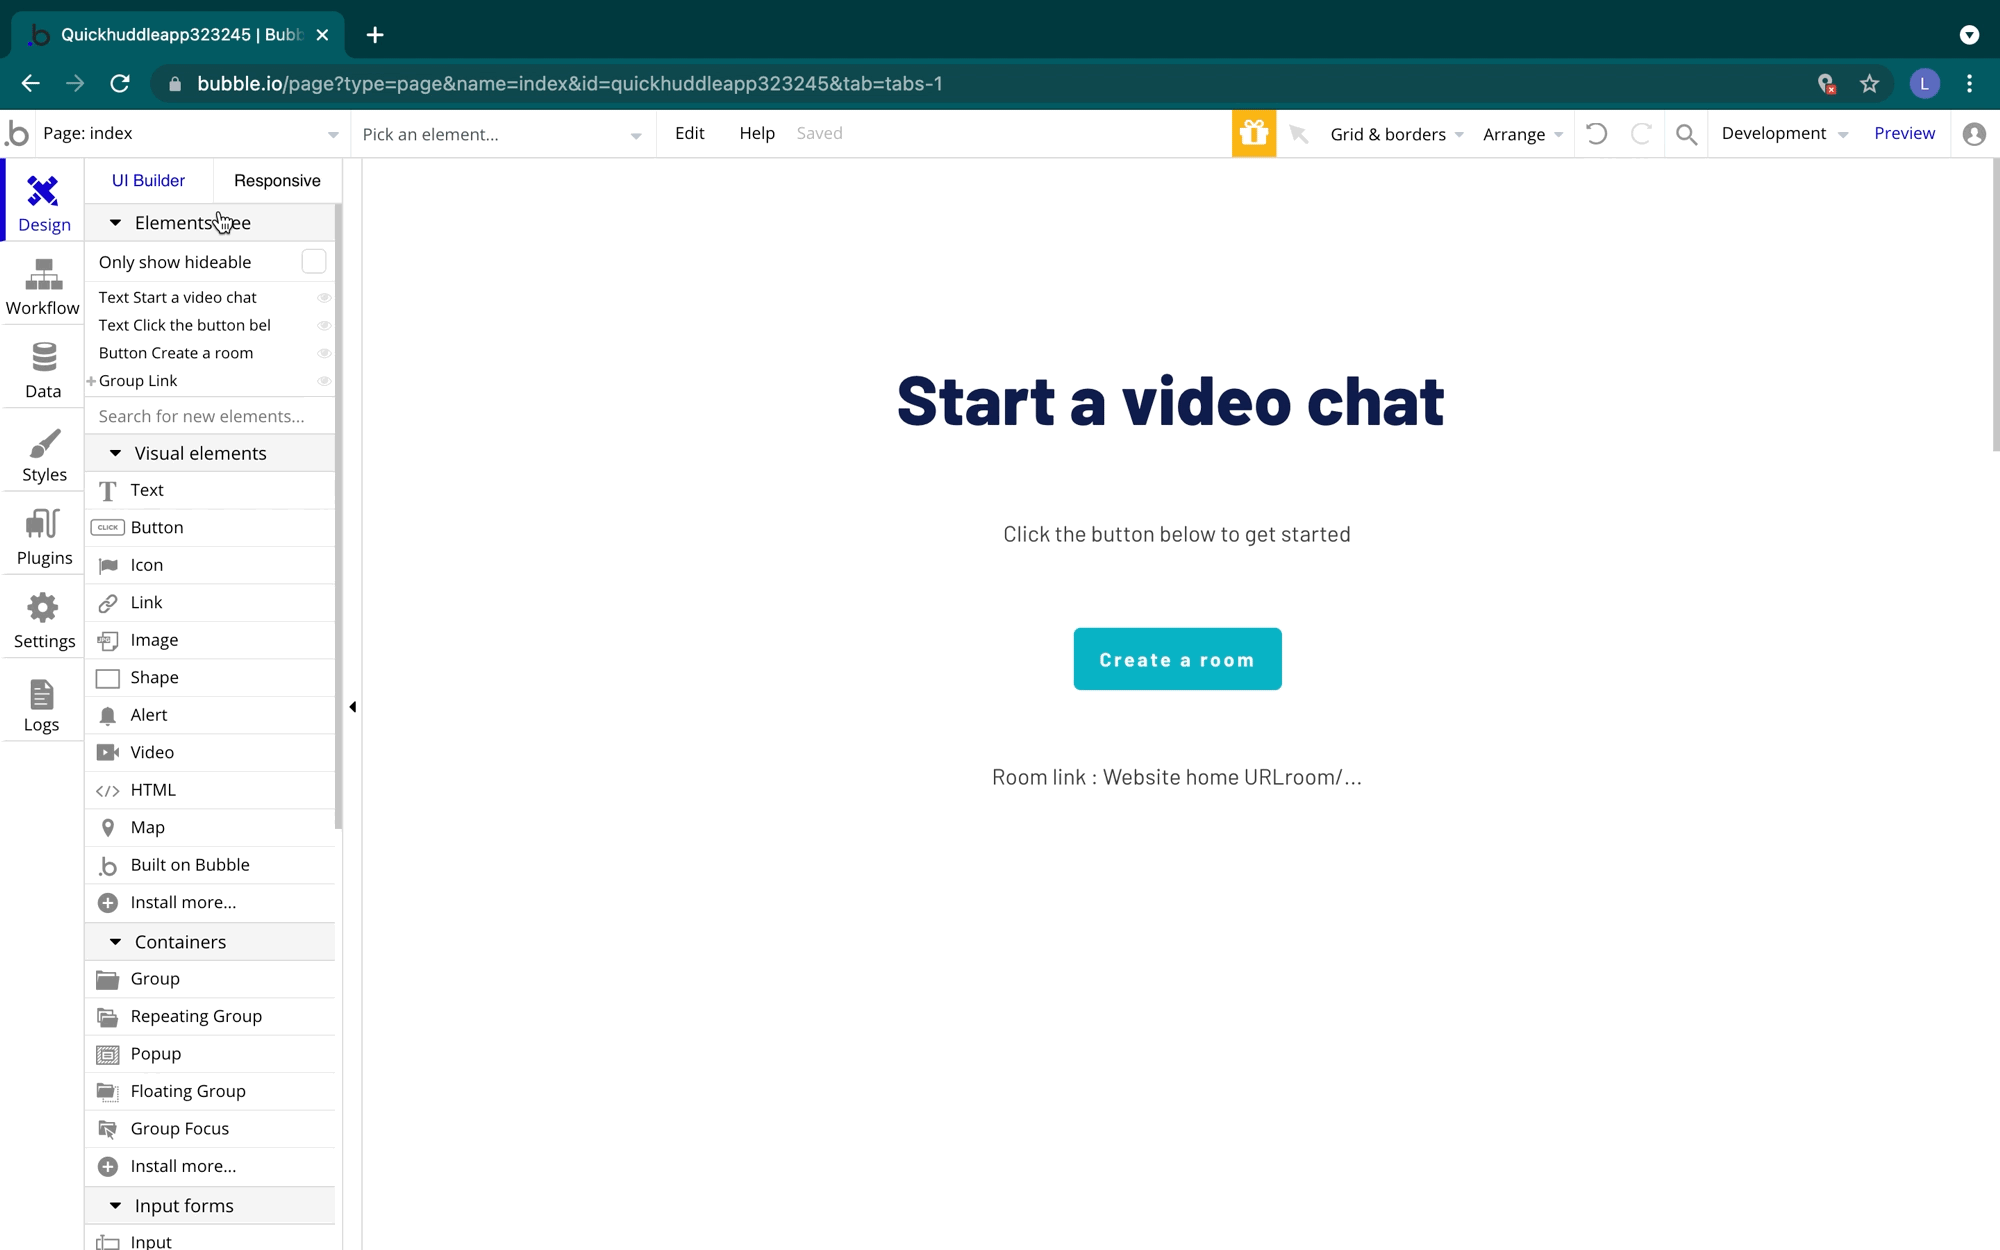
Customizing our Index Page
All Bubble apps include an index page. It's the homepage page of our app and will be what our users first see when they visit Quick Huddle to create a room.
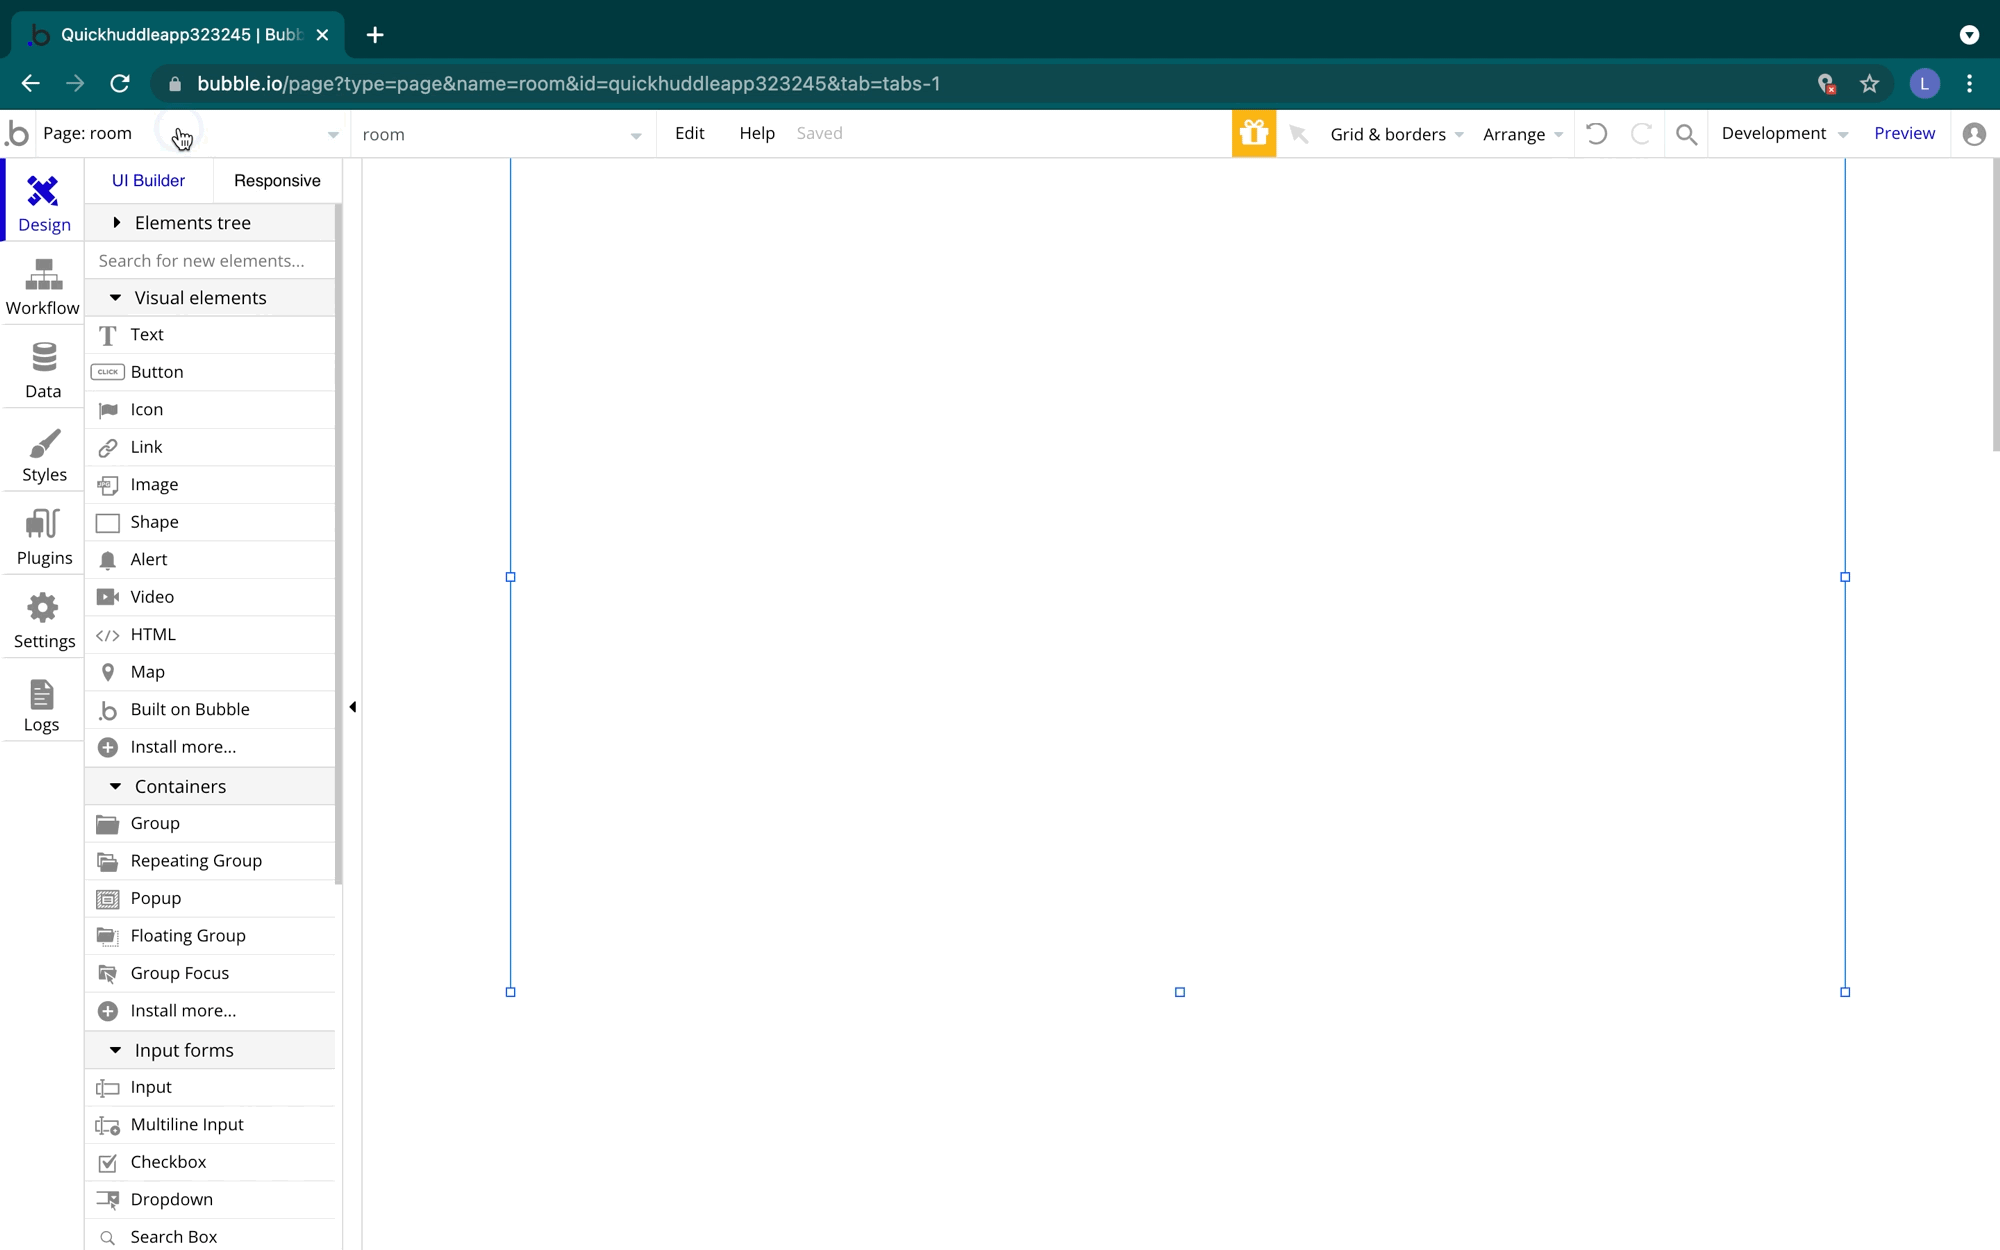
As a first step, switch over to the Design tab if you have not already.
Next, we'll add some elements to our page:
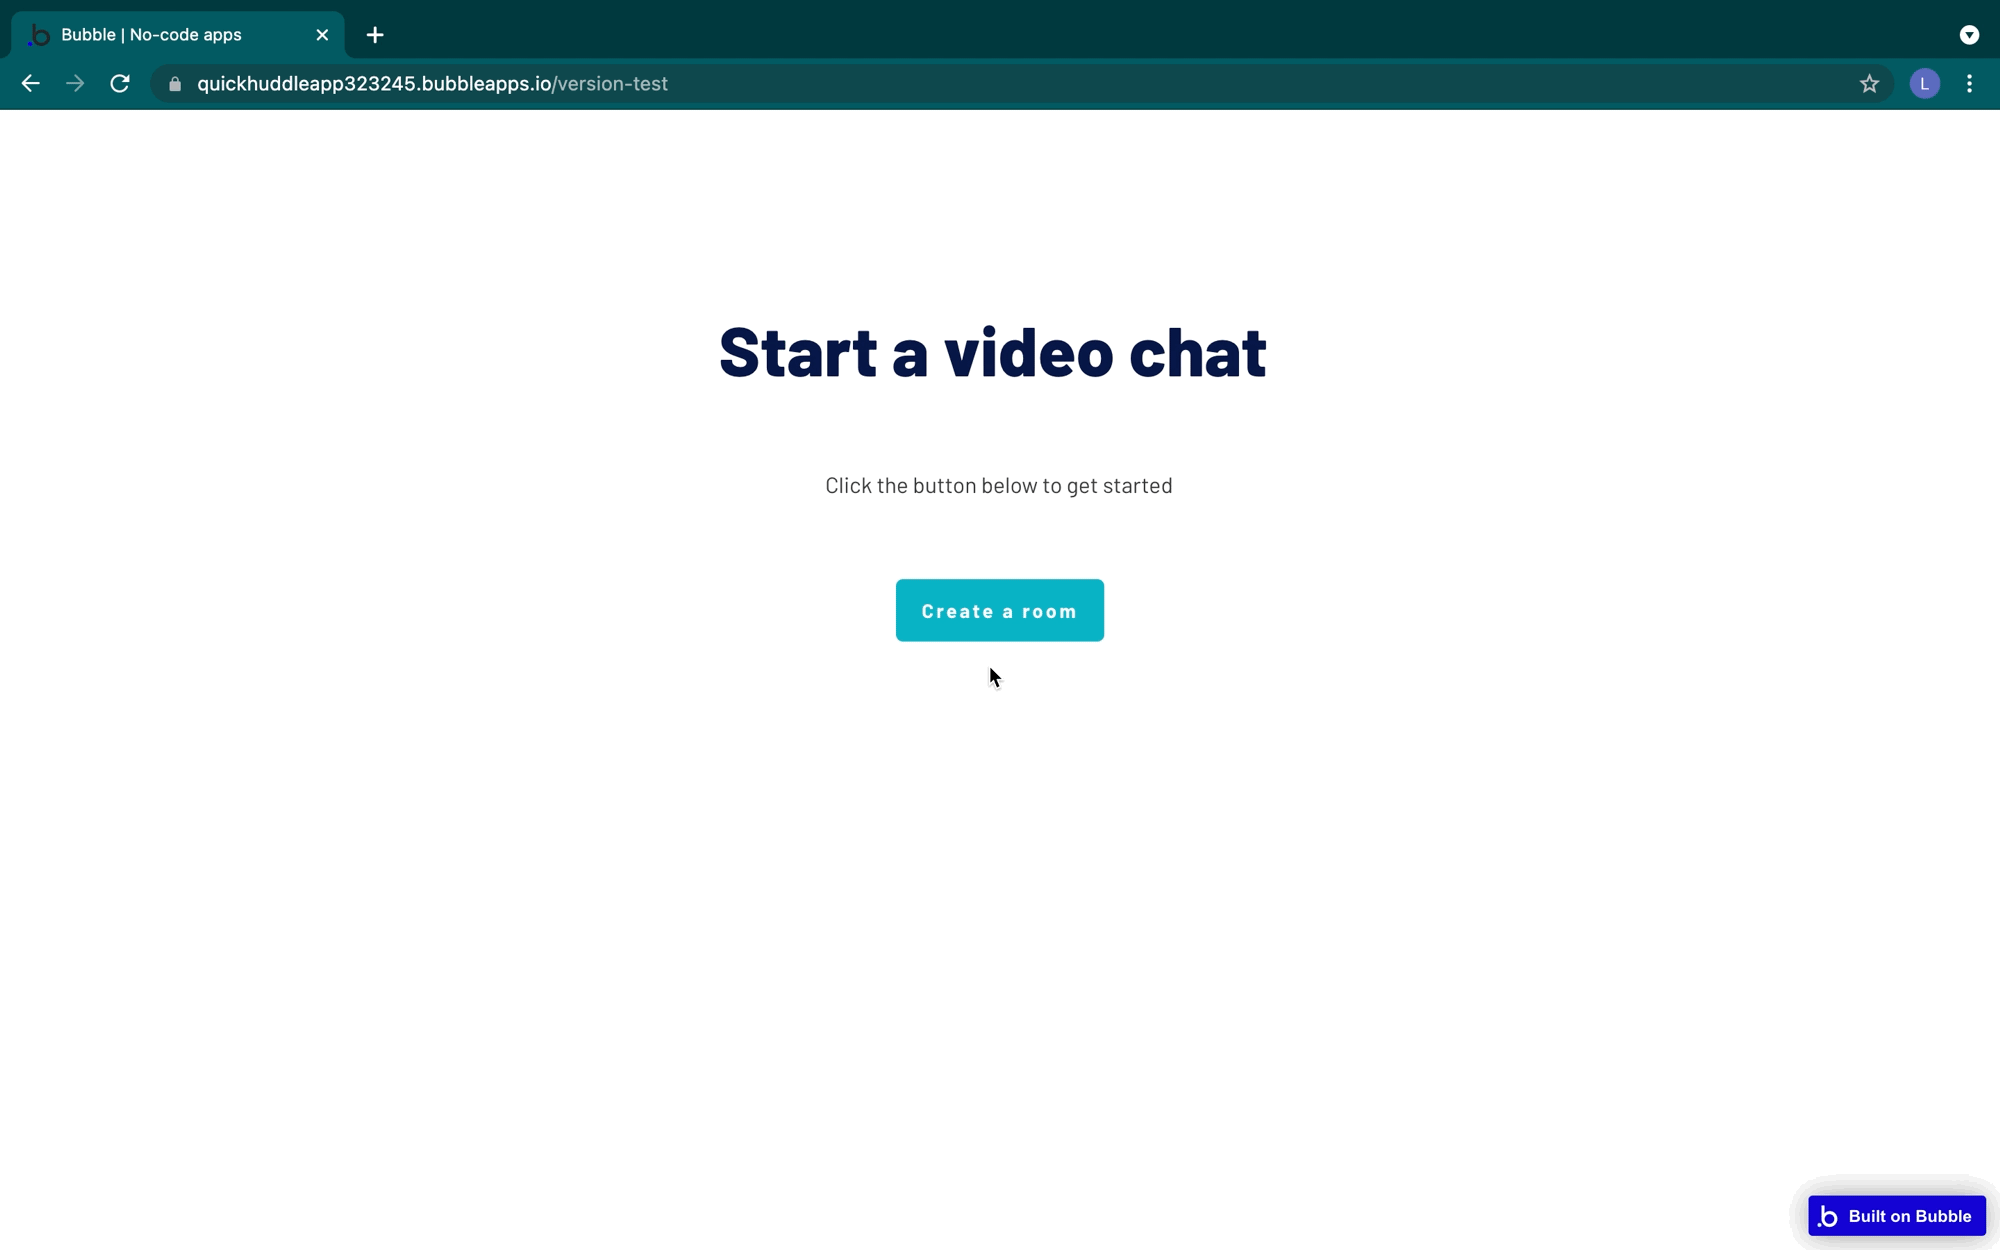
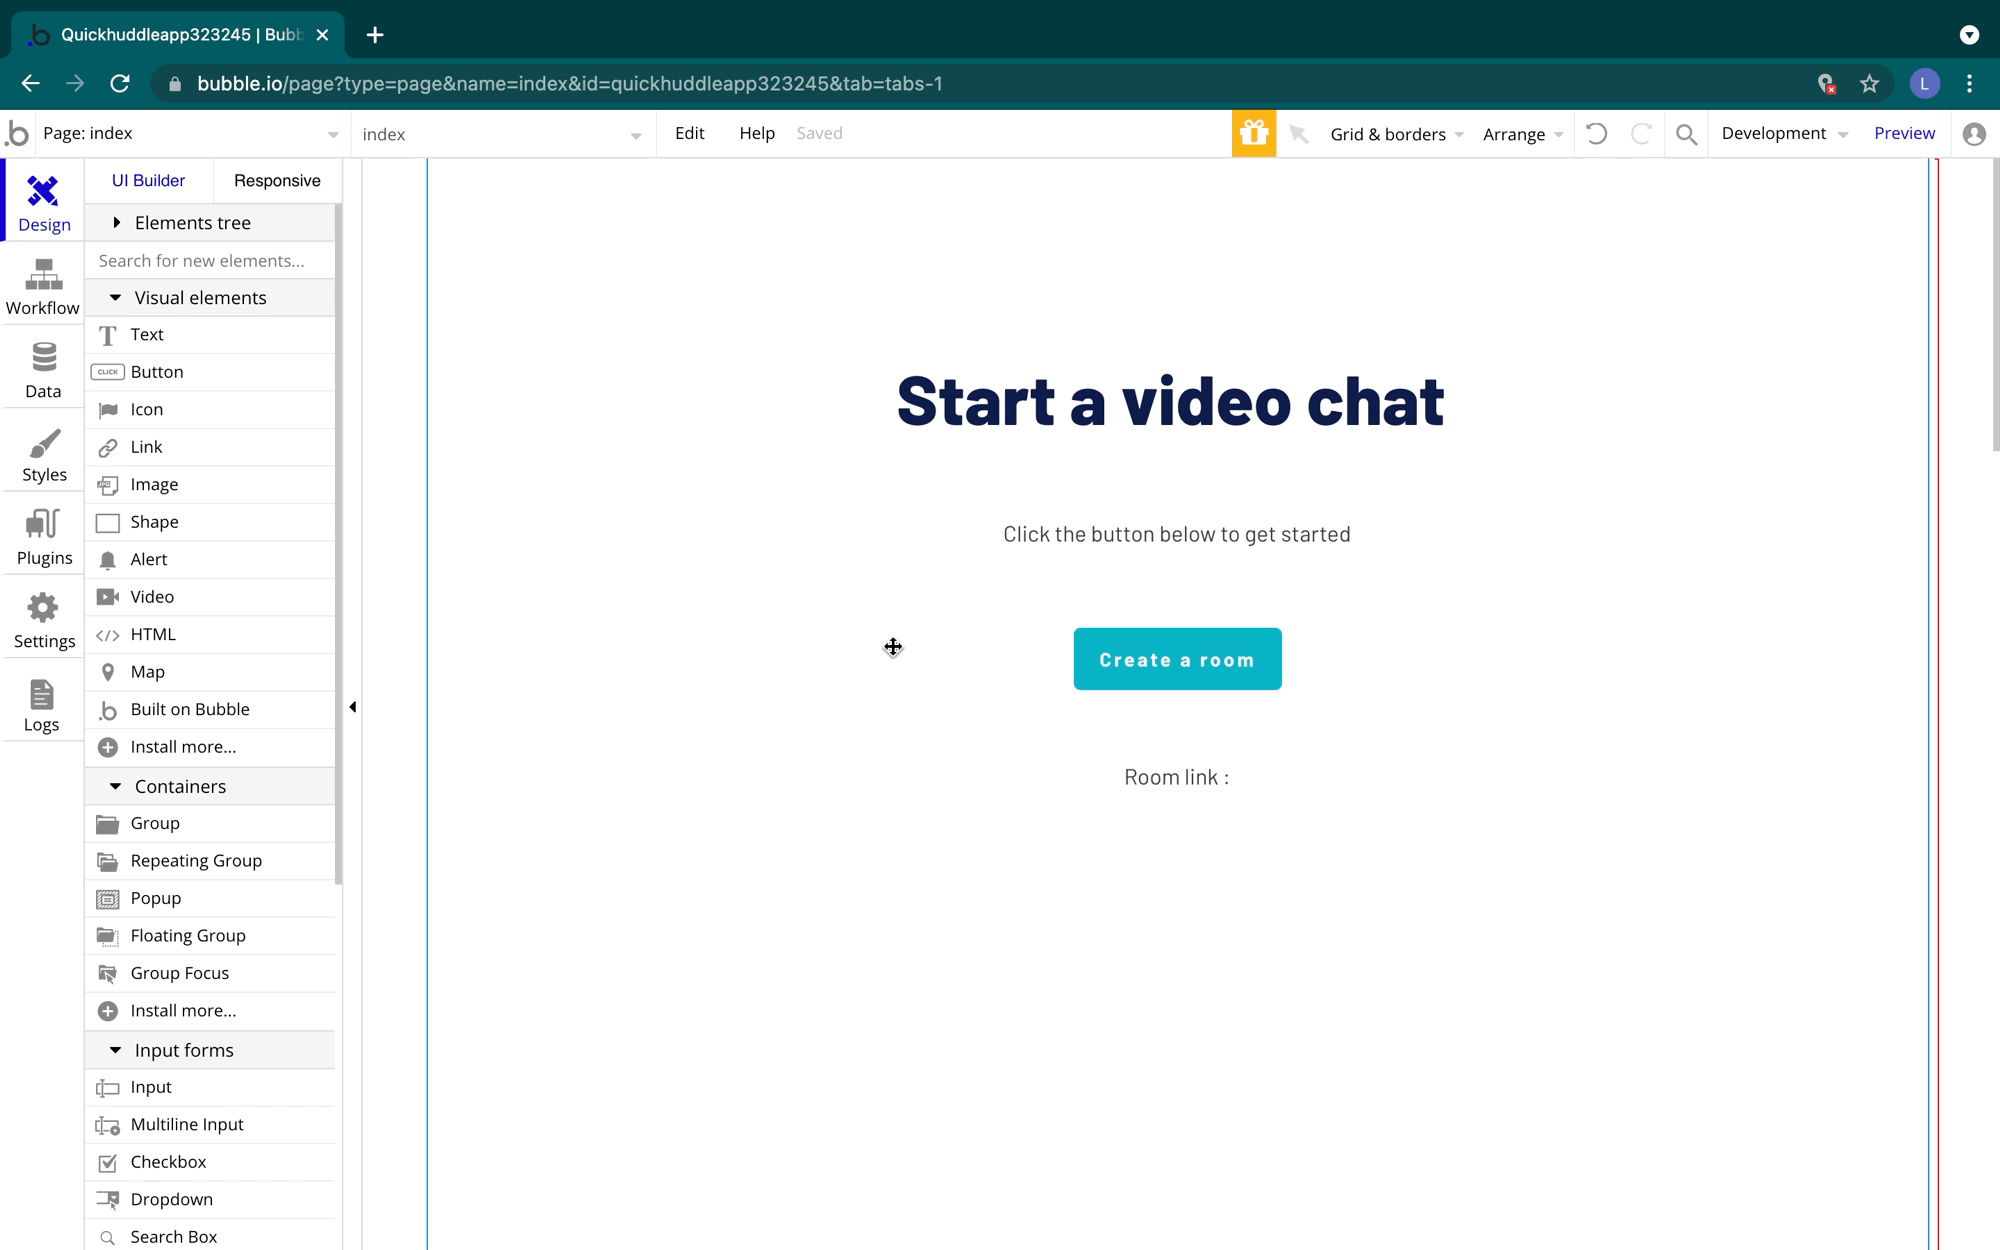
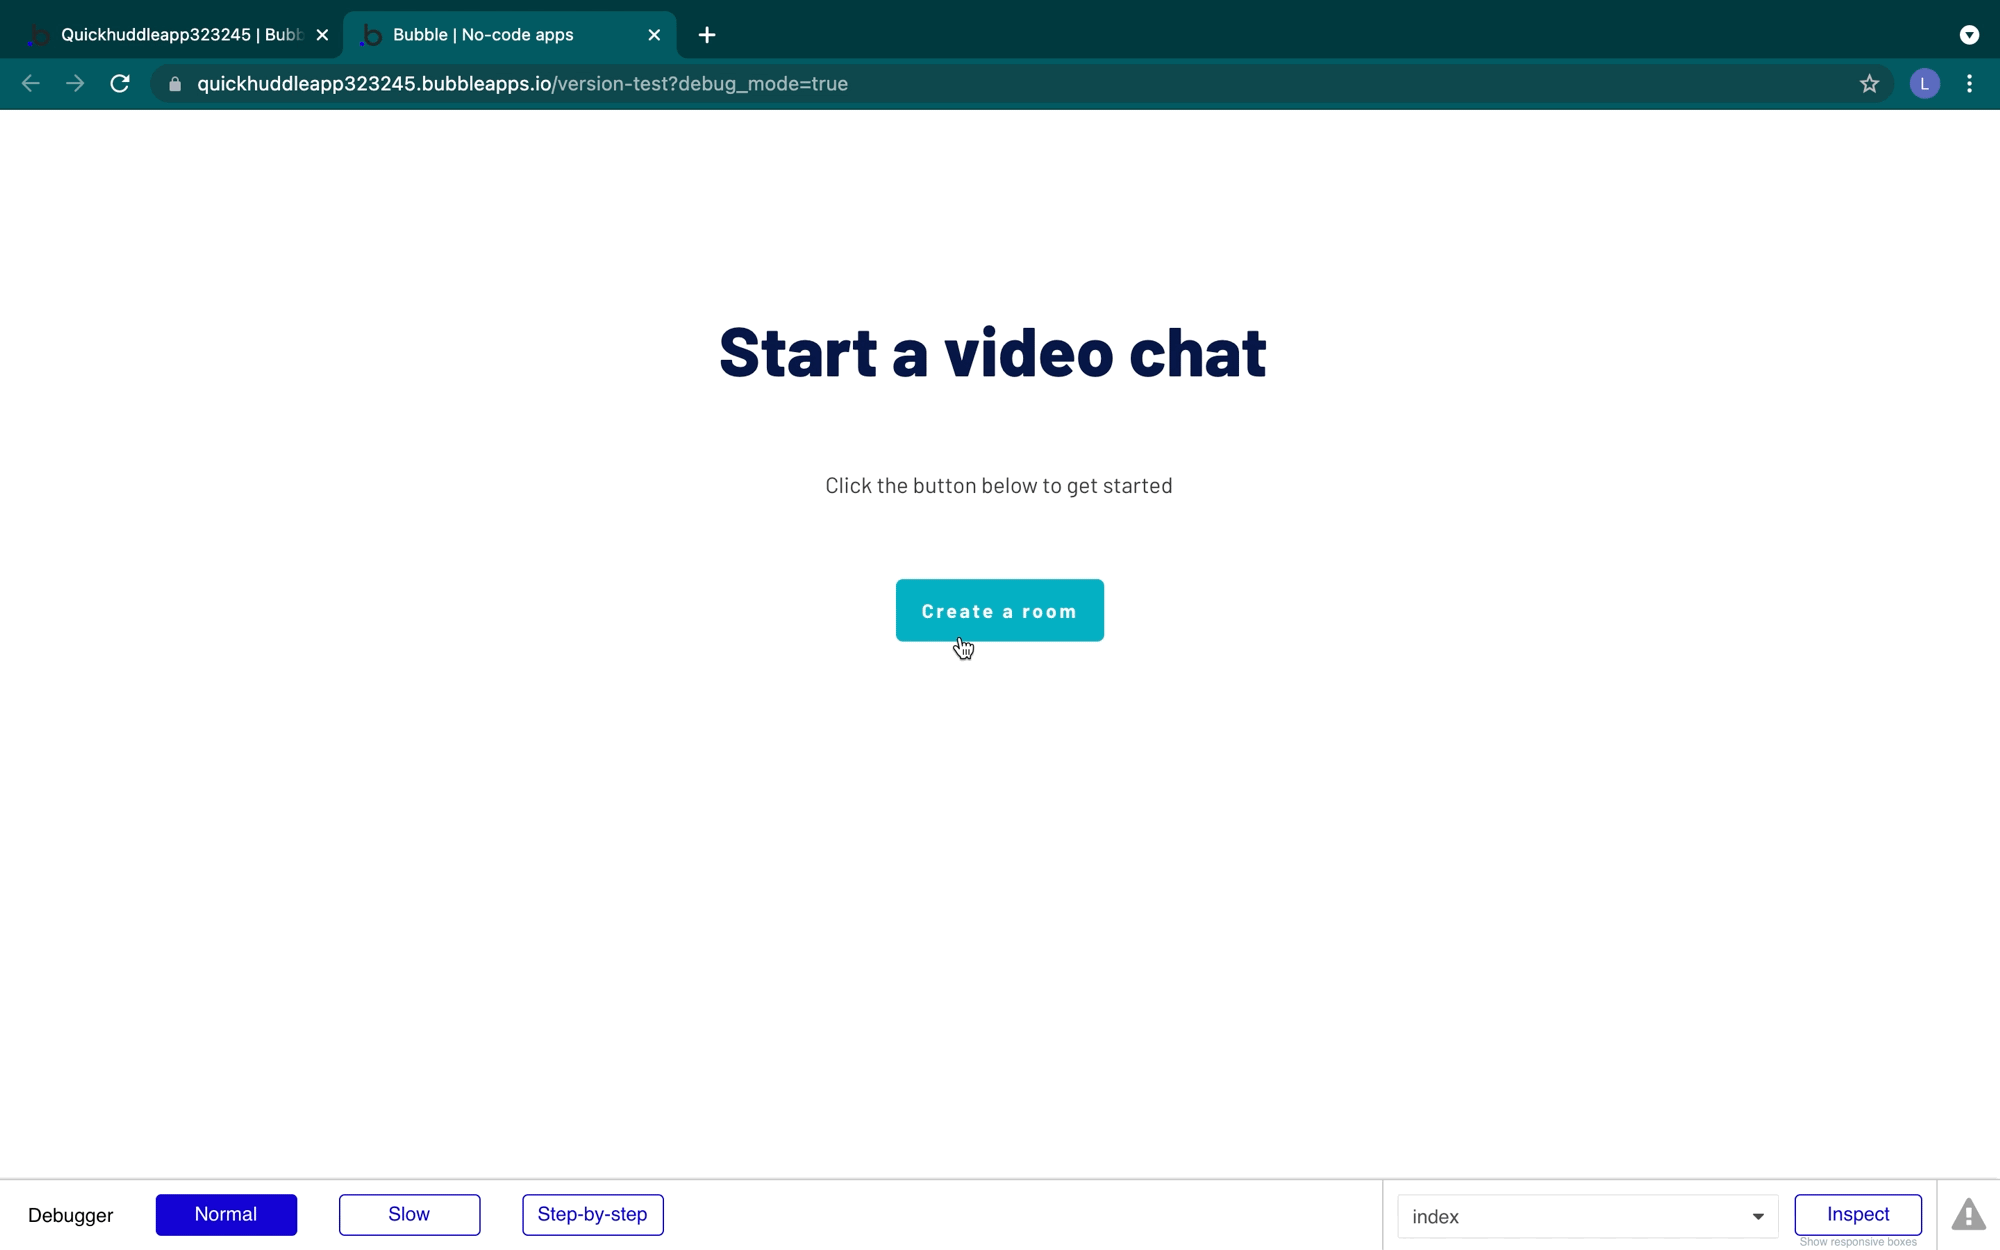
- A text element with text "Start a video chat" (style:
H1 Heading-Dark) - Another text element with text "Click the button below to get started" (style:
Body Copy) - A button titled "Create a room"
- Another text element underneath that says "Room link: "
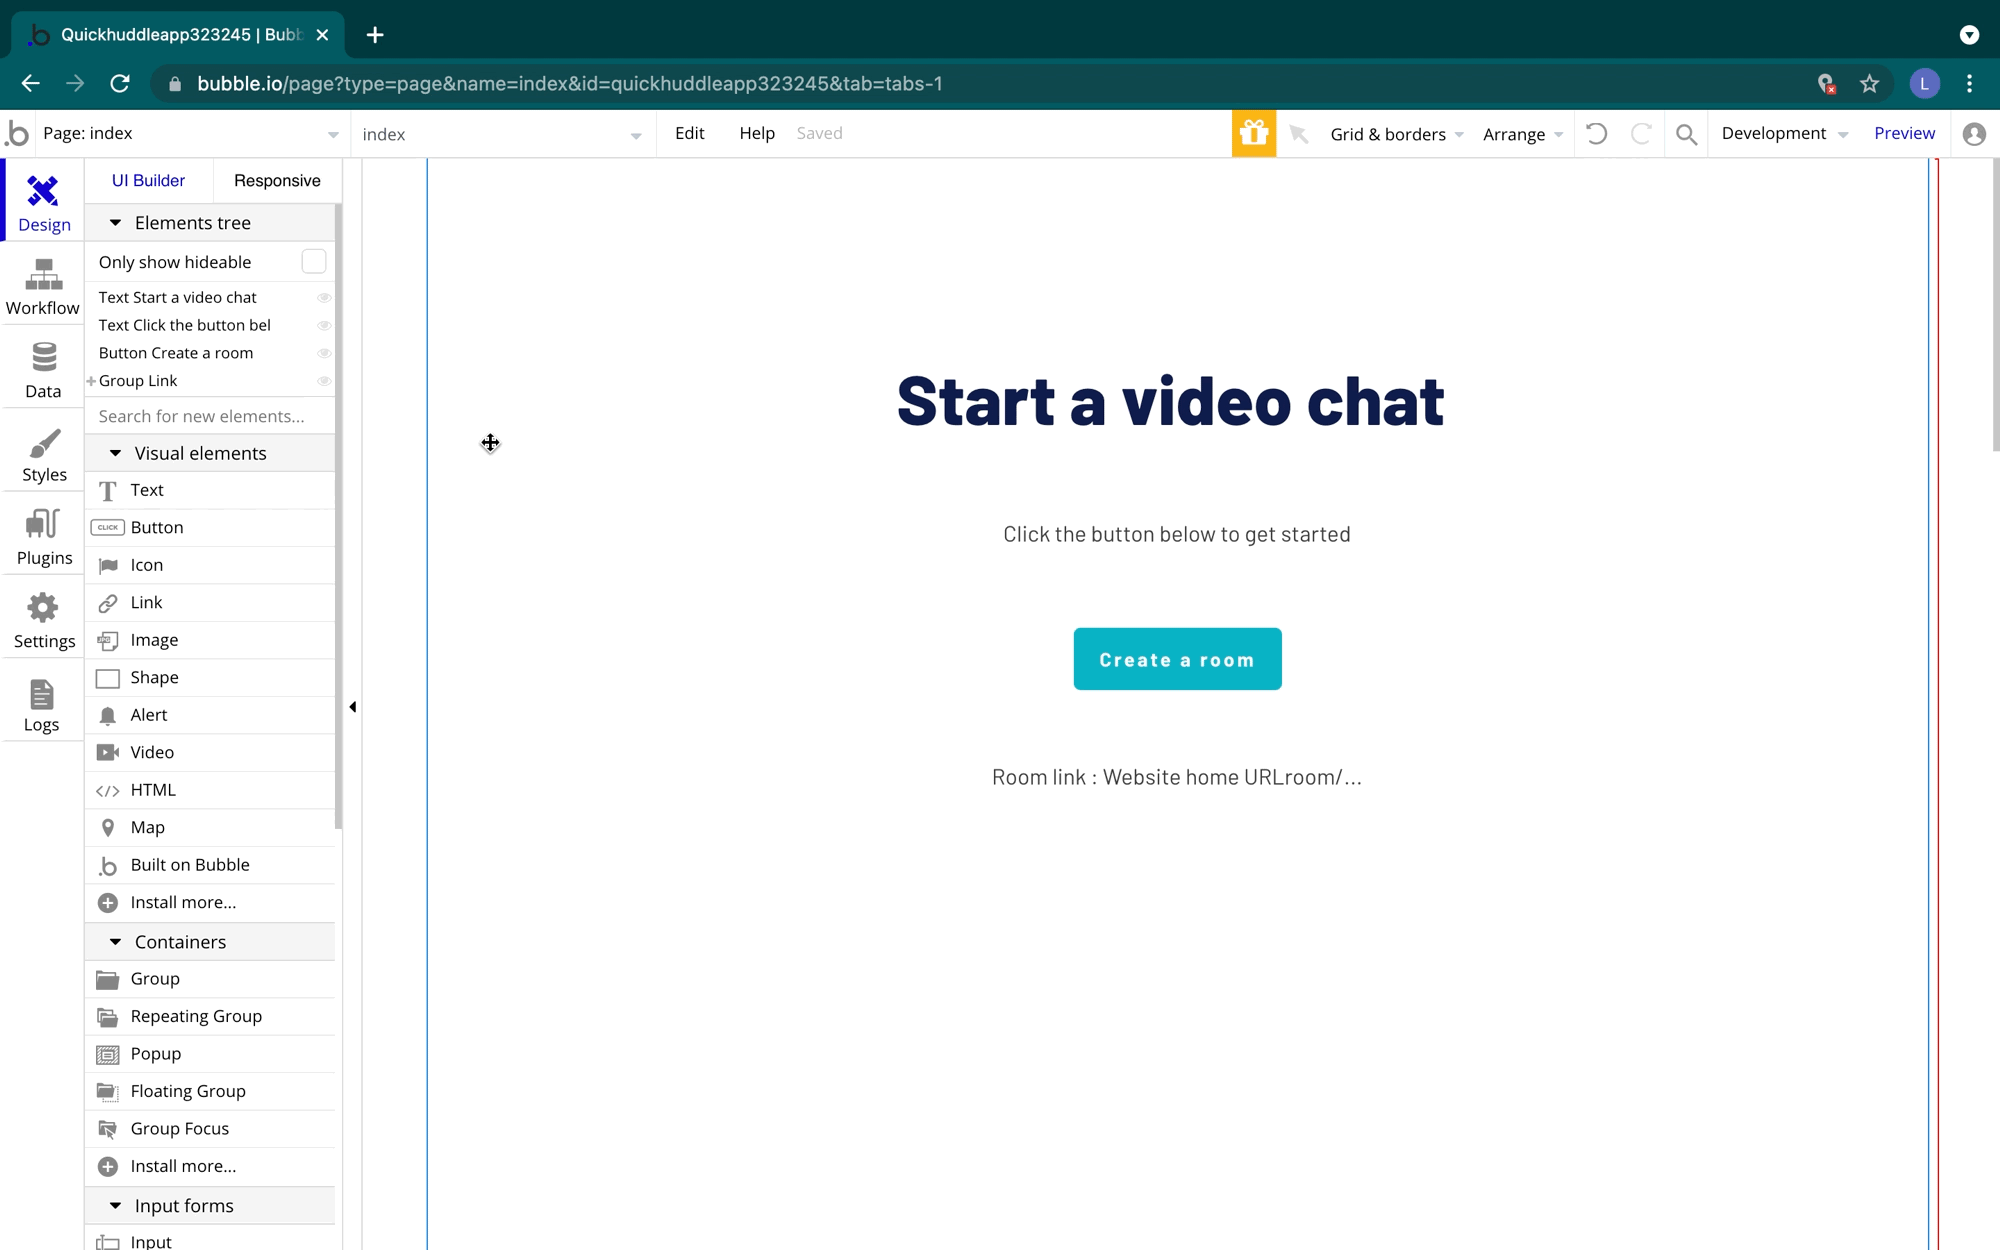
These elements can be added by dragging and dropping them from the left-hand menu.
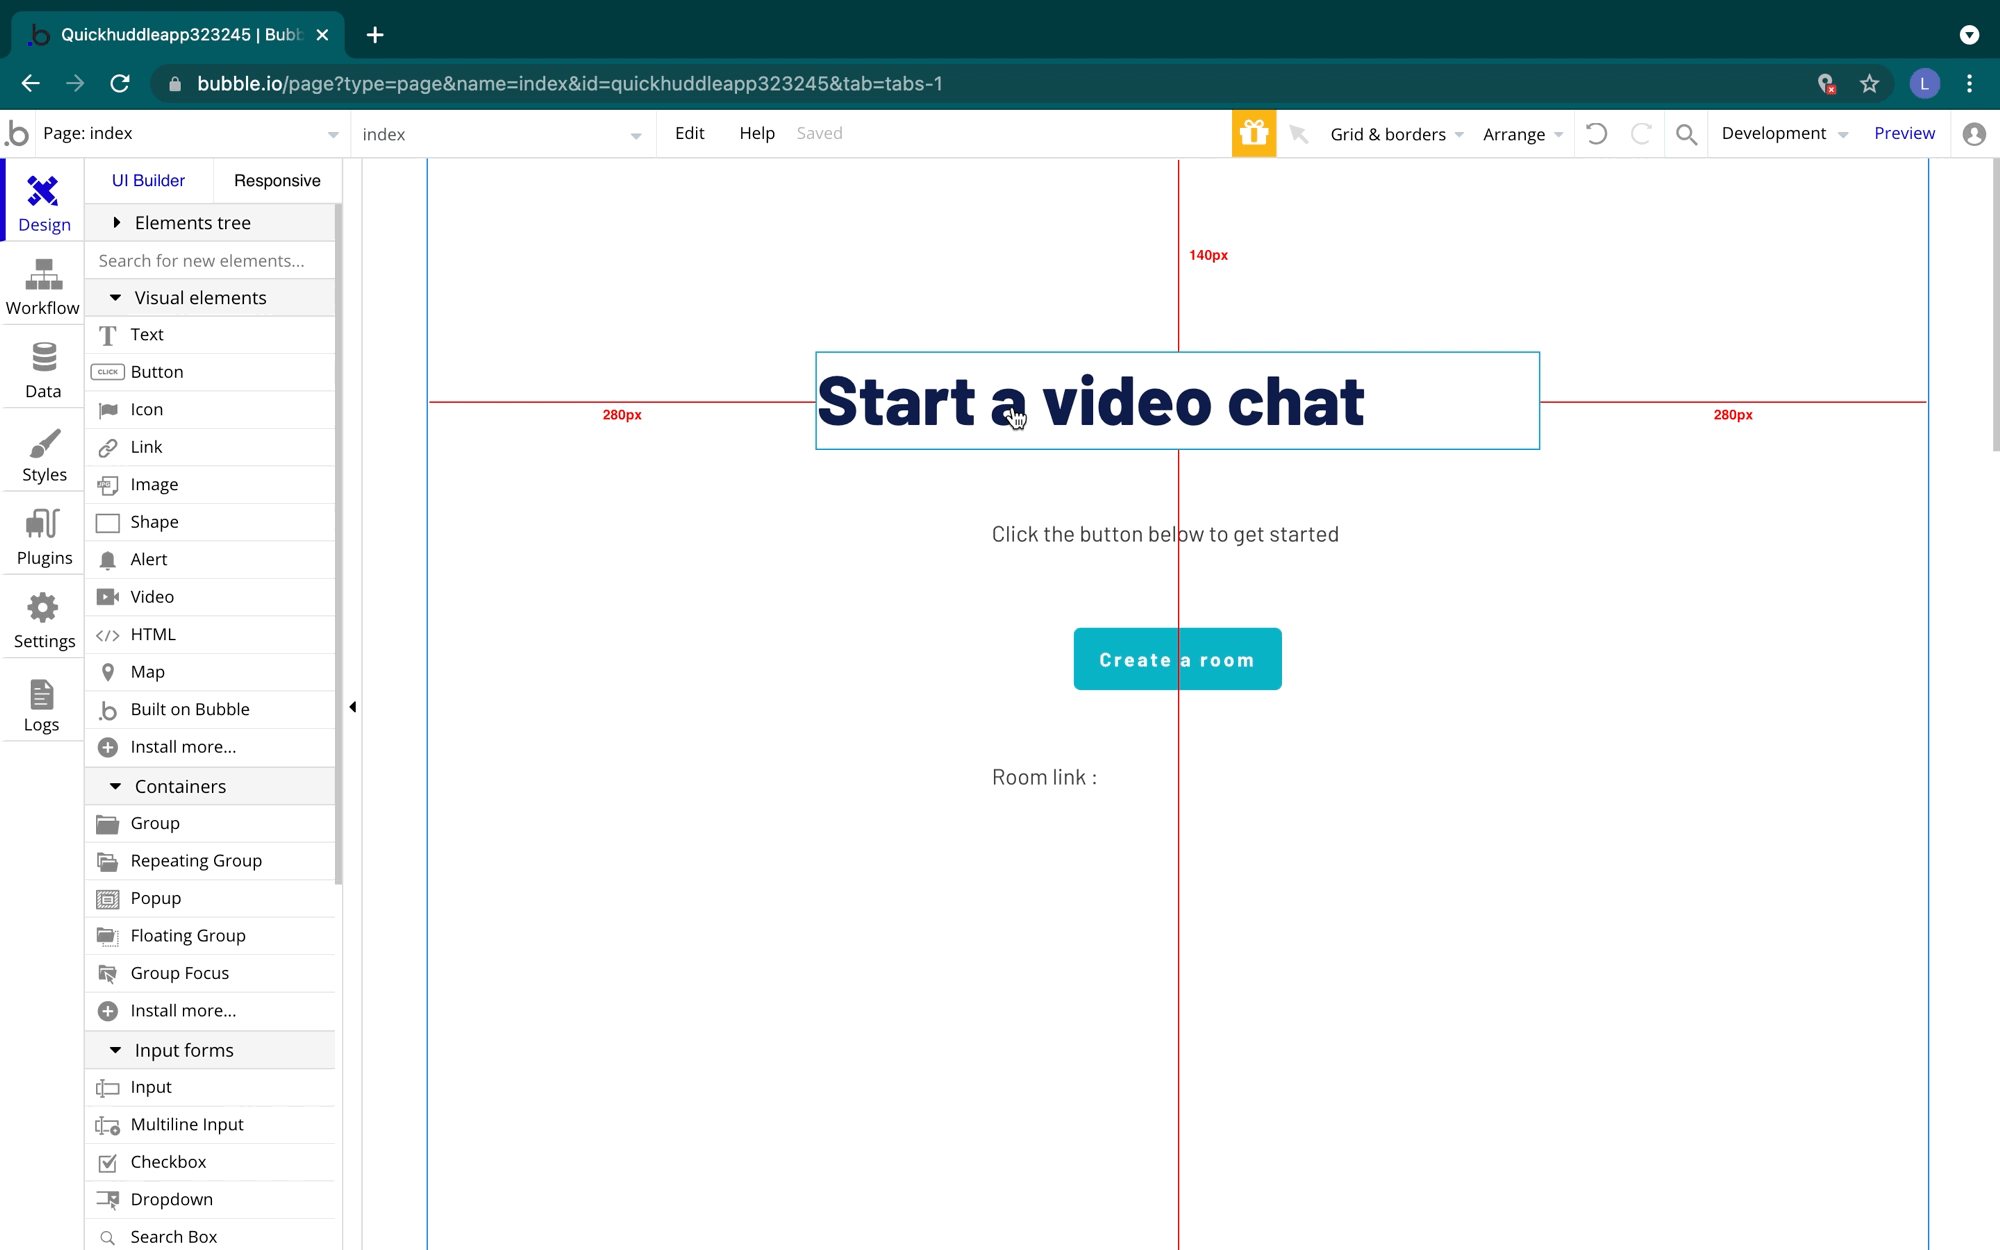
We'll also center the elements to make sure all our page content is distributed evenly. To do that we can select all the elements on the page. We'll select Arrange > Center horizontally and then Arrange > Distribute vertically

Once the elements are distributed, we can edit the font styles for our text elements so that they are center-aligned. To edit the style, click the element, and select Edit style and then choose the center-aligned option. We'll center the "Start a video chat" heading text, the "click the button below to get started" text, and the "Room link :" text.
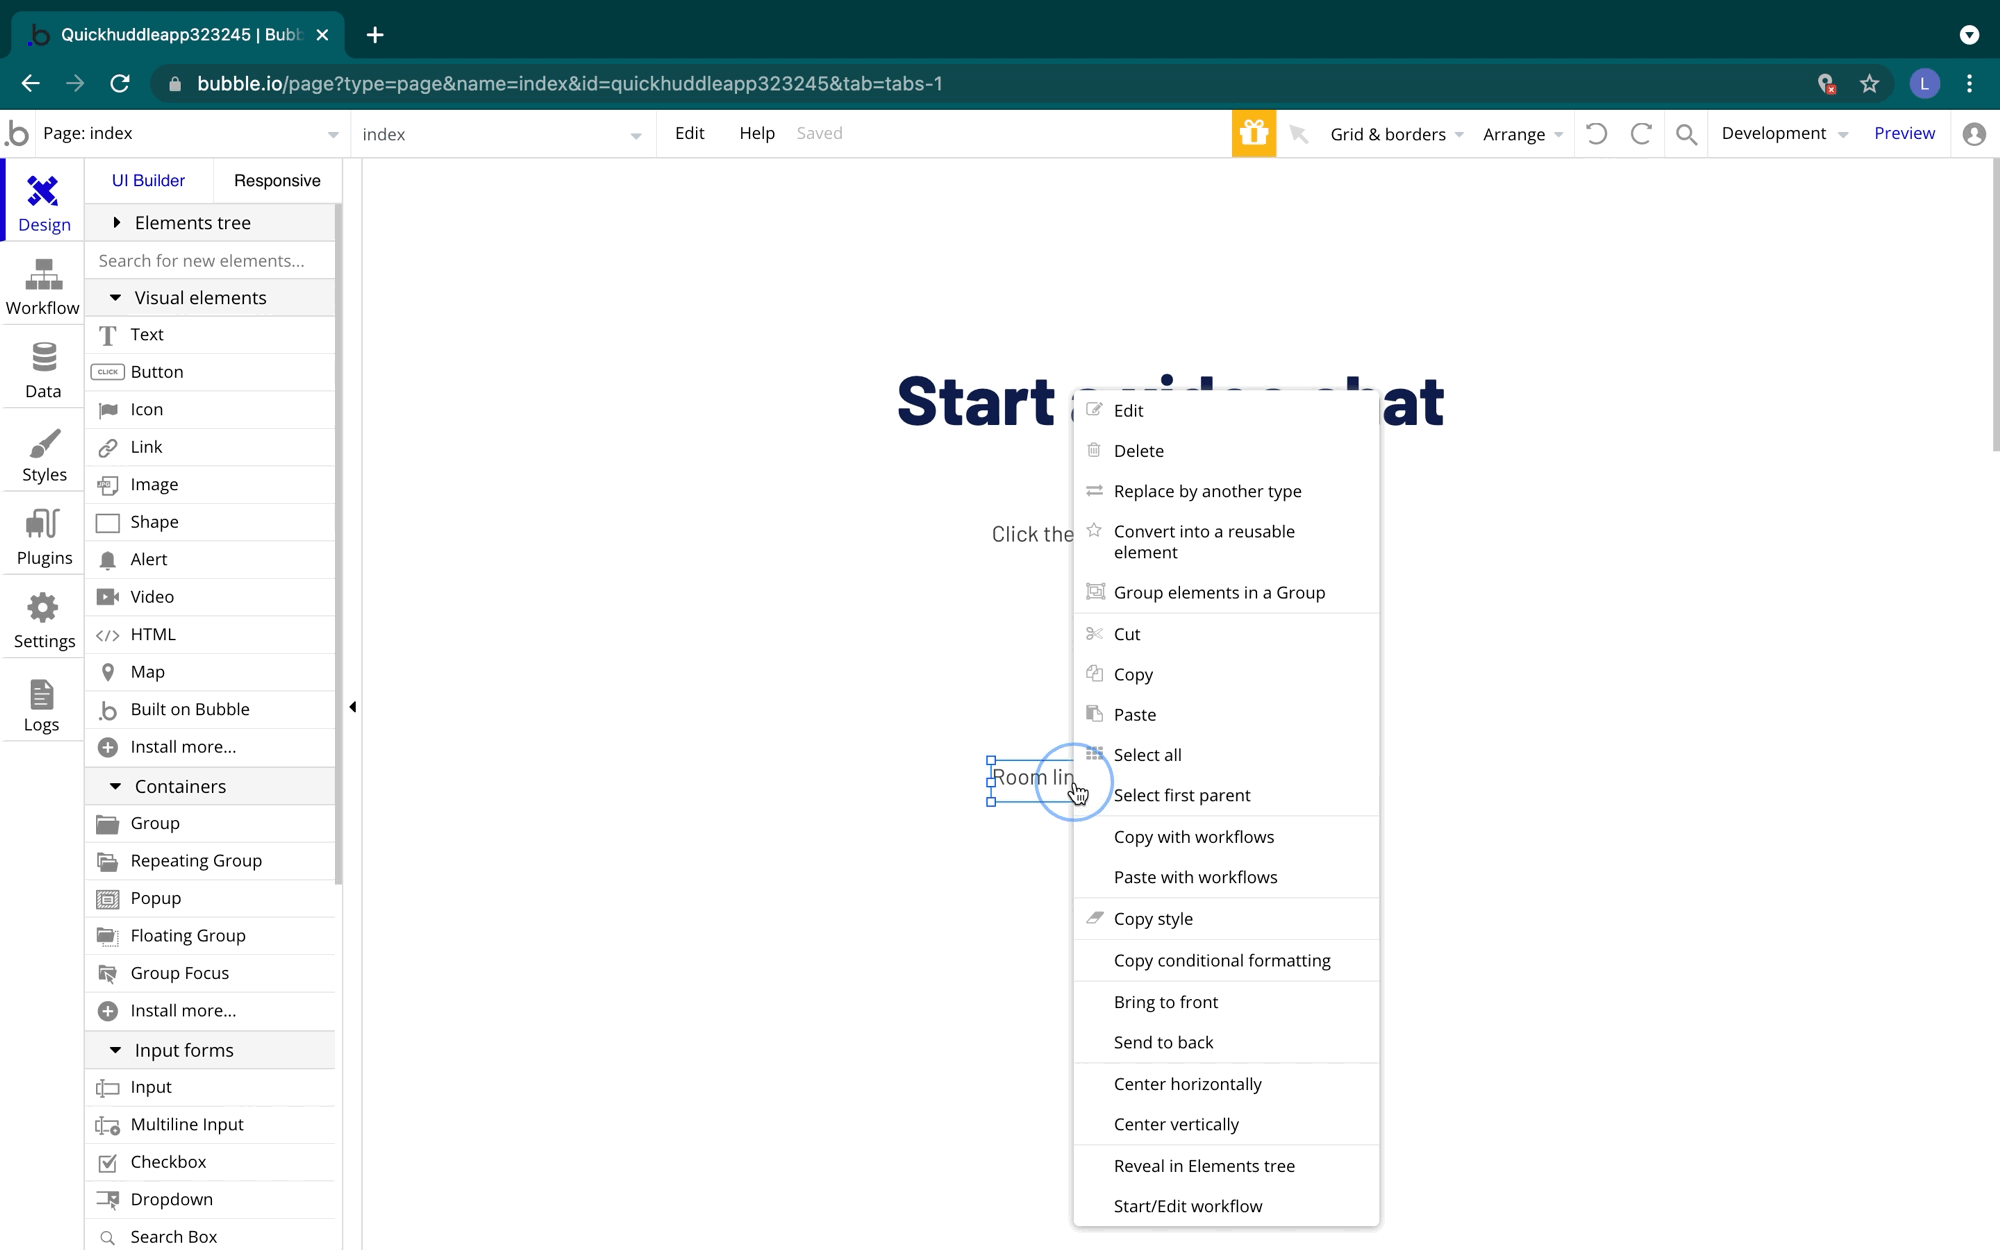
Next, we'll create a group on the page. Groups are elements that contain other elements. A group has two roles:
- It can gather elements from a visual perspective, which enables all elements to move together.
- It can have data injected into them, and the elements inside the group can refer to this parent group's data.
You can learn more about groups, how they're used and what they can do in Bubble's manual,
We'll put our room link text into a group so that later we can access the right video call information when we share a link.
To create the group, control-click the "Room link: " text element and then select Group elements in a Group. We'll also change the name of the group to Group Link so it's easier to reference later.
To select the group you can go to the Elements tree, make sure "Only show hideable" is unchecked and then select the Group.
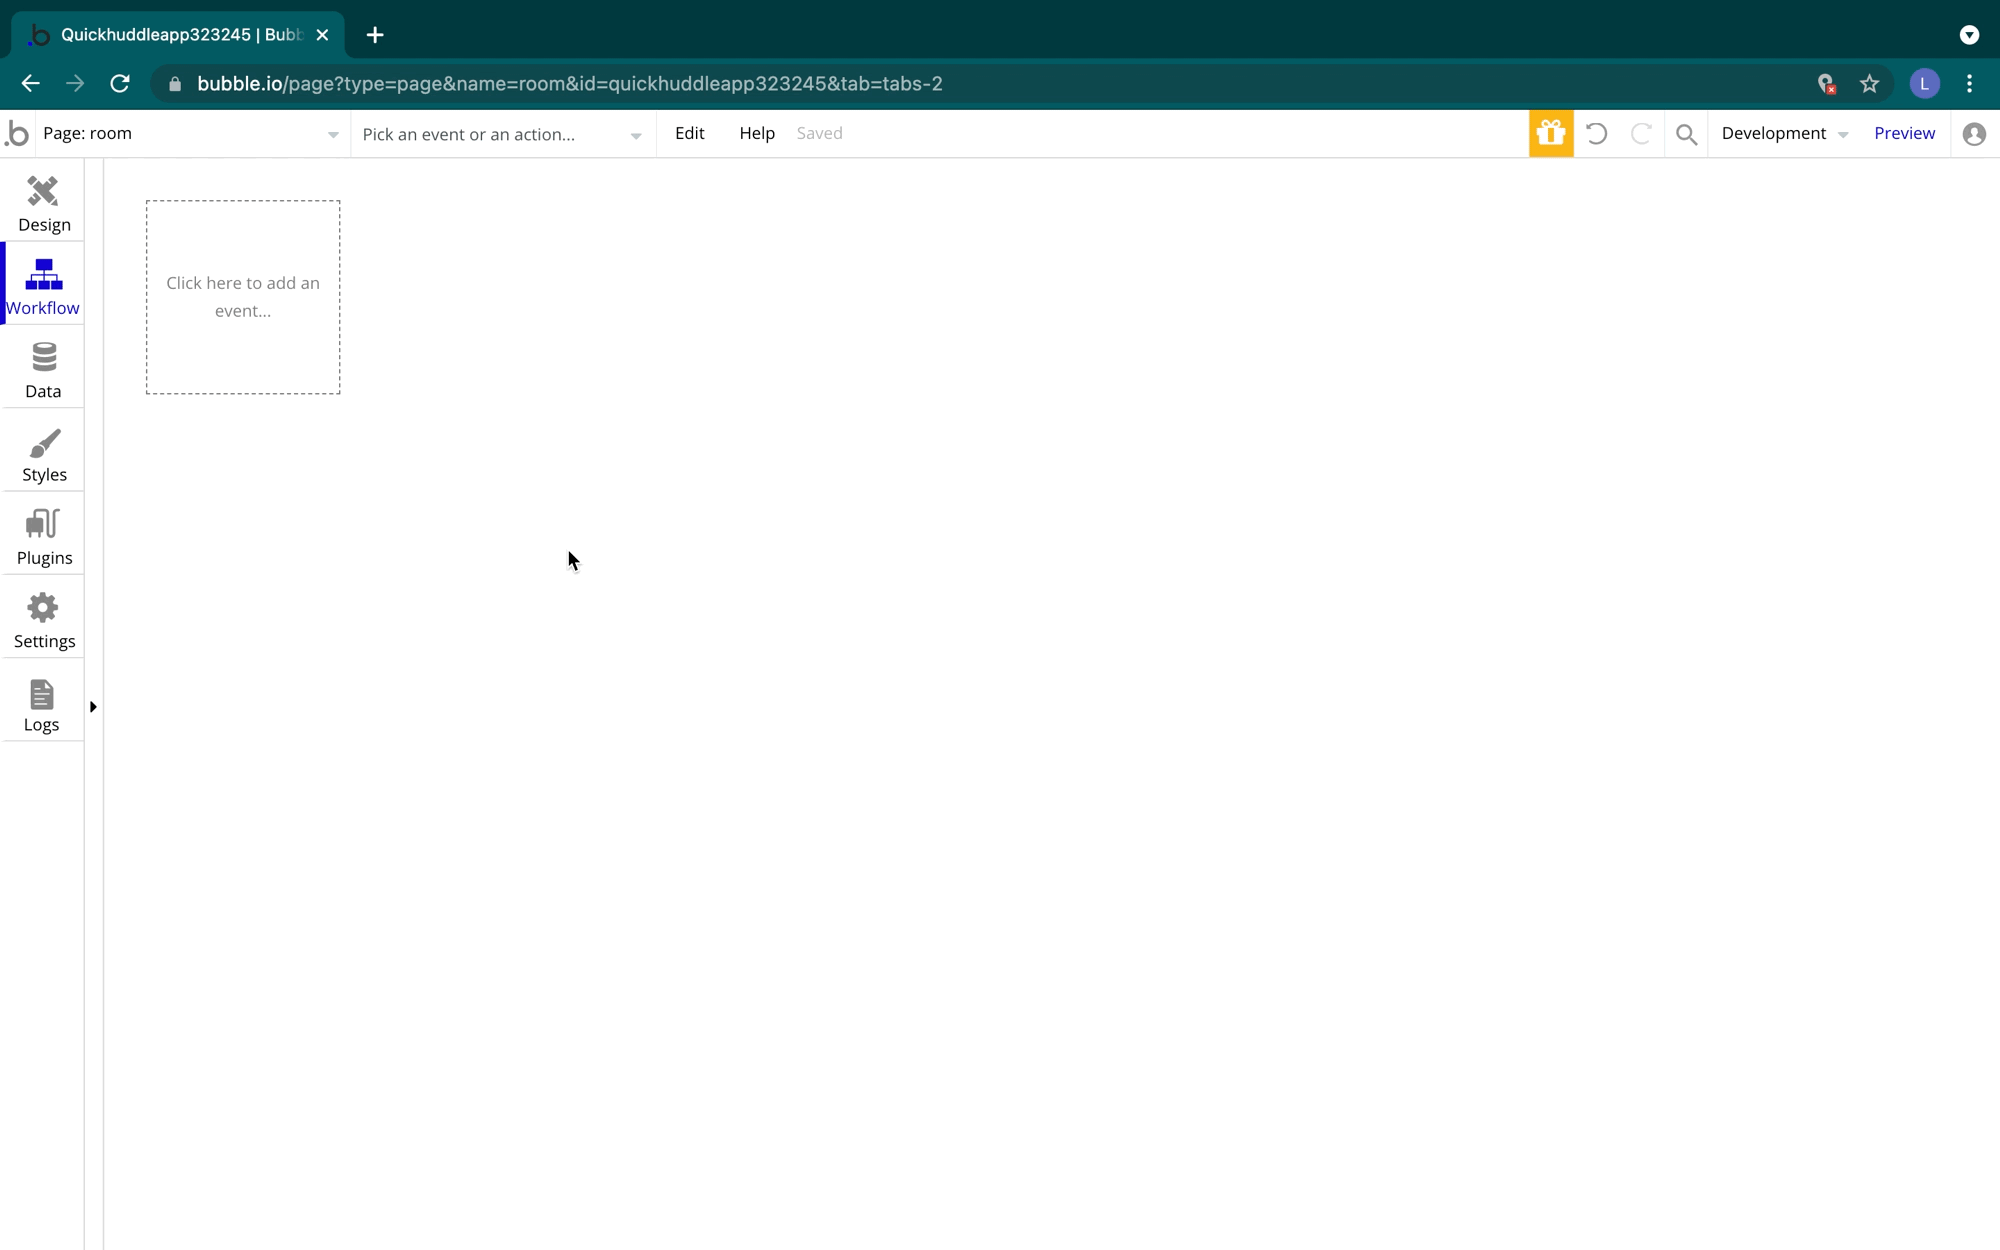
Adding a Room page
Our room page will be where we access video calls. For now, all we need is a blank page called room. Head to the pages section in your Bubble editor, select Add a new page..., type in room for the page name, leave the clone from field empty, and select CREATE.

About Bubble workflows
Here is where we'll use the Daily plugin for Bubble. We can switch to our index page to create our workflows. Bubble is built around a workflow system and it's the heart of what will make our application interactive.
Workflows consist of two parts an event and one or more actions. Events are the part of the workflows which tell Bubble when a certain workflow's action should run. You can check out Bubble's manual for a list of predefined events that are available.
Actions are the steps that Bubble should take when an event is true. Actions can do all sorts of things, from logging users in, to hiding and showing elements, to adding functions from plugins like our Daily plugin for Bubble. More on what actions are available are also in Bubble's manual.
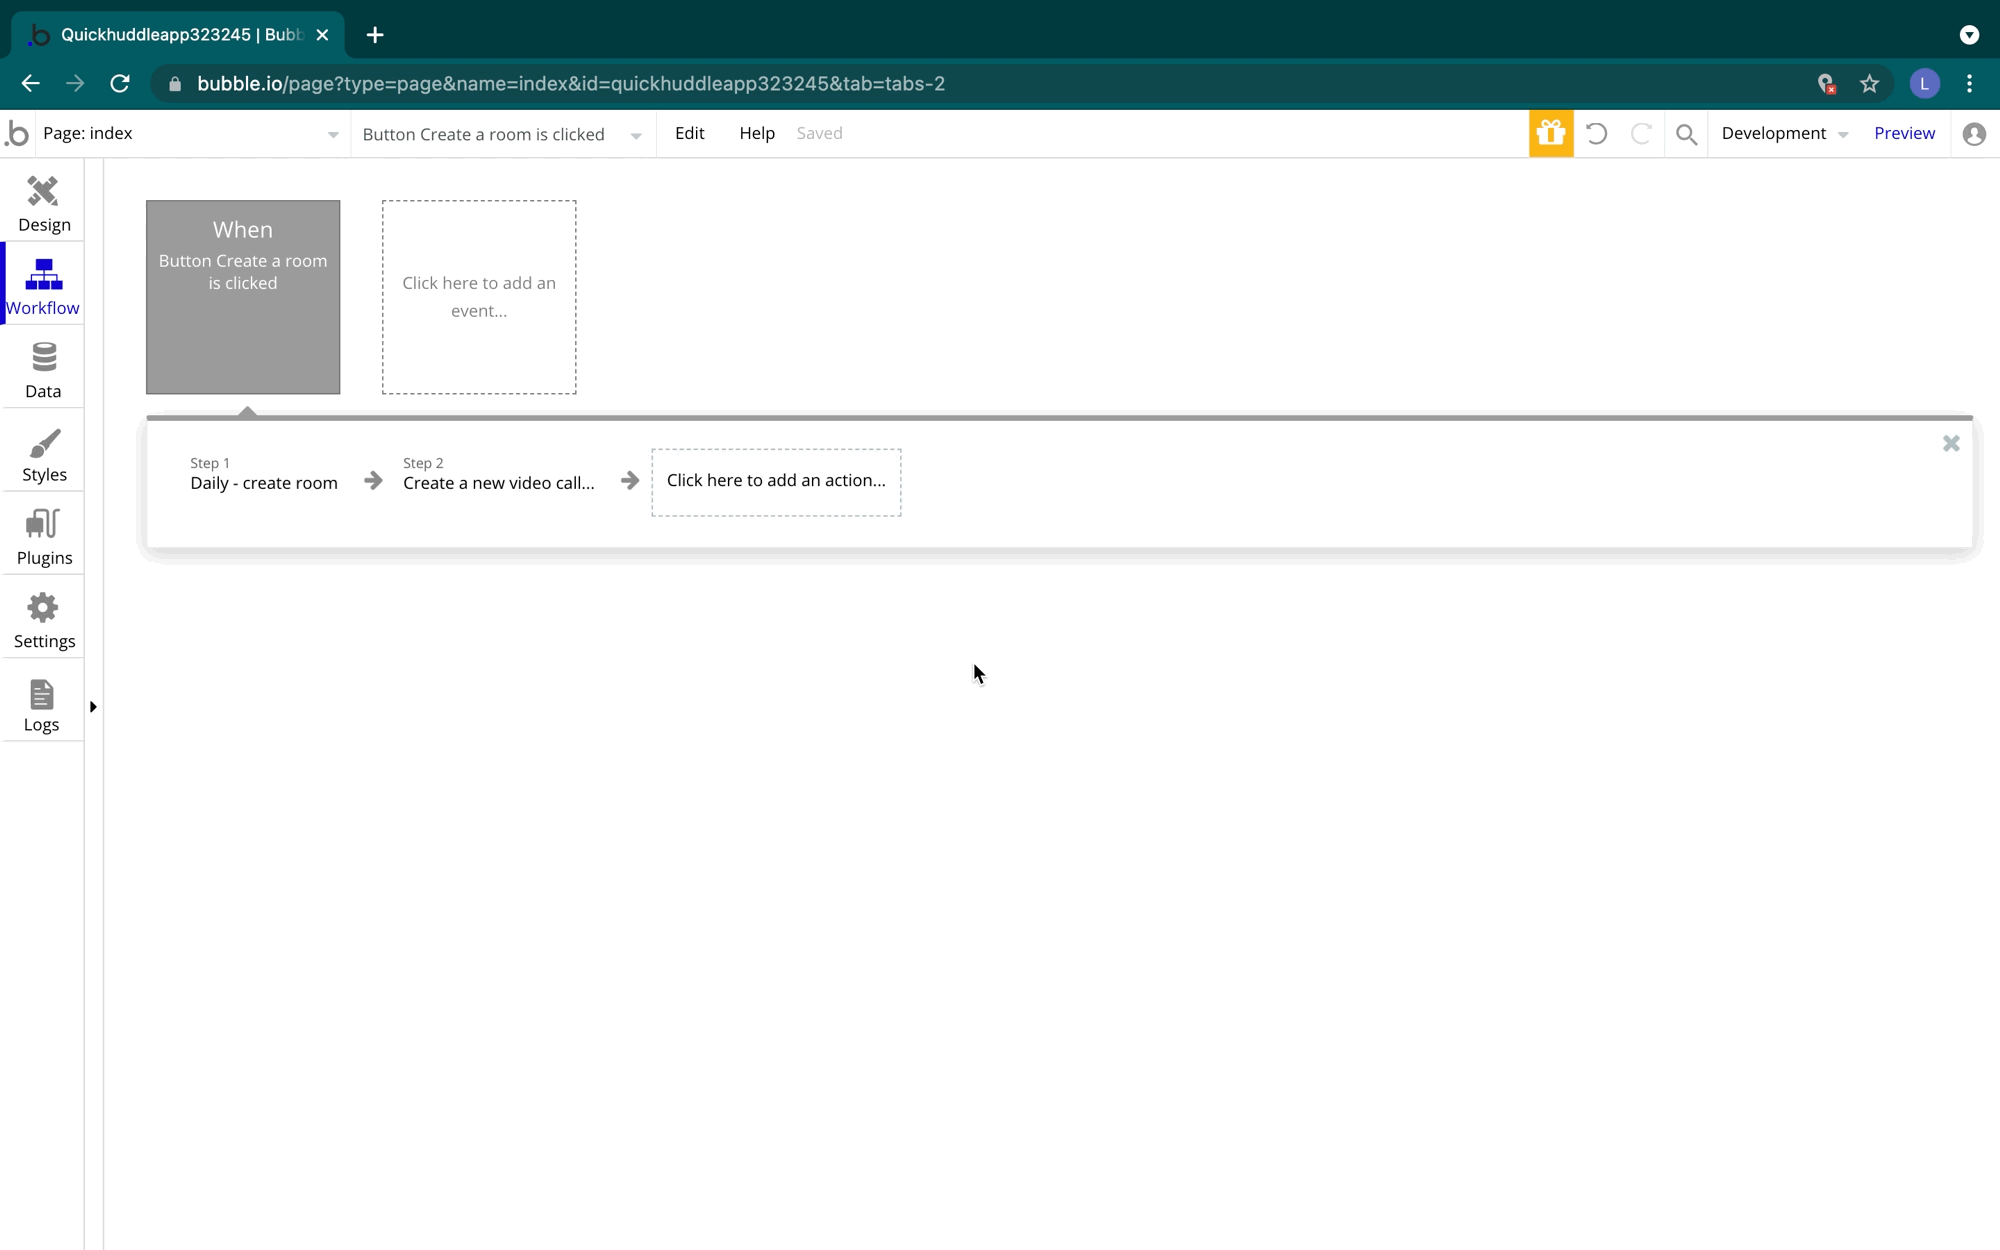
The Create a Room workflow
When a user visits our index page, they will select Create a room, which will create a room in Daily with our plugin. Then they will see a link that they can copy to access that video room.
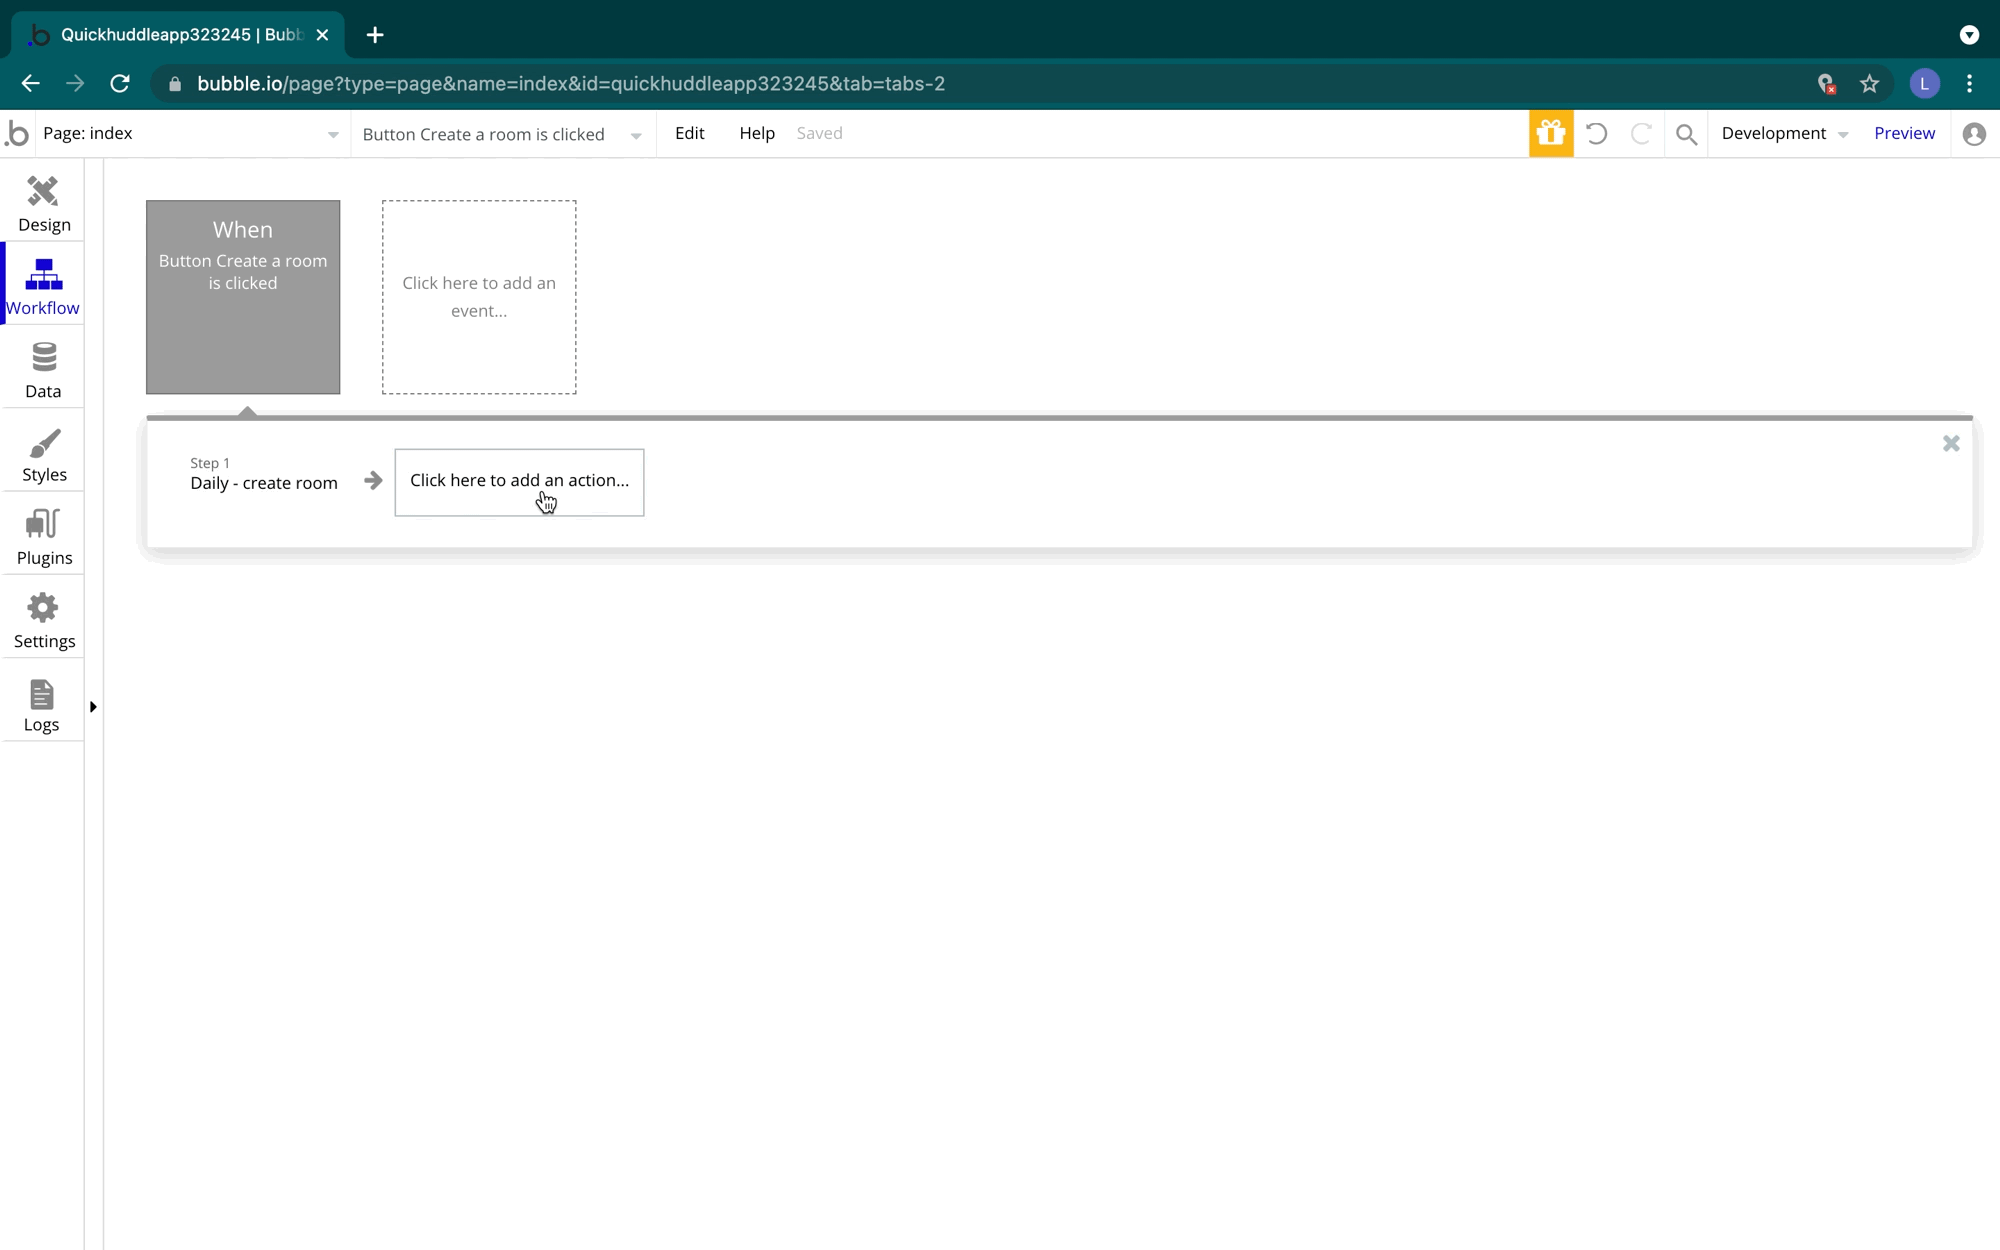
Moving back to the index page, we'll select the Create a room button and then Start/Edit workflow. We'll select Click here to add an action... and then search for Daily - create room
We can leave most of the preset settings as is but we'll want to change the expiry property because we already decided users shouldn't be able to join calls after 10 minutes.
For that, we'll add a little bit of logic to our exp setting which will require a UNIX timestamp. To configure that in Bubble, we'll add a dynamic expression of the current date/time which will capture the time this workflow is run. We'll add 10 minutes, and extract the Unix timestamp. Bubble returns a Unix timestamp in milliseconds. We'll divide that number by 1000 to convert that to seconds which is required for Daily.
The final expression should look like:
Current date/time + (minutes):10:extract Unix/1000
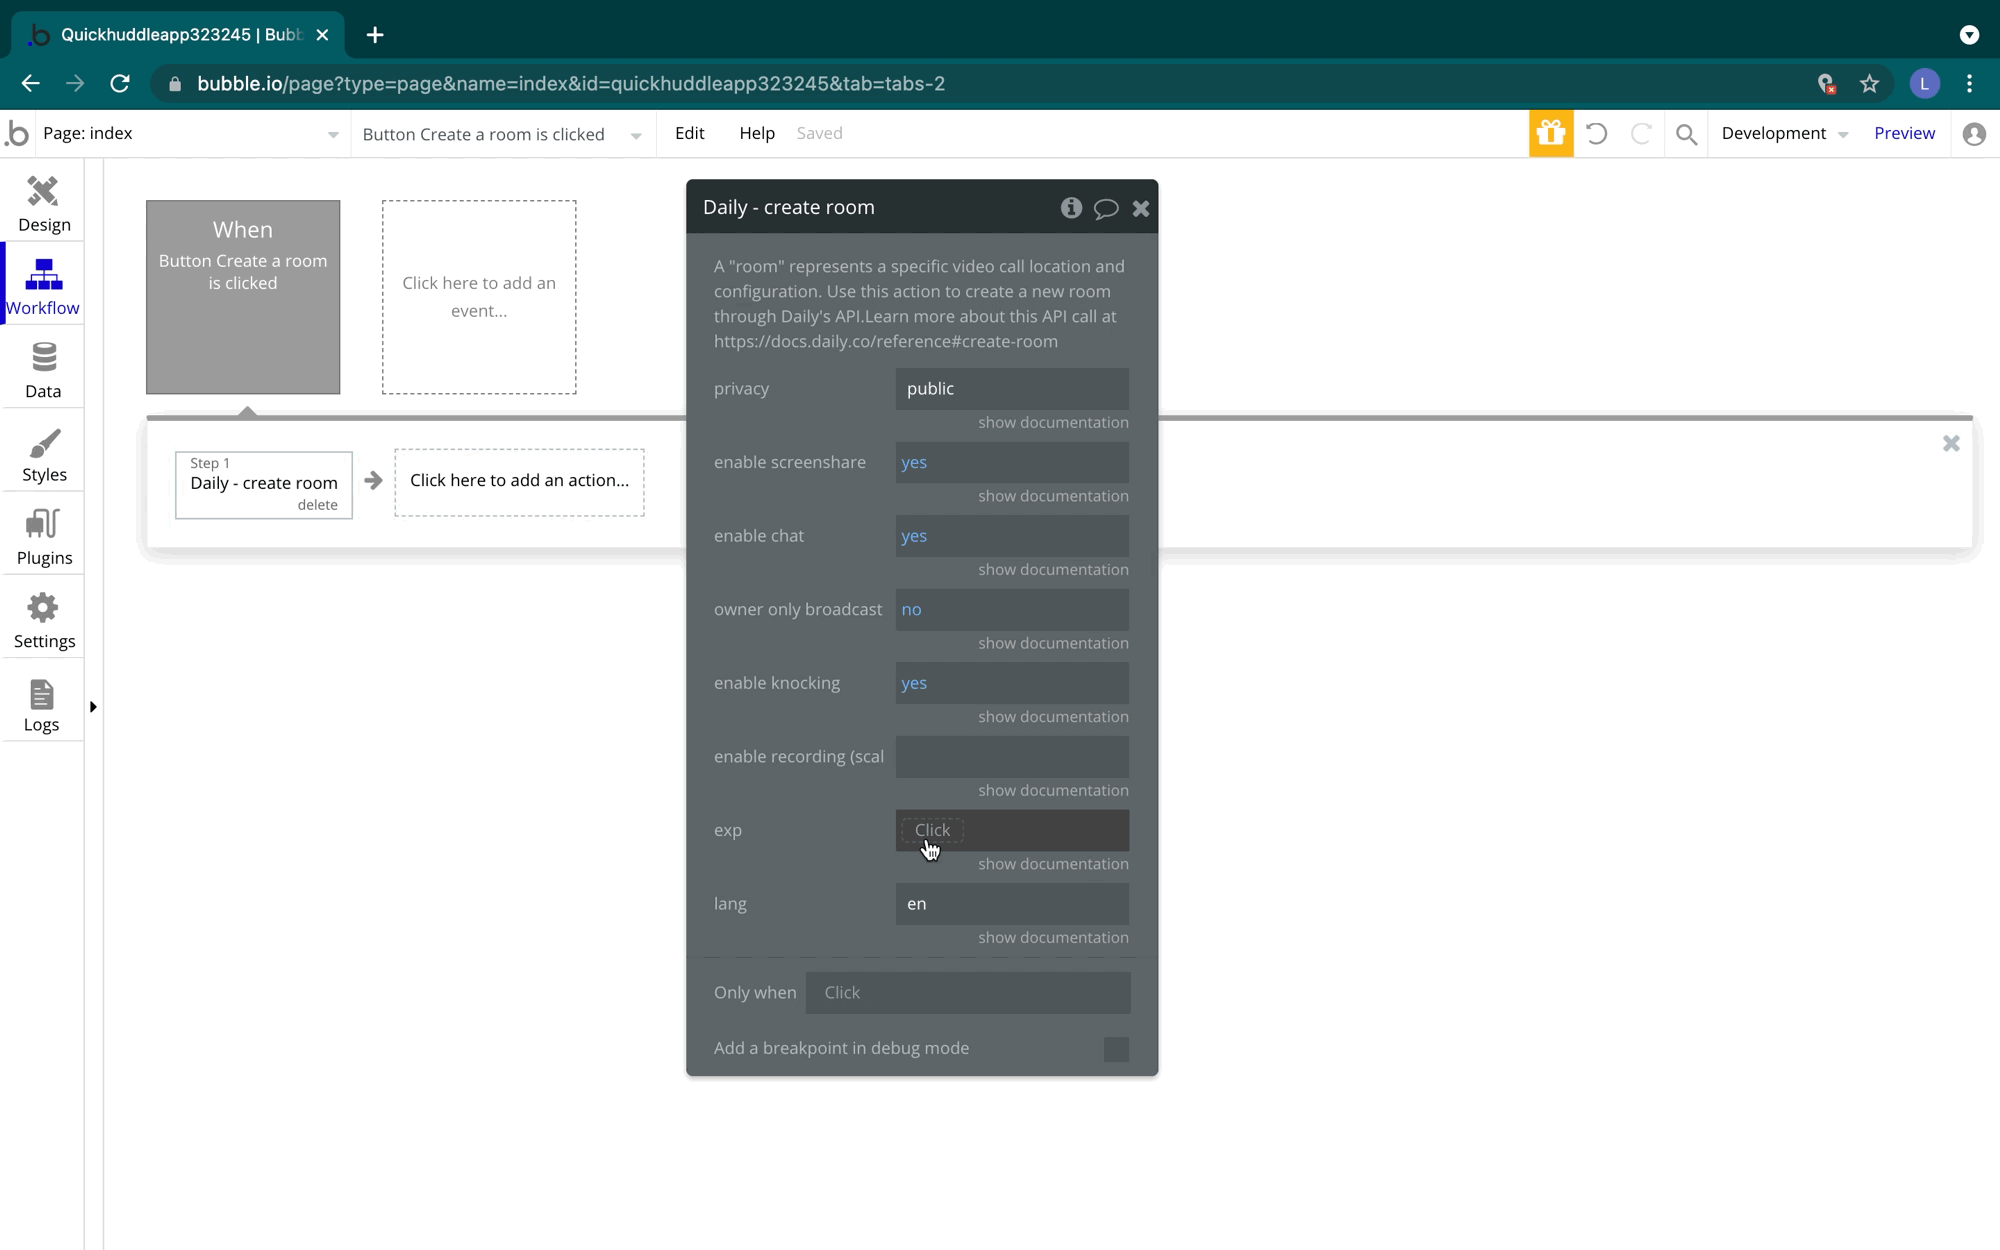
If you forget about what a parameter in any of the plugin actions accepts or requires you can always select show documentation to learn more.
Previewing the step
Before we set up the rest of our workflow, let's preview our step. Click Preview.

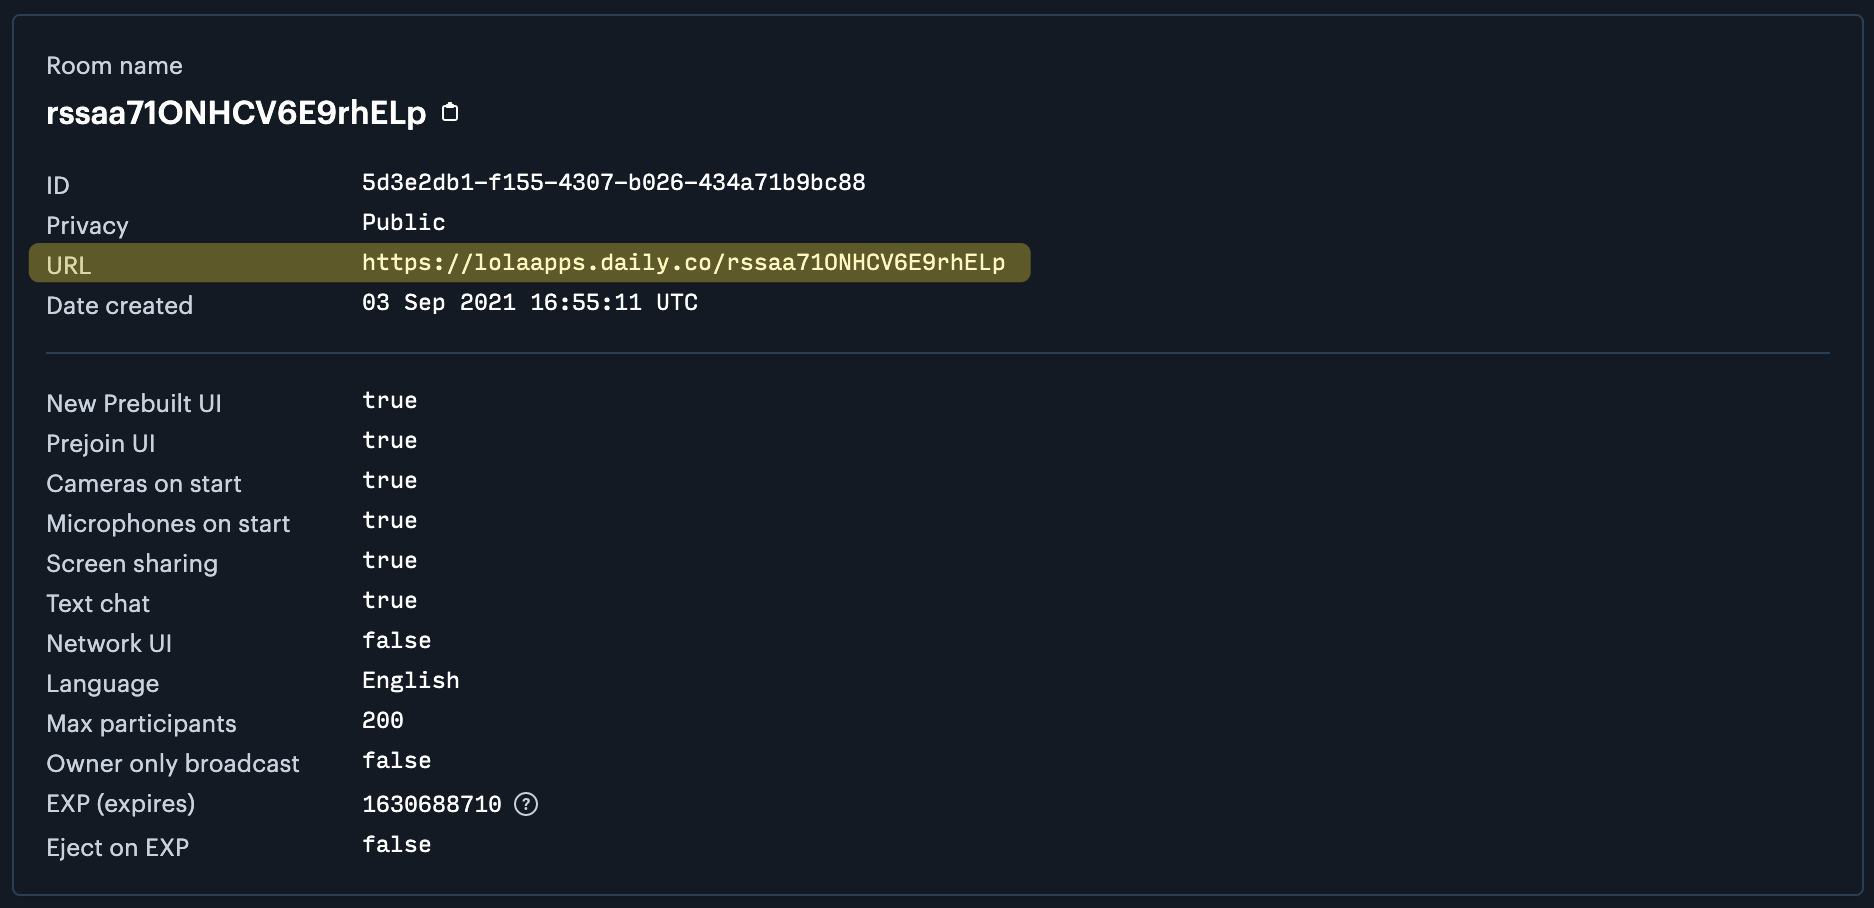
In the previewed app select Create a room. Then we can head to our Daily rooms dashboard to see the room we just created.
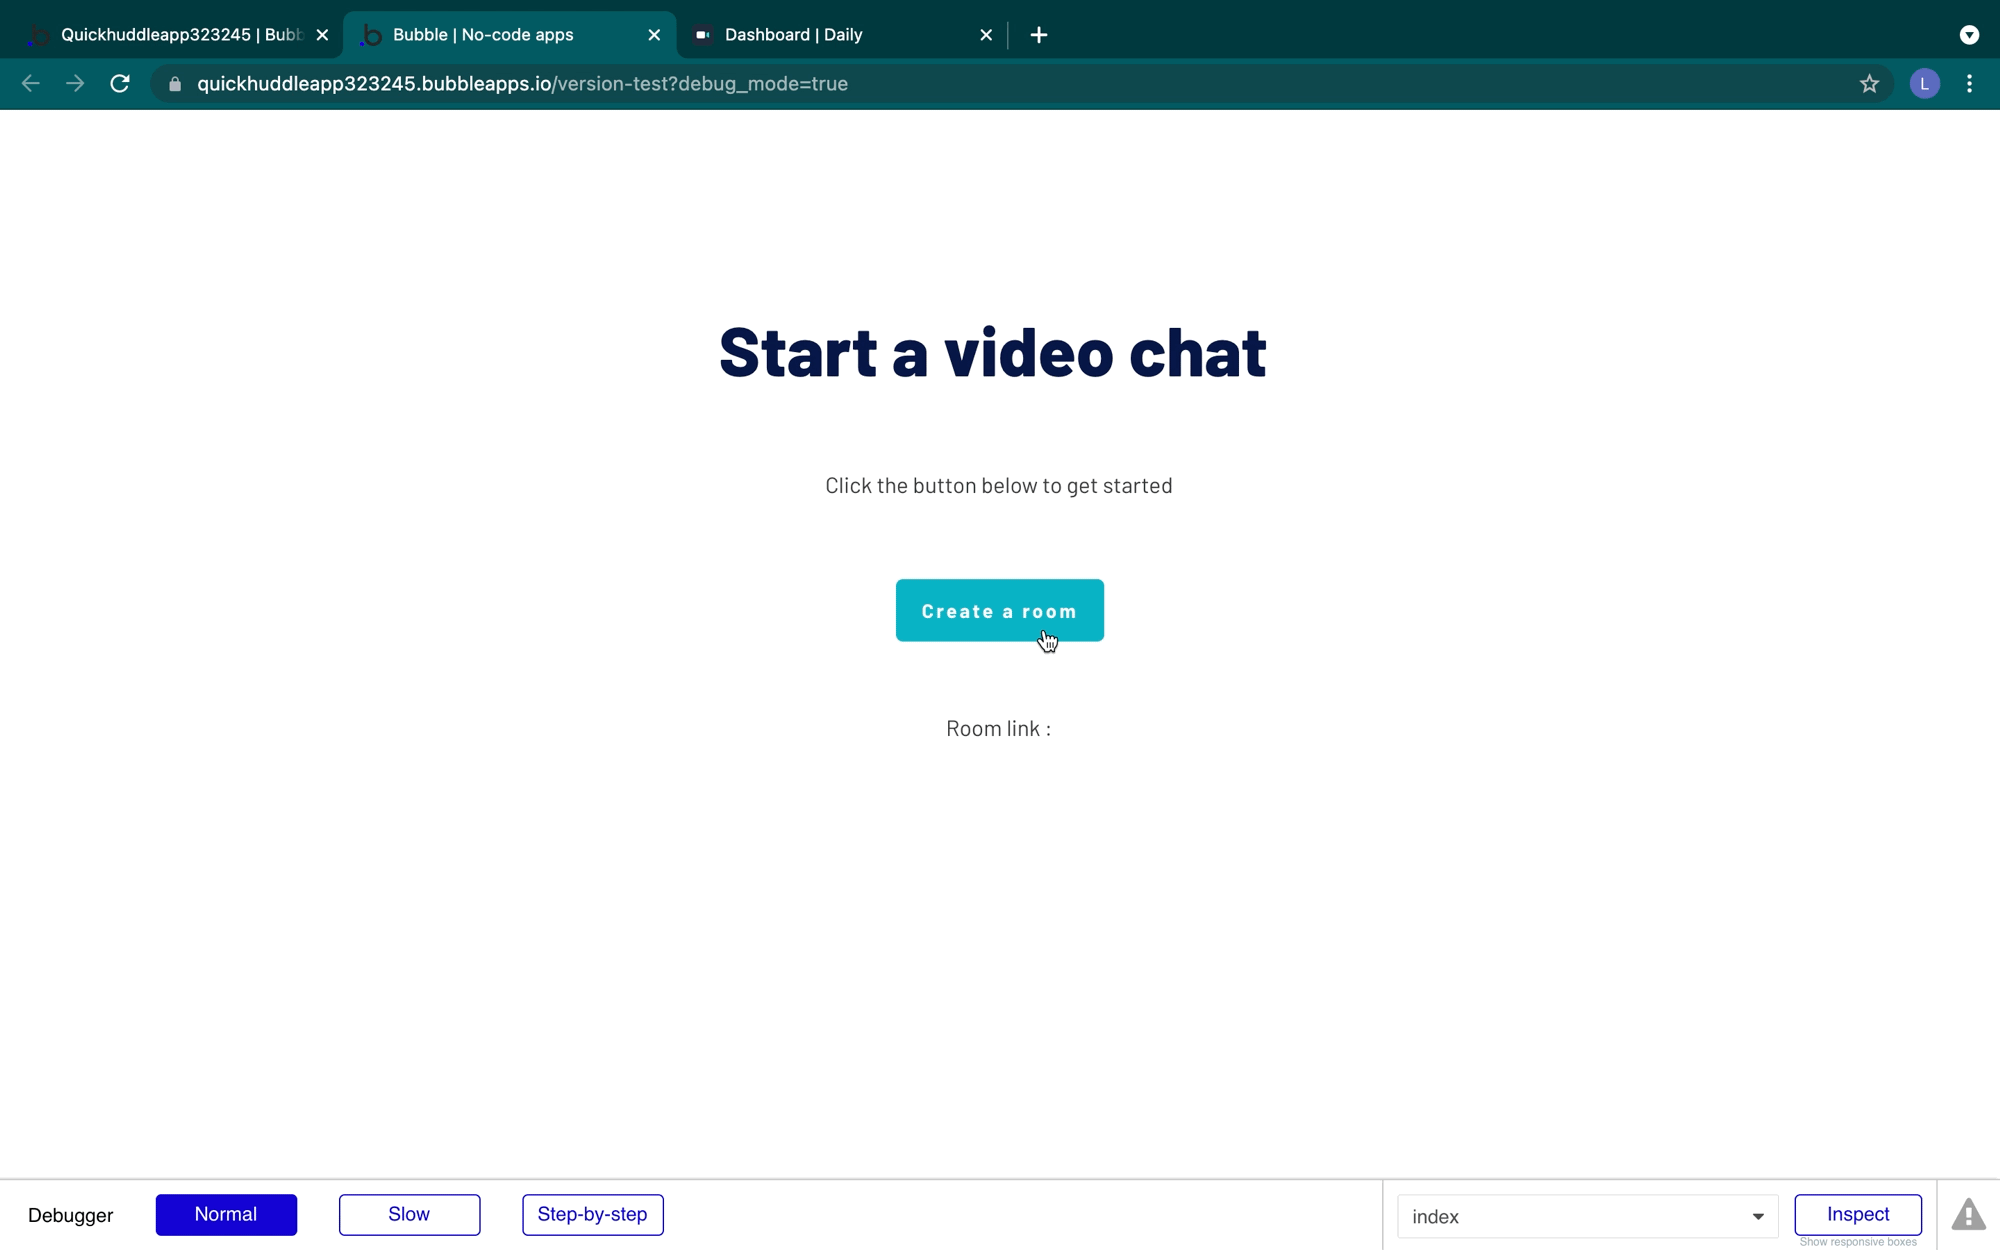
We can see the settings of our room. The settings we configured in our plugin action will show up here. We also have this Daily URL, which is the link to the room that we just created with our plugin action that we'll want to embed within our Bubble app.
Saving our Daily room URL and the Bubble database
We'll need to do some database work in Bubble in order to save our Daily room URL so that later when we share links from our Quick Huddle app we can embed the correct Daily room into our app.
The Bubble database helps us save information that we want to store and retrieve later. The database consists of multiple parts, data types, and data fields. Data types are tables of data where each row represents a single object that has one or more data fields. A data field is a single piece of information about that object. You can learn more about managing data in Bubble, in their manual.
For our app we'll need one data type, we'll call it video call and we'll use this data type to save the URL that we get from Daily when we create a room with our plugin action.
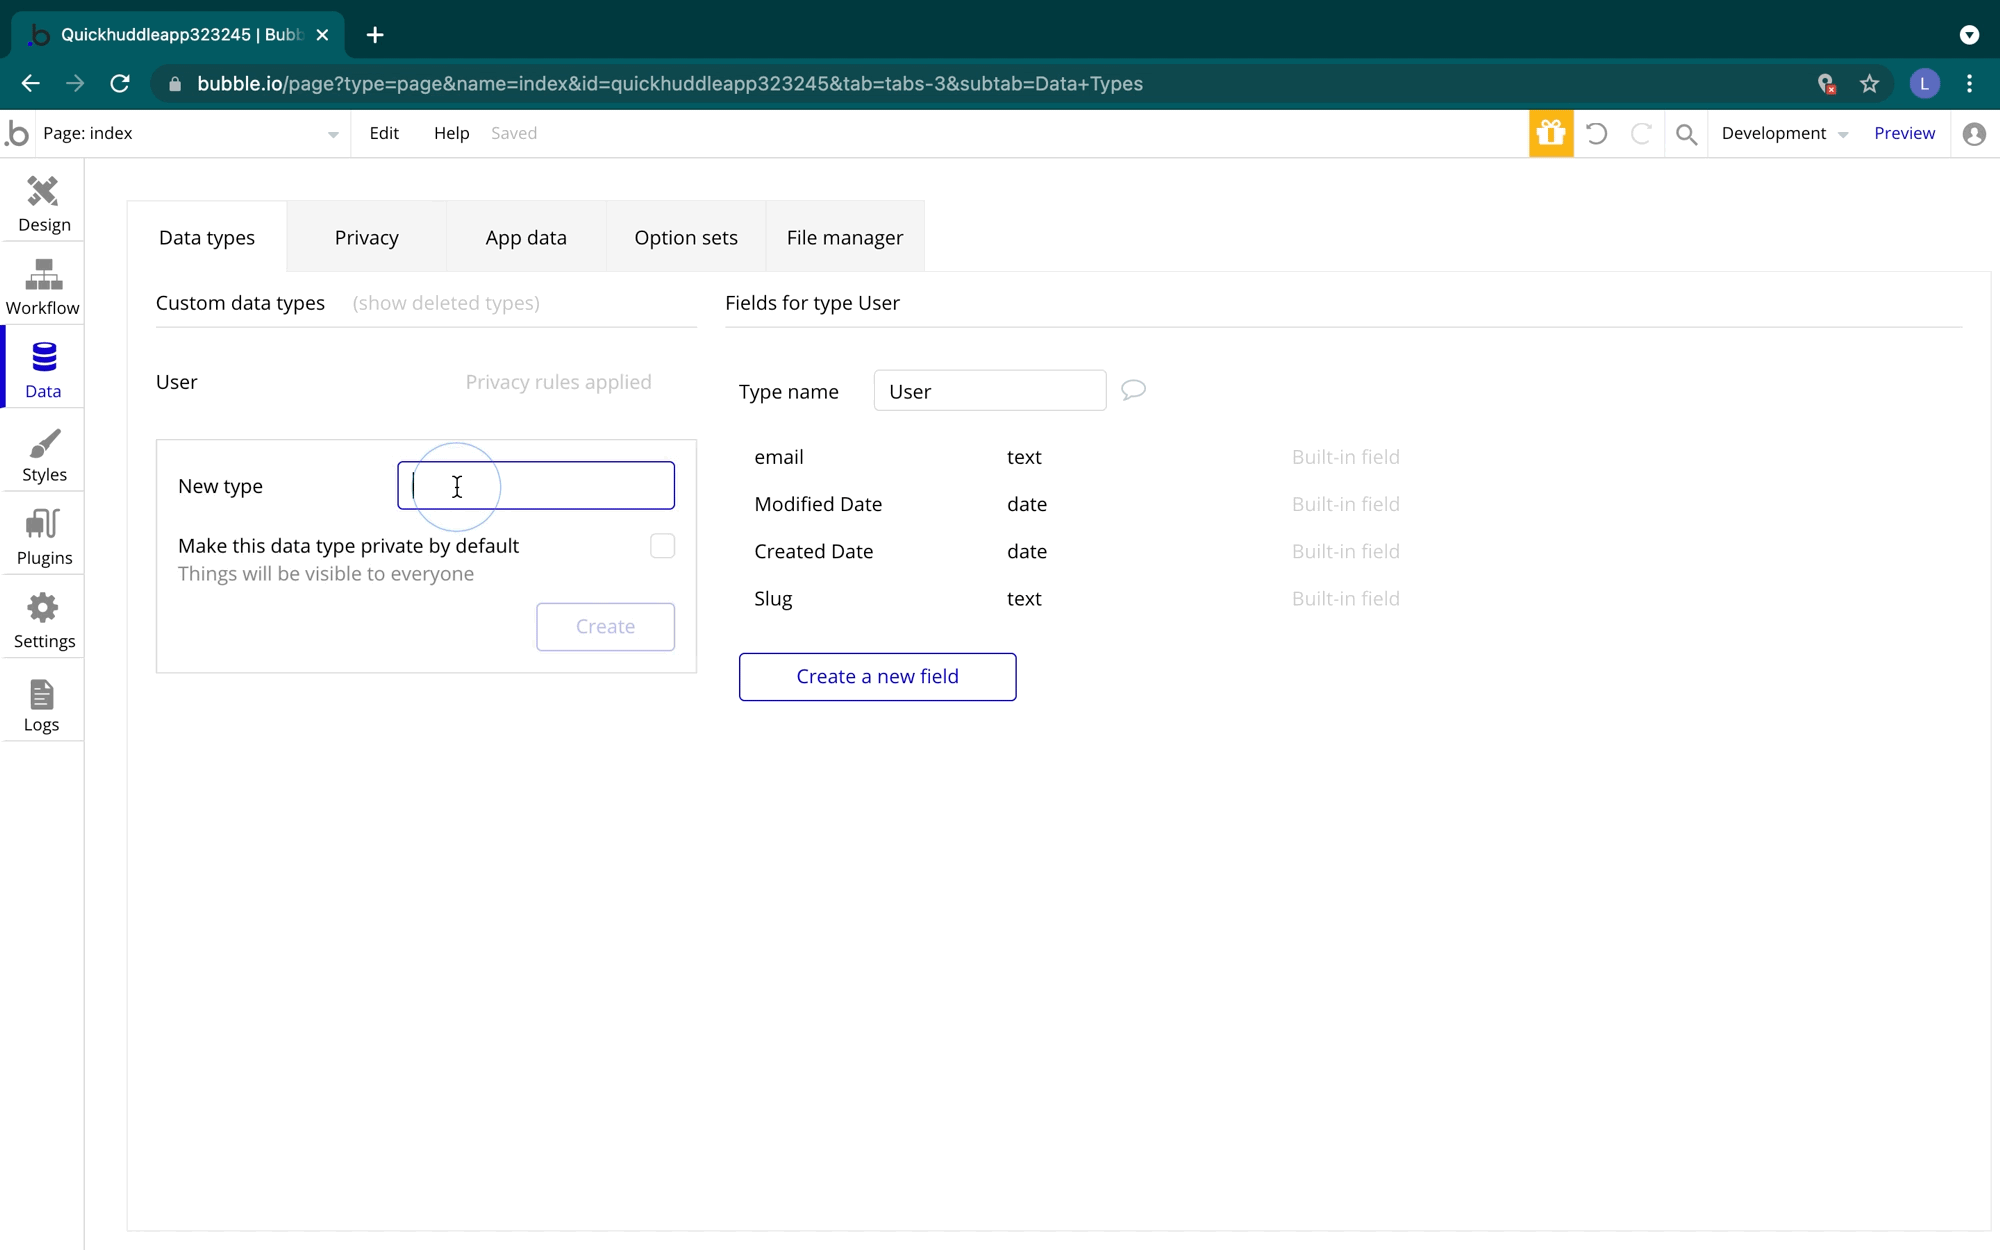
To create the data type, we'll head to the new type input in the Data tab and type in video call. We won't make the data type private by default. We'll add a field to our data type called URL and make it of type text.
With our data type created, we can now add another step to our workflow to save our Daily URL into our database. In the Workflow tab, we'll select Click here to add an action. Then search for and select create a new thing... .
For the type input, we will choose video call. We'll also select set another field choose URL and then choose the Result of step 1 (Daily - create room)'s url. This will ensure that when we create a room, we're always saving the URL for the room that we just created.
Showing a link to our user
We've created the video room and saved the URL to our database but we haven't displayed any new information to the user yet.
We could send our users directly to the URL that we get from Daily which would be hosted on Daily's site but in our case we want to create a link for accessing the video call directly on our site so users stay there.
To begin to set up that link, we'll head to the Design tab, and then the Elements tree. You'll see the group that we created called Group Link. This group will hold our text element with the link for our user to copy. Let's select the group and set the Type of content to video call so it can accept information from our video call data type. We'll leave the data source empty
Let's dive into the anatomy of the link we want to share with users. It will consist of multiple parts.
- Our website home URL which is also the link to our index page
- The page in our app we want to direct users to (in our case it will be room)
- A unique id to identify which video call from our database that we want to embed when a user accesses the specified link. (All Bubble data types automatically come with a unique id so we won't need to set that up)
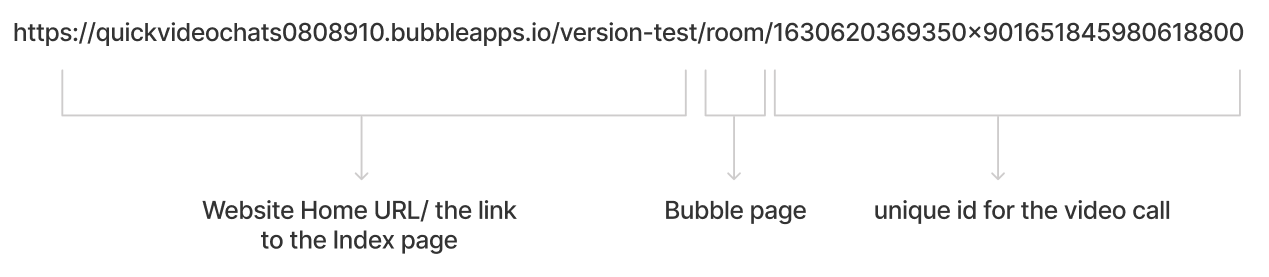
To set up the link, we'll select our room link text. After room link: we'll select Insert dynamic data. The dynamic data will make sure that we're sharing new links every time we send new information to our group.
Then we'll select Website home URL which is our app's base URL. This URL already comes with a slash at the end so we'll add room/ to the URL to direct users to the room page. Next, we'll add Parent group's video call's unique id so that we can specify which video call the link should access.

Displaying the right link
We have a room link set up but we're missing one more step to display the correct unique id. If we previewed our app at this stage we wouldn't see any information after room/ in the link.
Since the data source of our Group Link is empty. We'll want to set up an action to send data to our Group Link after we've saved the video call URL in our database.
To do this we'll go to the Workflow tab and our create a room workflow, we'll select Click here to add an action and choose Display data in group/popup. We'll choose Group Link as the element and for the data to display we'll enter Result of step 2 (Create a new vide...), which is the item we just saved in our database. Since our text room link is inside our group link, it will be able to access the same data we send to our Group Link through this action.
Hiding blank room links
The last bit on the index page is to add some conditionality to our group. Conditions control how page elements behave and appear under certain circumstances. You can add conditions that affect the visibility of an element on the page, or its data source, or even its background color.
In our case, we don't want users to see this room link text if there isn't a video call link for them to visit. In our Design tab, we'll select our Group Link, and in the Conditional tab, we'll select Define a condition and in the when input add This Group's video call is empty. Then we'll Select a property to change when true and choose This element is visible, and we'll leave that option unchecked.
Now our group will only be visible after we've created a room and displayed data through our workflow into that group. Since our text "Room link:" is in our Group Link that won't be visible either.
Setting up the room page
When a user visits the room page, with a video call's unique id in the URL we want it to immediately open up the correct video call.
While on the room page, we'll click on the page and switch to the Appearance tab in the properties editor. We'll set our Type of content to video call so our page can accept information from our video call data type.
In our Workflow tab, we'll select Click here to add an event.... We'll choose a Page is loaded . Then we'll select Click here to add an action and search for and select Daily - join room since we immediately want to join a video call when the page loads.
The Daily - join room action joins video or audio rooms that we have created on our Daily domain and, depending on the room style we choose, it overlays Daily's Prebuilt onto our app. Daily's Prebuilt comes automatically with features like grid/speaker views, a pre-join call UI, chat participants views, and screen sharing.
In the action editor, we'll select Insert dynamic data and input Current Page video call's URL to the URL field. This will be the URL that we saved from Daily in our database. Since we just made it so that this page is of type video call, when we visit this page and have a unique id specified in our link, our app will be able able to access the Daily URL of that video call when this workflow runs.
For the style, we can choose fullscreen .

We also have a meeting token parameter. Meeting tokens help set room access, and participant details. In our app, we don't need any special participants to access so we can leave that meeting token field empty.
If you'd like to create a meeting token you can do so with the Daily - create meeting token action in this plugin.
Previewing the app
We're ready to try this out. Switch to the index page. Select the preview button, click create a room, and then copy the link into your browser. You'll need to add a name and enable access to your audio and video and then join the meeting.
And that's it! This tutorial was an introduction to the Daily plugin for Bubble but you can do a lot more than we covered today including:
- Private rooms
- Live streams
- Webinars
- You name it!
If you have any feedback or questions, contact Daily's development partner, Lunch Pail Labs at help@lunchpaillabs.com
Never miss a story
Get the latest direct to your inbox.