


At Daily, we empower developers to integrate performant WebRTC video and audio into their applications. That includes being able to actually measure relevant performance indicators in a video API. One popular tool to do just that is testRTC.
To aid developers in evaluating our video API’s performance, we have developed a repository tailor-made for running performance tests with testRTC. The repo comes bundled with all the code you need to test Daily's API. This includes:
- An app, readily deployable to Netlify, to create Daily rooms that can be joined in a variety of configurations.
- Two fundamental test scripts you can import into testRTC to run against the Netlify-deployed app.
How it works
Our testrtc-client GitHub repo is set up for quick and hassle-free deployment to your Netlify account by using Netlify’s one-click deployment. Our pre-made testRTC test scripts are then imported into your testRTC account and run against your deployment.
The application utilizes an instance of Daily's call object to manage video tracks and display call elements. The call object enables fine-grained control over the entire call experience. In the future, we aim to enable using testrtc-client to test Daily Prebuilt as well.
You can find additional details on running the app locally, deploying it, and utilizing the bundled test scripts in the repository README.
In this post, we'll walk you through the process of deploying the app and running tests against it.
Set up your accounts
To follow along with this walkthrough, be sure to set up free accounts with the following services if you haven’t already:
Getting a Daily API key
You'll find your Daily API key on the developers page of your Daily dashboard:

Keep this key handy, because you'll need to provide it when deploying the testrtc-client application to Netlify.
Deploying testrtc-client
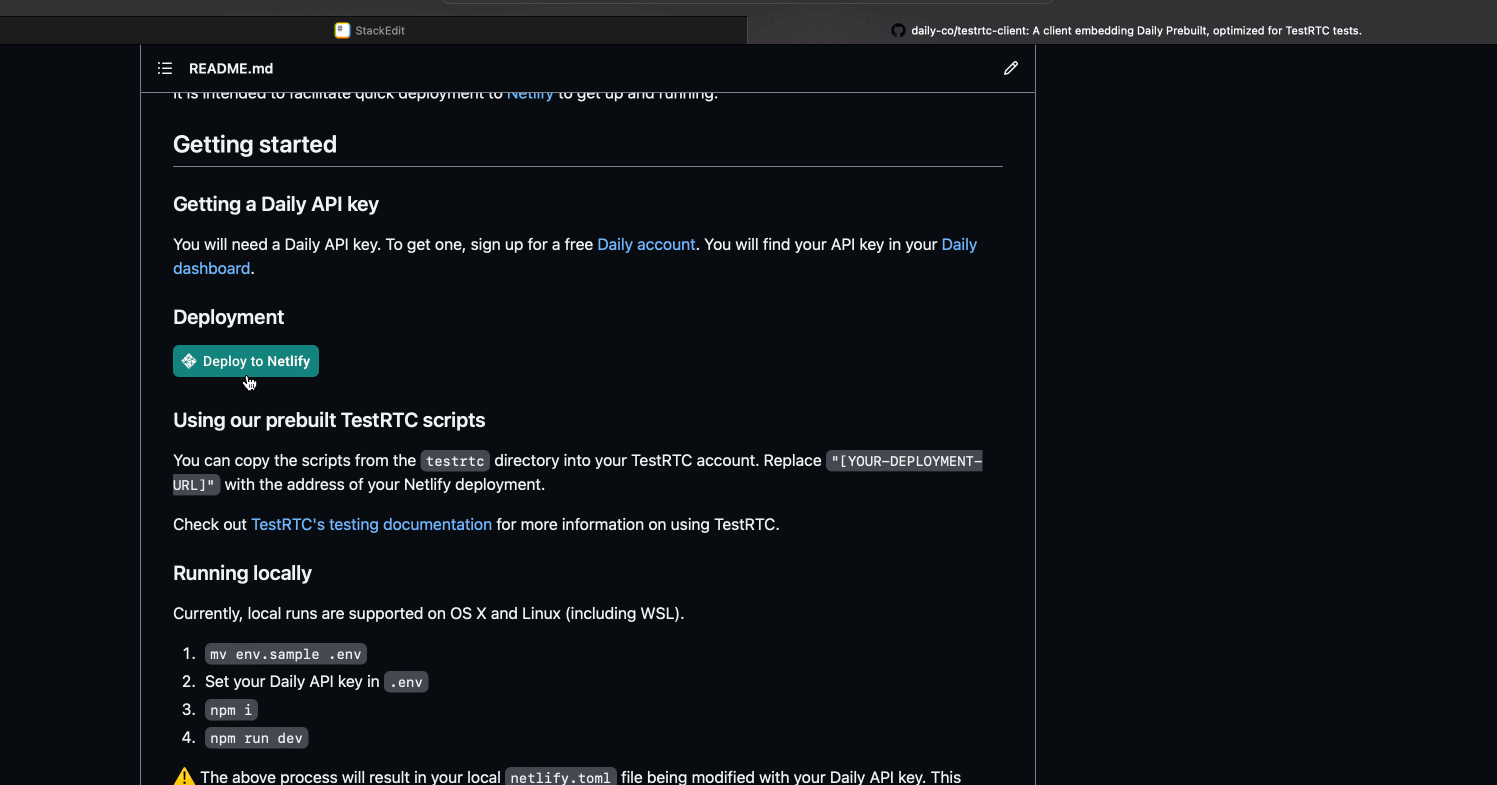
Click the "Deploy to Netlify" button in the testrtc-client README.
From there, you'll be redirected to Netlify, which will take you through the process of automatically cloning and deploying the repository to your own Netlify account. During deployment, you will be prompted to paste in your Daily API key, which will be set as an environment variable in your deployment. This will be used to generate short-lived Daily rooms on demand.
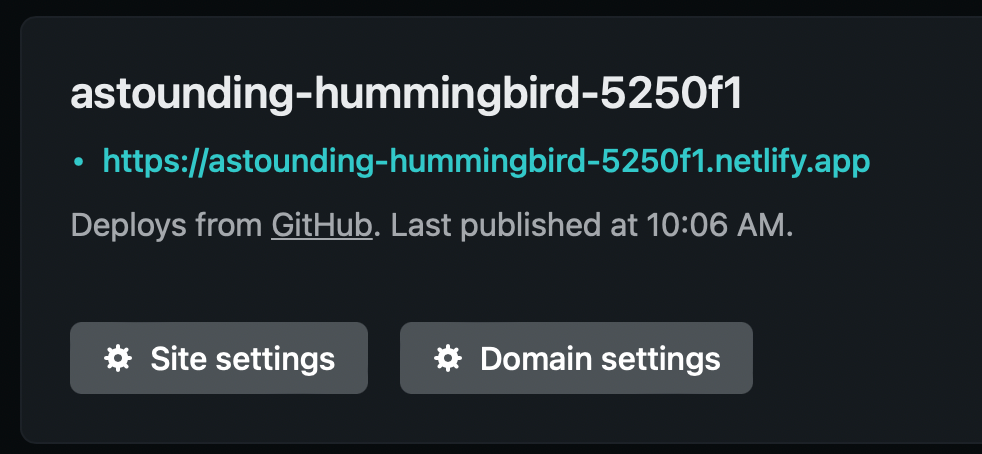
At the end of this process, you should have a Netlify deployment up and running and a clone of the repository in your own GitHub account. If you run into any problems, check out Netlify’s support documentation or reach out to us.
Netlify should automatically redirect you to your application page, where you’ll find your deployment URL. If it doesn’t, look for your new site in your Netlify account dashboard. Keep it handy; you’ll need to paste your deployment URL into your test script configuration shortly.
Now it's time to import and run some testRTC tests against the app you’ve just deployed.
Importing Daily's testRTC test scripts
The testrtc directory contains files of two different types:
- JSON files (like
p2p-1-1.jsonandsfu-1-1.json), which you can use to import the tests directly into your testRTC account. - JavaScript files (like
p2p-1-1.jsandsfu-1-1.js) to view the test source in a more readable format.
We’ll use sfu-1-1.json as an example for this walkthrough. Download it to your PC by either saving it individually, or cloning the entire repository. This script tests the performance of a two-participant Daily video call in SFU mode. The p2p-1-1.json test script performs a very similar two-participant test, but in peer-to-peer mode. We plan to add tests for additional scenarios in the future.
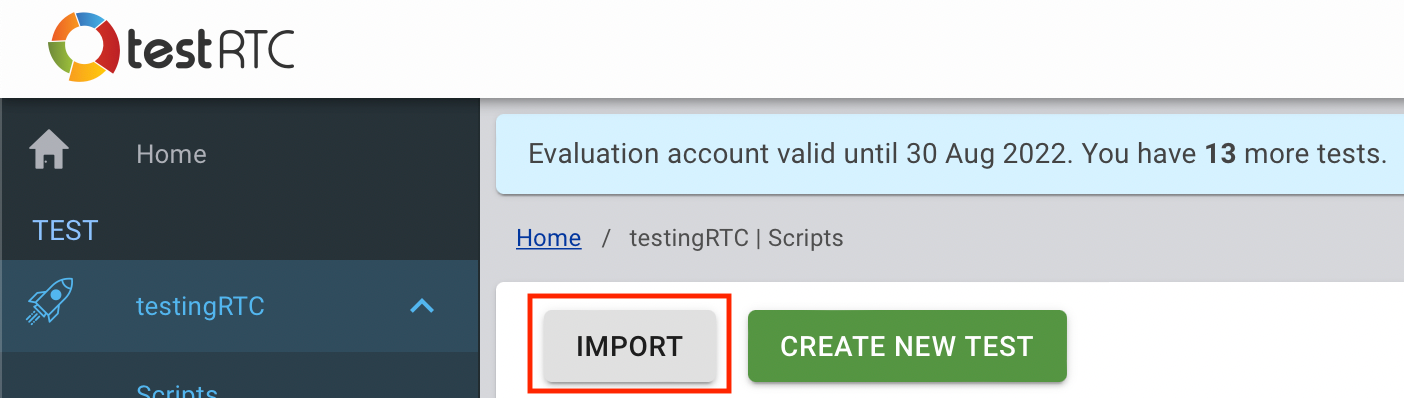
Be sure you're logged into your testRTC account. Then, navigate to the scripts page and click "Import".
Import sfu-1-1.json, which you downloaded from the testrtc-client repository. After a moment, a new test will appear in your test list. Clicking on the title (“Daily 1-1 SFU - Self-Serve”) takes you to a test details page. Here, you'll see details about your test and enter the URL of your Netlify-deployed testrtc-client application.
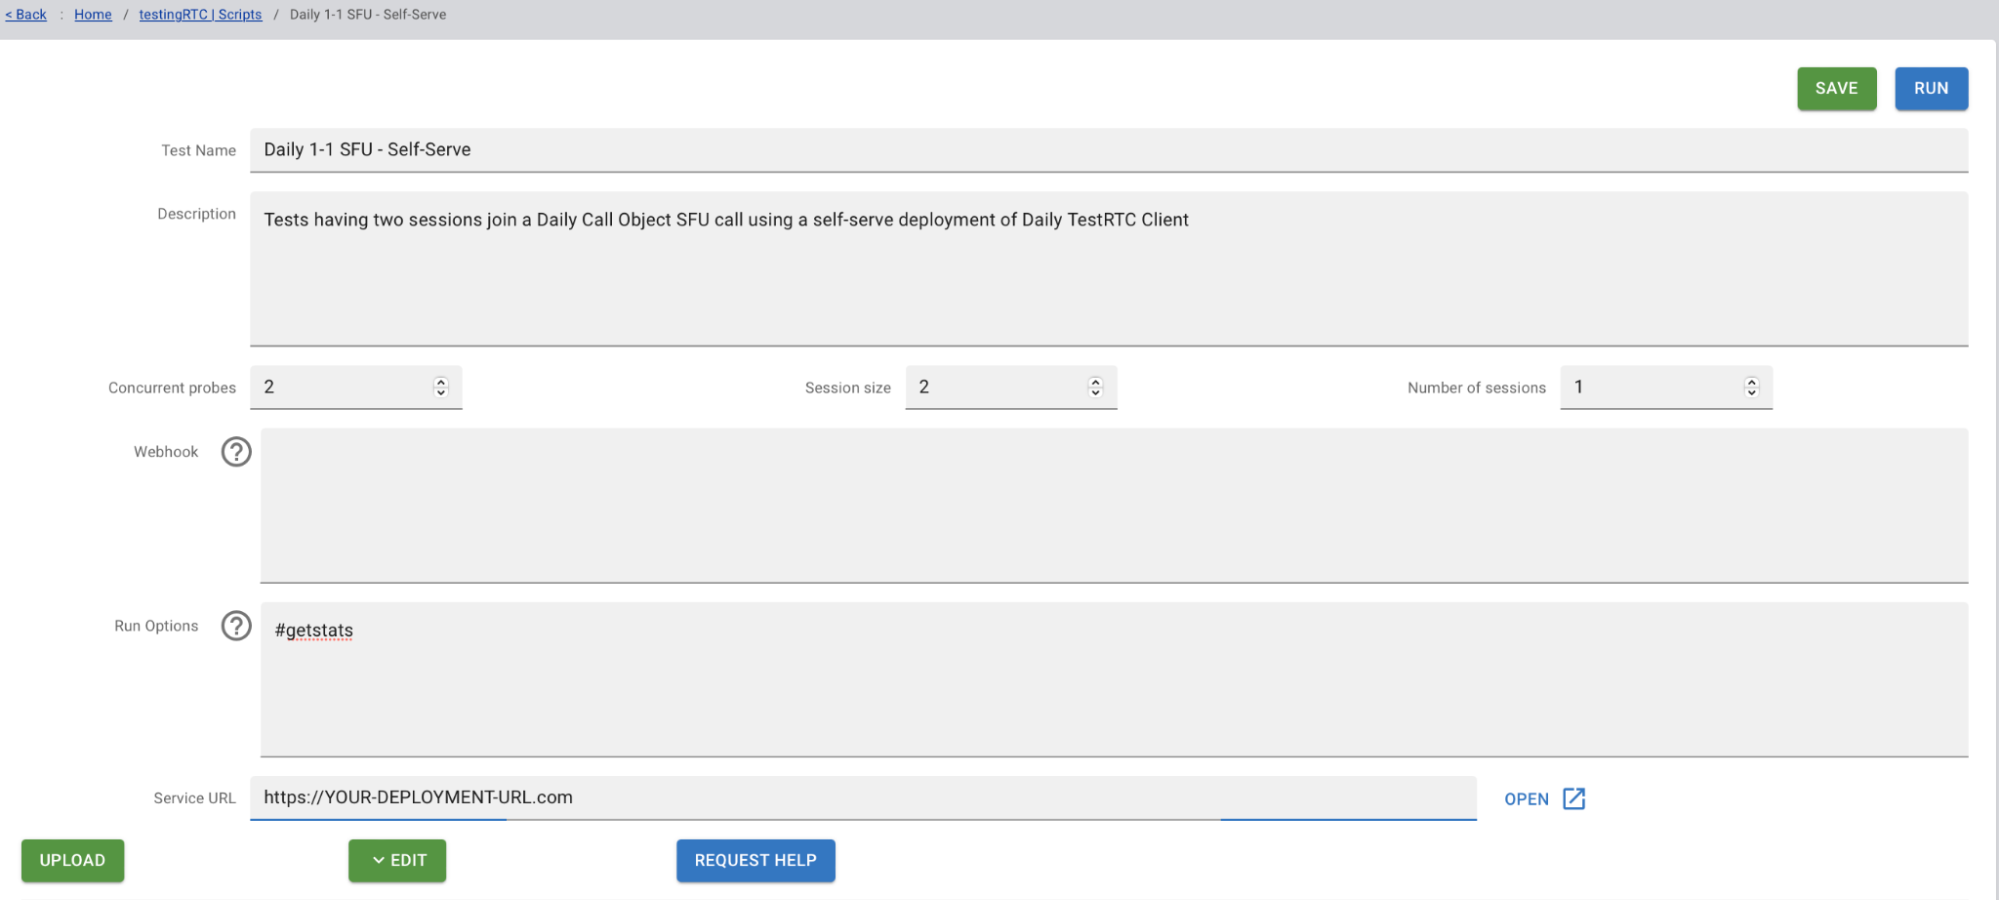
Paste the URL of your testrtc-client Netlify deployment into the "Service URL" input field, which by default contains the string ”https://YOUR-DEPLOYMENT-URL.com”.

Finally, click "Run" to run the test.
Review the results
The test will take a few minutes to run. Once it's done, you should be presented with the results:
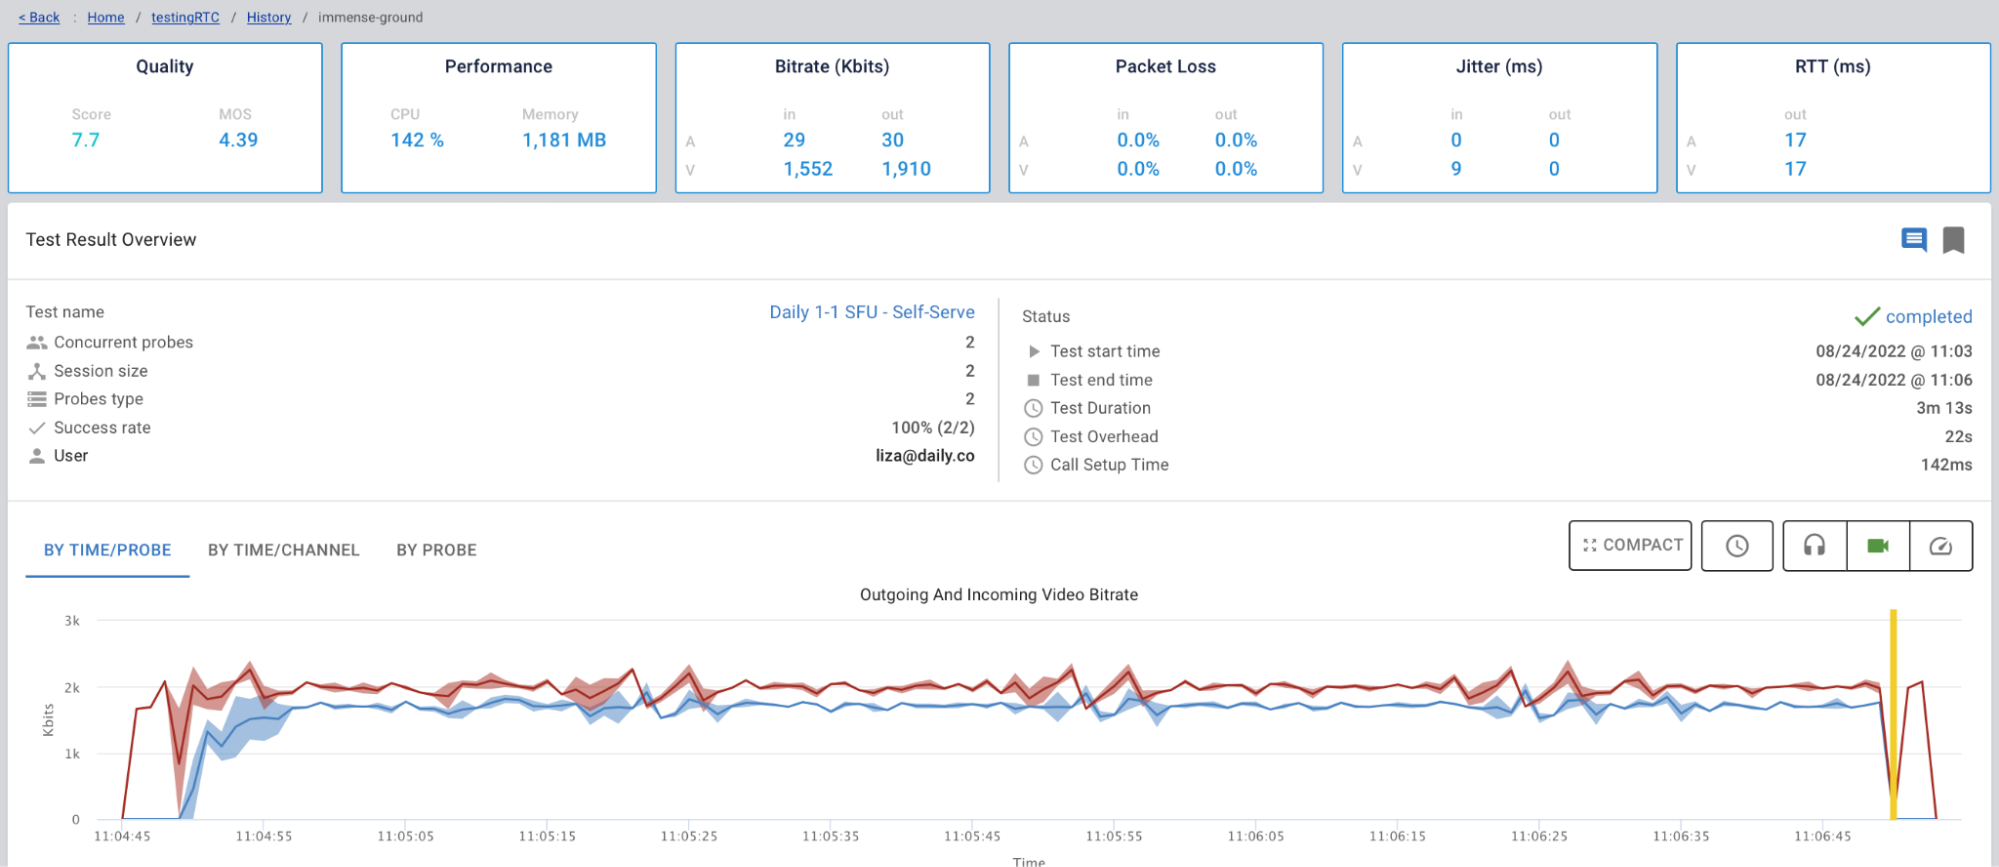
As a quick rundown, the two main scores in the top left hand corner are the overall score and the audio’s "Mean Opinion Score (MOS)."
In addition to the overall and mean opinion scores, testRTC provides lots of other useful data about the tested session, such as CPU and memory usage, jitter, packet loss, and more.
If you need help interpreting the results, check out the testRTC's test scoring overview or the more in-depth test results documentation. You can also reach out to us if you want help reviewing and understanding your scores.
Customizing the tests
Daily's testrtc-client comes ready to accept your customized room and call-object parameters, which you can embed right in a query string. If you'd like to try testing a different room or call configuration, you can modify the test scripts to specify your own room parameters, call options, and bandwidth constraints.
For example, a GET request to the following URL will result in a room being created which will connect to the Sydney signaling server:
https://your-deployment.netlifyapp.com/?roomParams={"geo":"ap-southeast-2"}
You can read more information about customizing your tests in the repository README.
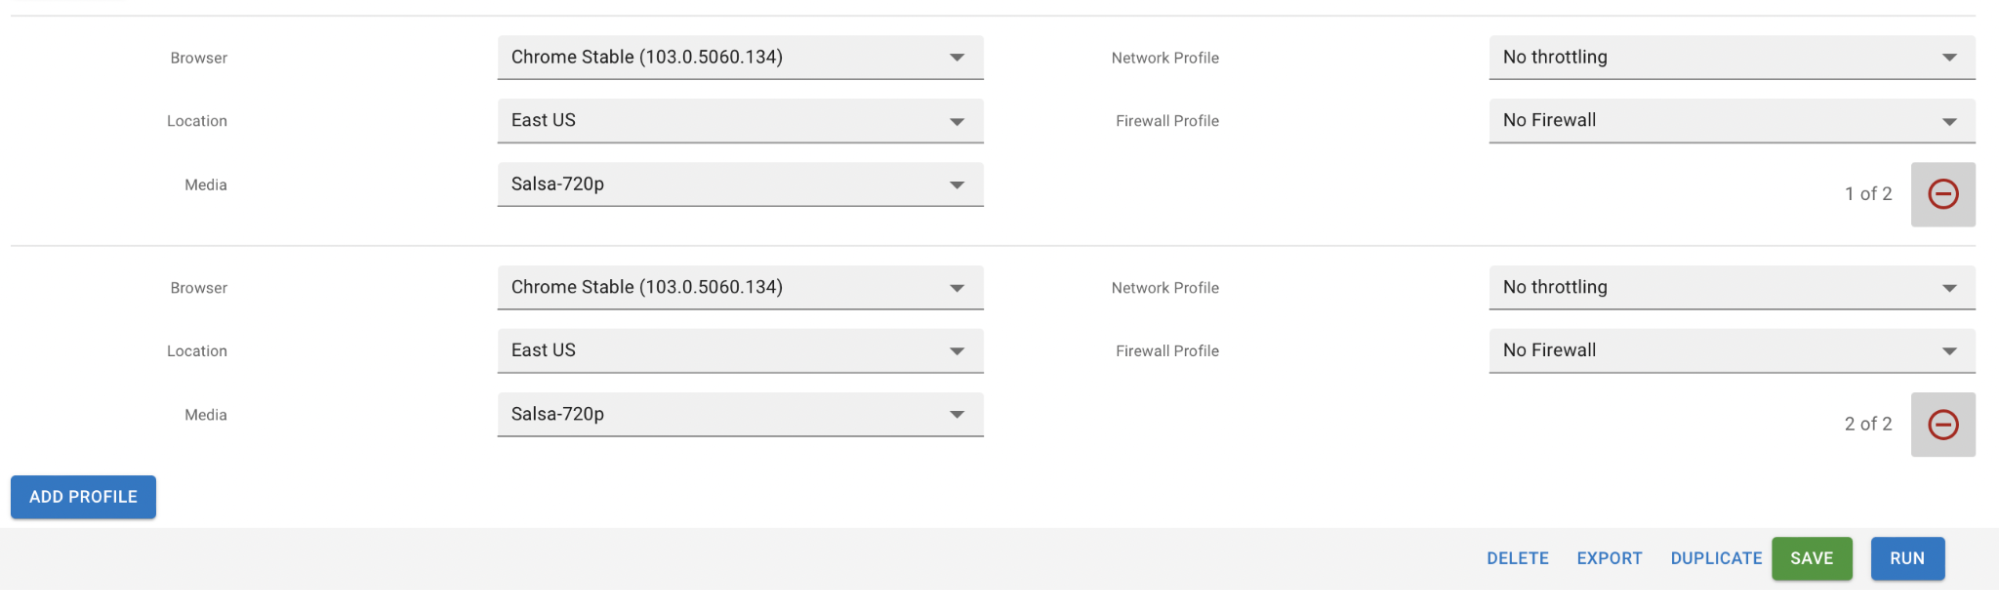
The testRTC setup enables you to modify other test parameters, such as:
- Location of the agents being spun up
- Media inputs
- Agent count
Note that the tests you will have imported from our repo are already configured with reasonable defaults for all of these settings, but you may find it helpful to play around with different configurations.
Conclusion
In this post, we’ve walked you through how to use Daily’s new testrtc-client application and accompanying test scripts to measure Daily’s performance with testRTC.
You can now:
- Deploy your own version of
testrtc-clientto Netlify with one click - Import our custom-made test scripts into your testRTC dashboard
- Run our Daily performance tests and interpret the results
- Customize our tests or even write your own
Keep an eye out for more test scripts in the future, including Daily Prebuilt support in addition to our current custom call object setup.
If you have any questions about the performance results you see after running our tests, customizing the tests, or configuring your rooms or calls to get the most out of Daily, we invite you to contact us.
Never miss a story
Get the latest direct to your inbox.