

[14/01/22] This demo app uses manifest v2. Manifest v2 is being deprecated by Chrome in 2022 and will no longer be accepted into the Chrome store.
Additionally, Notion has updated their authentication API — specifically, the public integration — since this post was written. This example now uses an outdated (but functional) approach, which we will update shortly.
This tutorial is part of a series on how we built Daily Collab, our latest Chrome extension demo, which lets you embed and transcribe Daily video calls in any Notion page.
The goals for our most recent Chrome extension demo, Daily Collab, were two-fold: to build an app that showcased Notion’s new public API and to have an excuse to start building a transcription feature into Daily’s frontend library, daily-js. Thankfully, we were able to accomplish both and learn a lot about how Notion’s API authentication works along the way.
So, what exactly do transcription and authentication have in common? Well, adding a transcription feature to the Daily Collab demo meant using the Notion API to edit specific Notion documents. To authenticate each edit, Notion requires an API key from either a workspace administrator or an authorized developer.
(In our case, we realized we would need to use Notion’s public authentication so the transcription feature could work across multiple workspaces.)
To help better understand how authentication works with the Notion API, we’ll cover Notion’s two types of authentication in this tutorial:
- Internal integrations
- Public integrations
We’ll start with the simpler of the two—internal integration— to see how to authenticate individual Notion API requests for a specific workspace. Next, we’ll see how Notion’s public integration works in Daily Collab, our Chrome extension demo that embeds a Daily call into any Notion page.
Note: Currently, Daily’s transcription feature is still in development, so we’d love any feedback you have after using this demo. (That is to say, don’t try to add it to your production apps! 😉 )
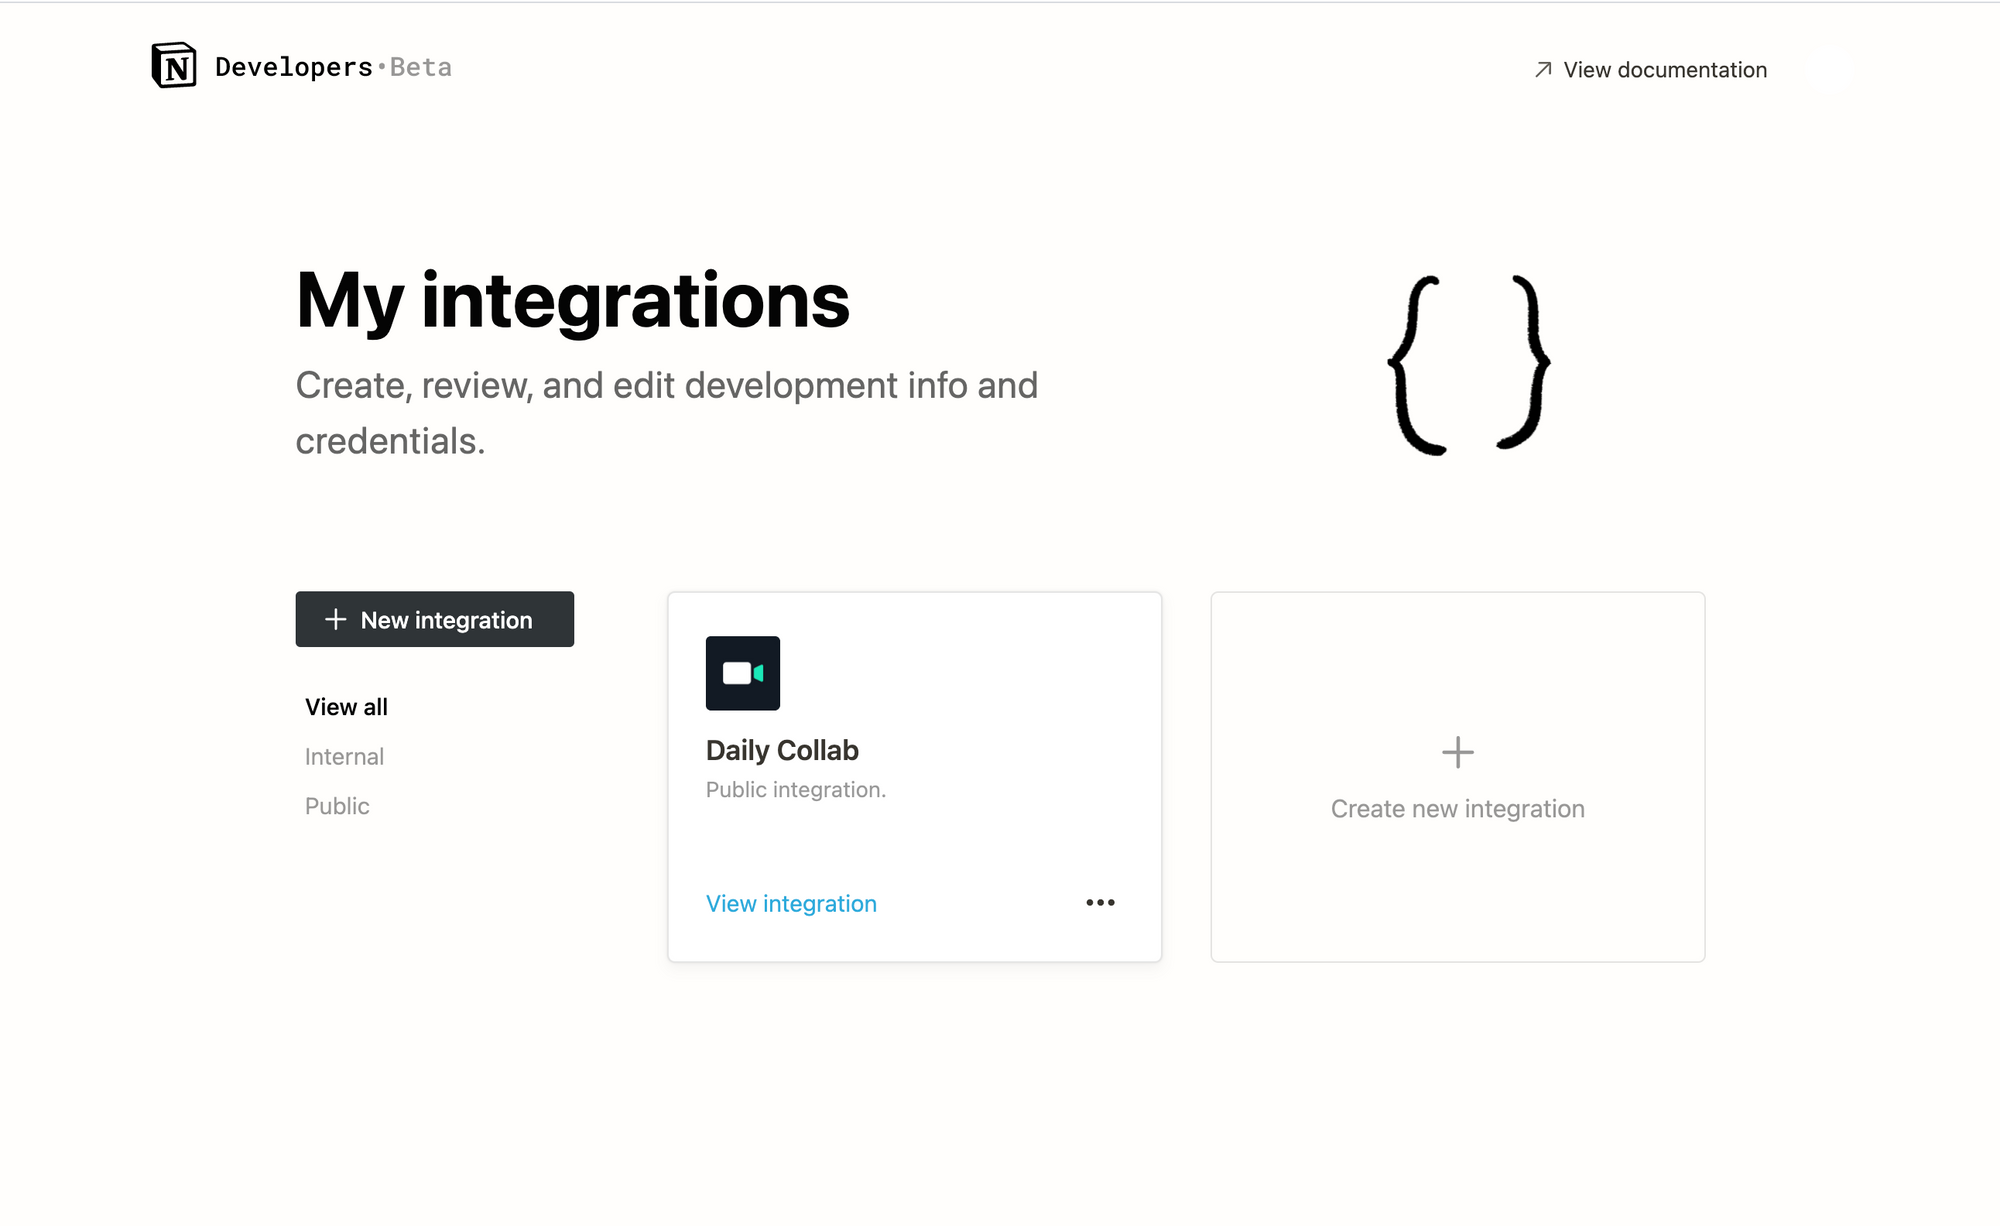
Using the Notion developer dashboard
Before we get started, if you are following along with this tutorial to add authentication to your own app, you will need to create a Notion API Key from Notion's developer dashboard. Depending on which type of authentication you will be using, you can create either a public or internal integration through their dashboard.
Daily and Notion: A love story 💕
When we first saw that Notion had a public API coming out, it seemed like the perfect opportunity to test it out with a new Daily demo. When we came up with the idea to build a Chrome extension that embeds a Daily video call in Notion pages, we were very proud of ourselves, except for one problem: just adding a Daily video call to the DOM didn’t actually use the Notion API. 🤦🏻♀️
Enter our upcoming Daily transcription feature. We decided the most interesting way to use the Notion API would be to add a button to the Chrome extension UI that lets you transcribe your current Daily call directly to the doc you’re currently viewing.

Transcription would not only start the process of adding a new feature to daily-js, it would also use the Notion API’s “append block child” endpoint.
Authenticating the Notion API: Internal integrations
Of the two authentication options for Notion (internal and public integrations), authorizing internal integrations is much more straightforward.
Internal integrations work well for any app that’s interacting with one specific Notion workspace. For example, when we first started building Daily Collab, we tested the call UI and transcription in only one test workspace in Notion. Since there was only one workspace where we were appending blocks to Notion docs, it made sense to start with an internal integration while we were in feature development.
To authorize an internal integration, Notion requires your Notion API key. To get this key, create an internal integration in the Notion integration dashboard and under Secrets you’ll see Internal Integration Token. Copy this token and keep it safe!
Your API key must be passed with each Notion API call. So in Daily Collab’s case of appending a new block to a Notion document, the bearer token gets added to the authorization header using the API key in place of the NOTION_API_KEY placeholder in the code block below, like so:
async function updateNotionPage(docId, content) {
 const children = [{
   object: "block",
   type: "paragraph",
   paragraph: {
     text: [
       {
         type: "text",
         text: { content },
       },
     ],
   },
 }];

 const response = await fetch(
   ‘https://api.notion.com/v1/blocks/${docId}/children`,
   {
     method: "PATCH",
     headers: {
       Accept: "application/json",
       "Content-Type": "application/json",
       Authorization: `Bearer ${NOTION_API_KEY}`,
       "Notion-Version": "2021-05-13",
     },
     body: JSON.stringify({
       children,
     }),
   }
 );

 return await response.json();
}
Note: The above code is from the Daily Notion custom API, not the Daily Collab Chrome extension code. We used custom endpoints for all Notion API requests.
Assuming your token is correct, you should receive a successful response and your Notion document will update almost instantly. Pretty cool, right?
Authenticating with public integrations
As is often the case with building apps, the simplest solution doesn’t always cover your use case. With the Daily Collab demo, we wanted to add the demo to the Chrome store so others could try it out in their Notion workspace, too. That meant the extension needed to work for anyone’s Notion workspace, not just our little test workspace.
To solve this problem, we switched over from an internal integration to a public integration.
Public integrations require a few steps to get them working. To understand how they work, let’s look at how the Daily Collab Chrome extension implements a public integration.
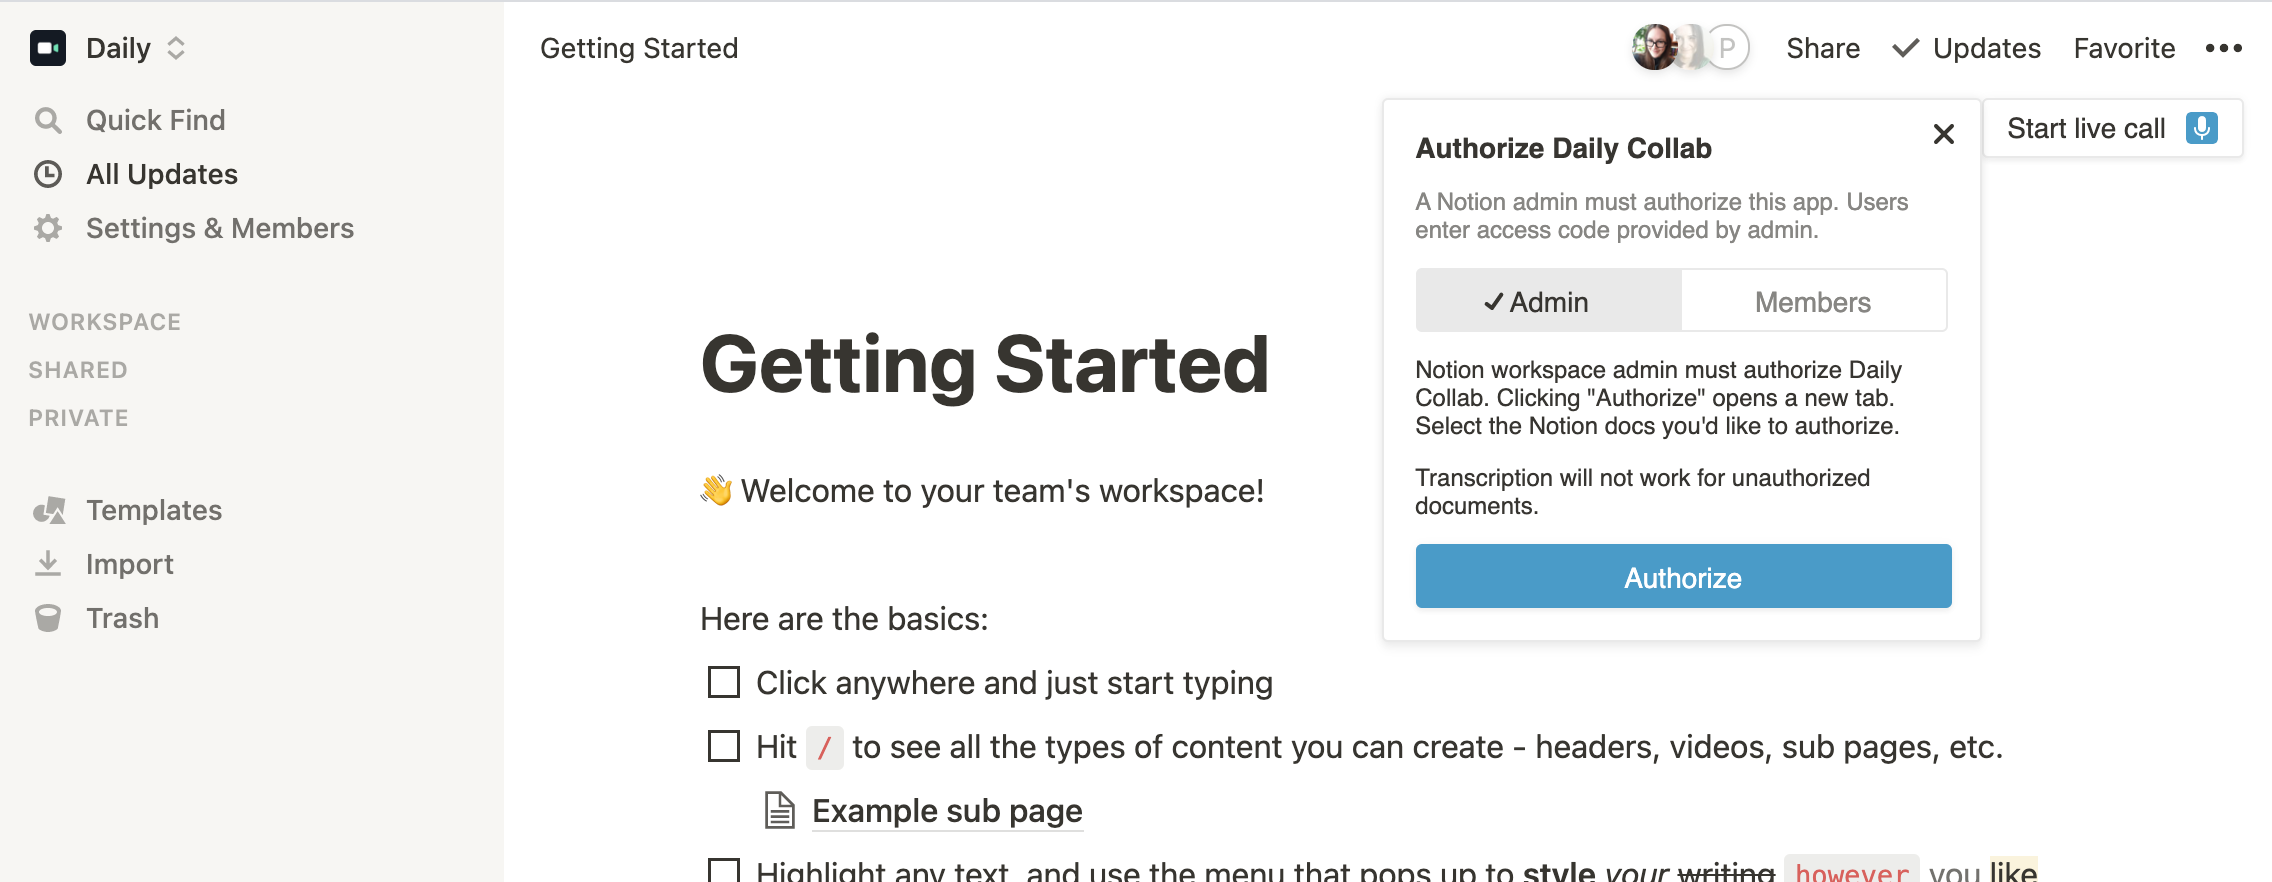
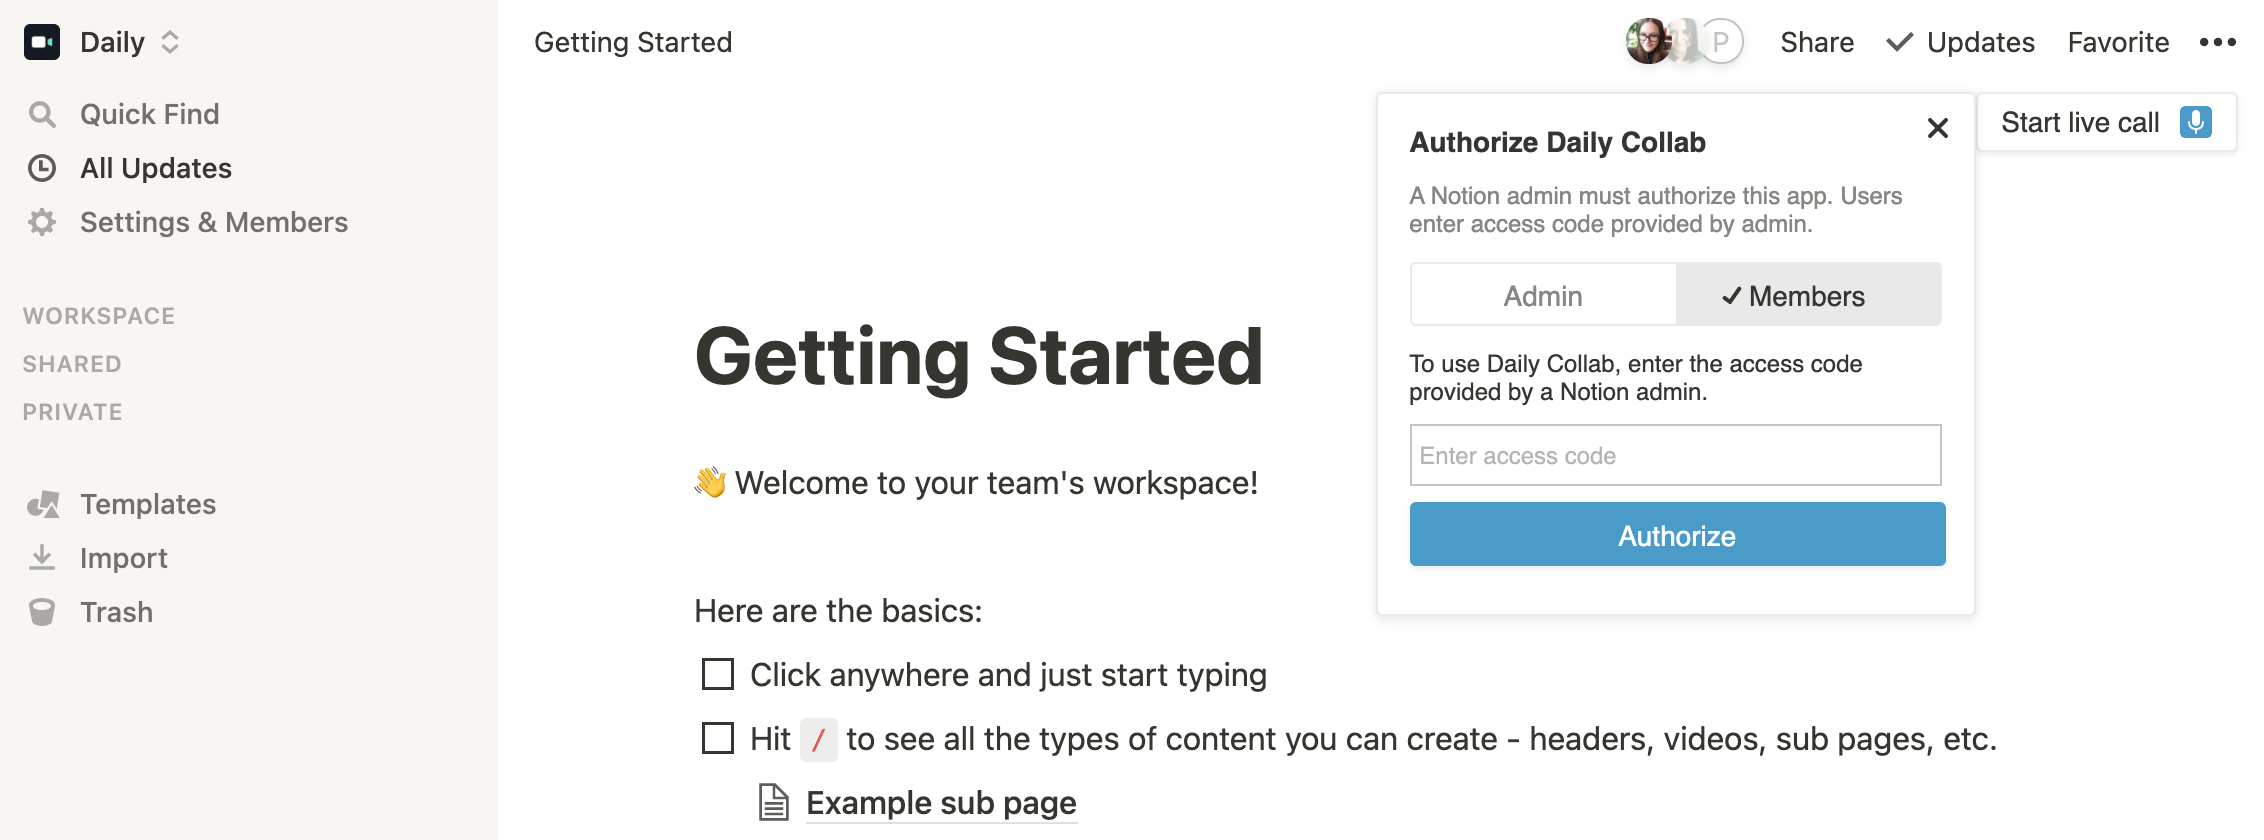
To enable the transcription feature, users must press the chevron button to the left of "Start live call" to open the authentication form. There are two views in this form:
- One for Notion workspace members who have a code from the Notion admin
- One for the Notion admins to authenticate the app for their workspace
The authentication form for admins will show with an Authorize button. Notion workspace admins can then authorize Daily Collab to edit Notion documents in the workspace by clicking the Authorize button (which is actually a link). Doing so will trigger the following events:
- A new tab will open with the following URL:
https://api.notion.com/v1/oauth/authorize?client_id=<CLIENT_ID>&redirect_uri=<REDIRECT_URL>&response_type=code
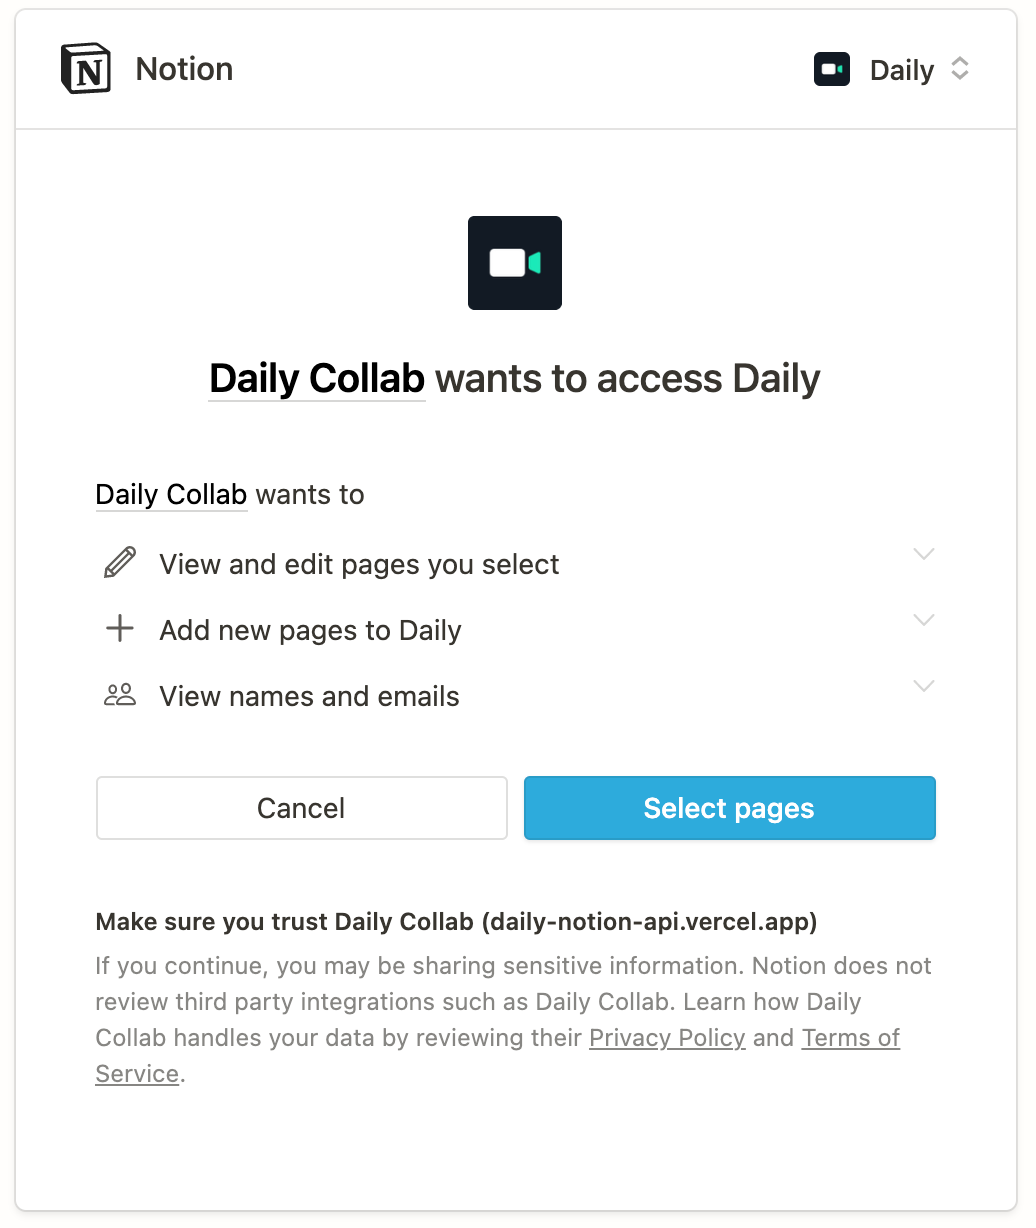
The client ID is available in the integrations dashboard underSecrets > OAuth client ID. The redirect URL is a custom Daily Collab endpoint to handle what should happen after authorization. - The admin will see an authorization screen from Notion where they will be asked to authorize Daily Collab.
- If they decline, they will be redirected to the redirect URL with an error message. If they give Daily Collab access, they will then be shown a list of workspace documents to choose from. Daily Collab is only able to edit documents specifically chosen from this list. (
Select allis an option too!) - Once the page picker is submitted, the admin is redirected to the redirect URL with a temporary code. To actually authenticate Notion API requests, the code must be exchanged for an access token.
- To get the access token, an additional POST request must be made to
https://api.notion.com/v1/oauth/token. The access token used with Notion API requests will be returned from this POST. Only one access token is given per Notion workspace, so re-authorizing will return the same token. - Once the token is received, it can be set in the auth header for Notion API requests the same way it is in the internal integration example above.
In Daily Collab, step 5 looks like this:
async function exchangeCodeForToken(code) {
 const auth = Buffer.from(
   `${process.env.NOTION_CLIENT_ID}:${process.env.NOTION_CLIENT_SECRET}`
 ).toString("base64");

 const res = await fetch(‘https://api.notion.com/v1/oauth/token’, {
   method: "POST",
   headers: {
     Accept: "application/json",
     "Content-Type": "application/json",
     Authorization: `Basic ${auth}`,
   },
   body: JSON.stringify({
     grant_type: "authorization_code",
     code,
     redirect_uri: ‘https://api.notion.com/v1/oauth/api/workspaces`,
   }),
 });

 return await res.json();
}
As described by the Notion documentation, authenticating the POST request to exchange the authorization code for the access token requires authenticating the request with HTTP Basic Authentication. To do this, the public integration’s client ID and secret, which are available in the public integration’s dashboard, are set in this format client_id:client_secret and base 64-encoded.
Understanding Daily Collab authorization from a bird’s eye view
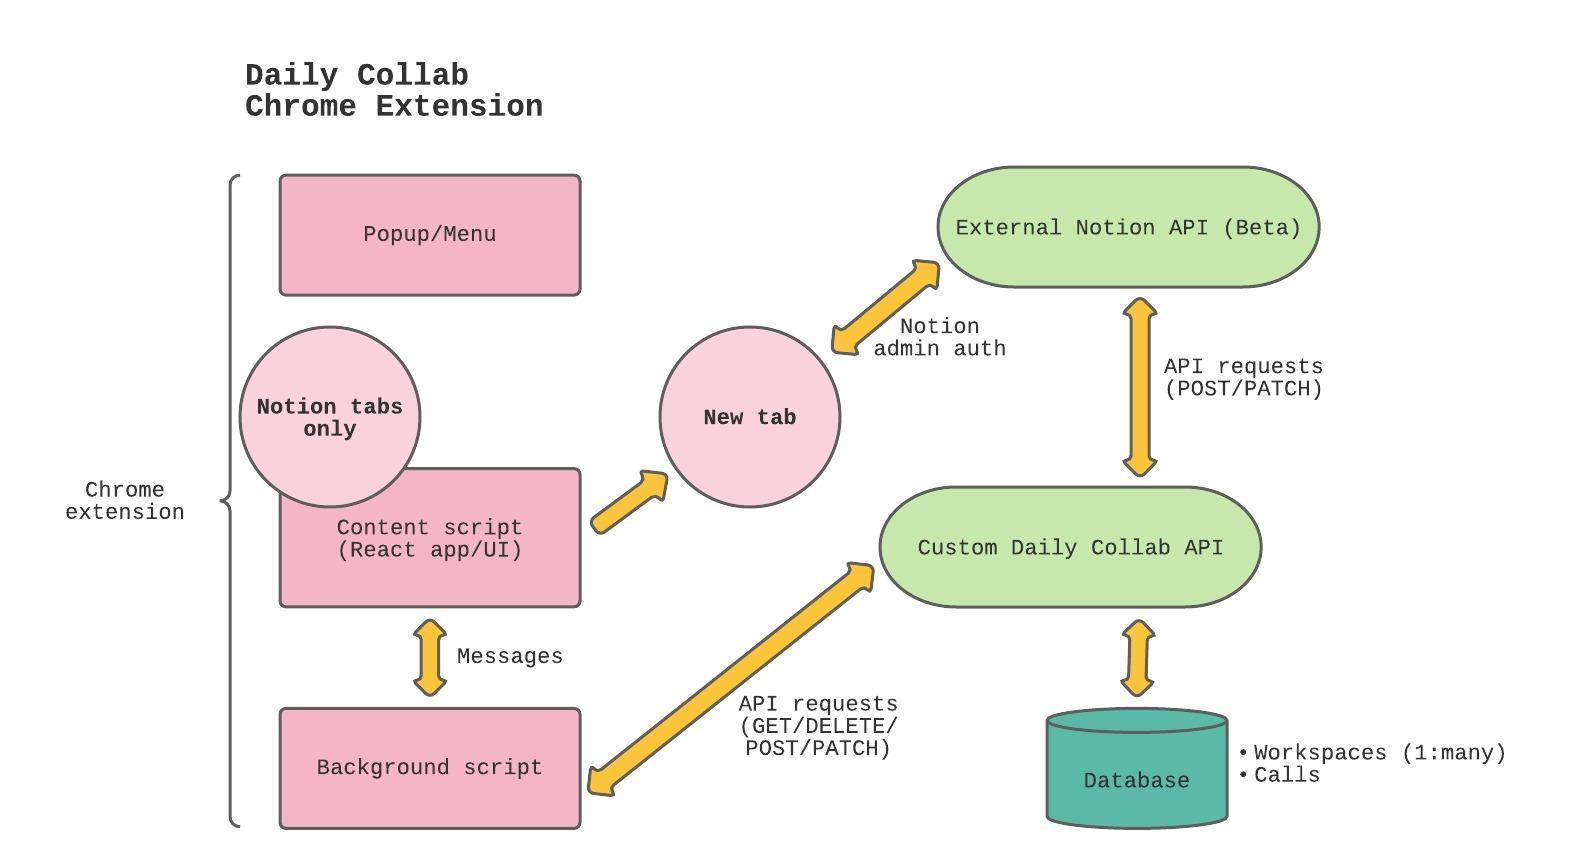
Now that we have a better idea of how Notion’s public integrations technically work, let’s take a closer look at how Daily Collab’s public integration works from a user’s perspective.
- The content script only runs on Notion pages and embeds a React app into the Notion page’s
<body>element. - The React app includes a button to display the authorization form.
- The admin clicks the Authorize button, a new tab opens and they can authorize Daily Collab, as well as select which Notion docs to permit changes to.
- Assuming the admin authorizes Daily Collab, the admin will be redirected to the redirect URL and is shown a code to share with other workspace members using Daily Collab. Since public integrations require a Notion workspace admin to authorize them, the code becomes the way for workspace members to say, “See, the admin gave the thumbs up!” Or in technical terms, the code will be set in the authorization header of all Notion API requests when transcription text needs to be added to the document.

- Once the admin has the access code, they can share it with other workspace members. Members can then enter it in the Authorization form to authenticate any Notion API requests they’ll be making with Daily Collab, i.e. the transcription feature.
Wrapping up
We hope this helps to better explain how authentication works in Daily Collab, as well as helping you set up Notion authentication in your own apps!
To learn more about Daily Collab and how Daily calls can be embedded in Notion documents, check out our other tutorials in our Daily Collab Chrome extension series. We cover more topics like how Chrome extensions work, how our transcription feature works with the Notion API, and getting the most out of your Daily calls.
If you’re interested in learning more about Notion’s beta API, check out the API documentation. To learn more about how to use Daily in your app, check out our own documentation here.
Never miss a story
Get the latest direct to your inbox.