Introduction
At Daily, we want developers to be able to implement real-time video calls using whatever tools they are already comfortable with. We have loads of examples using popular front-end JavaScript frameworks to help you get started, such as React, Svelte, and Vue.js. And you’re in luck – it doesn’t matter if you’re using one of those frameworks or using none of them, because today we'll be working with our old and sometimes forgotten friend, plain JavaScript.
Today, we'll be walking through Daily's new Web Components demo app. This tutorial is a great starting point for developers looking to build out a fully custom video call experience using daily-js.
In this post, we will get set up with Daily, get cozy with some of Daily’s basic features, and then dig into building in-browser video chat with HTML Web Components.
Getting set up with Daily
To use this demo, you will need a Daily room to join.
To get your own Daily room URL, you’ll need to create a Daily account (It’s quick, we promise!)
Once you have an account and are logged into the Daily Dashboard, you can create a new Daily room and copy its URL.
Note: You can also create Daily rooms via the REST API.
To follow along with our code tutorial below, fork our demo. You can run this demo app locally or set up your own hosted live demo using GitHub Pages.
To get started with a local deployment, you will need to run a server from this repo's directory. You can use something like python -m SimpleHTTPServer (run on the command line in the repo's directory) or use the VSCode Live Server extension.
Note: See How do you set up a local testing server? for more info.
To preview the demo app in action, check out our live demo by inputting your Daily room URL.
Basic video call features
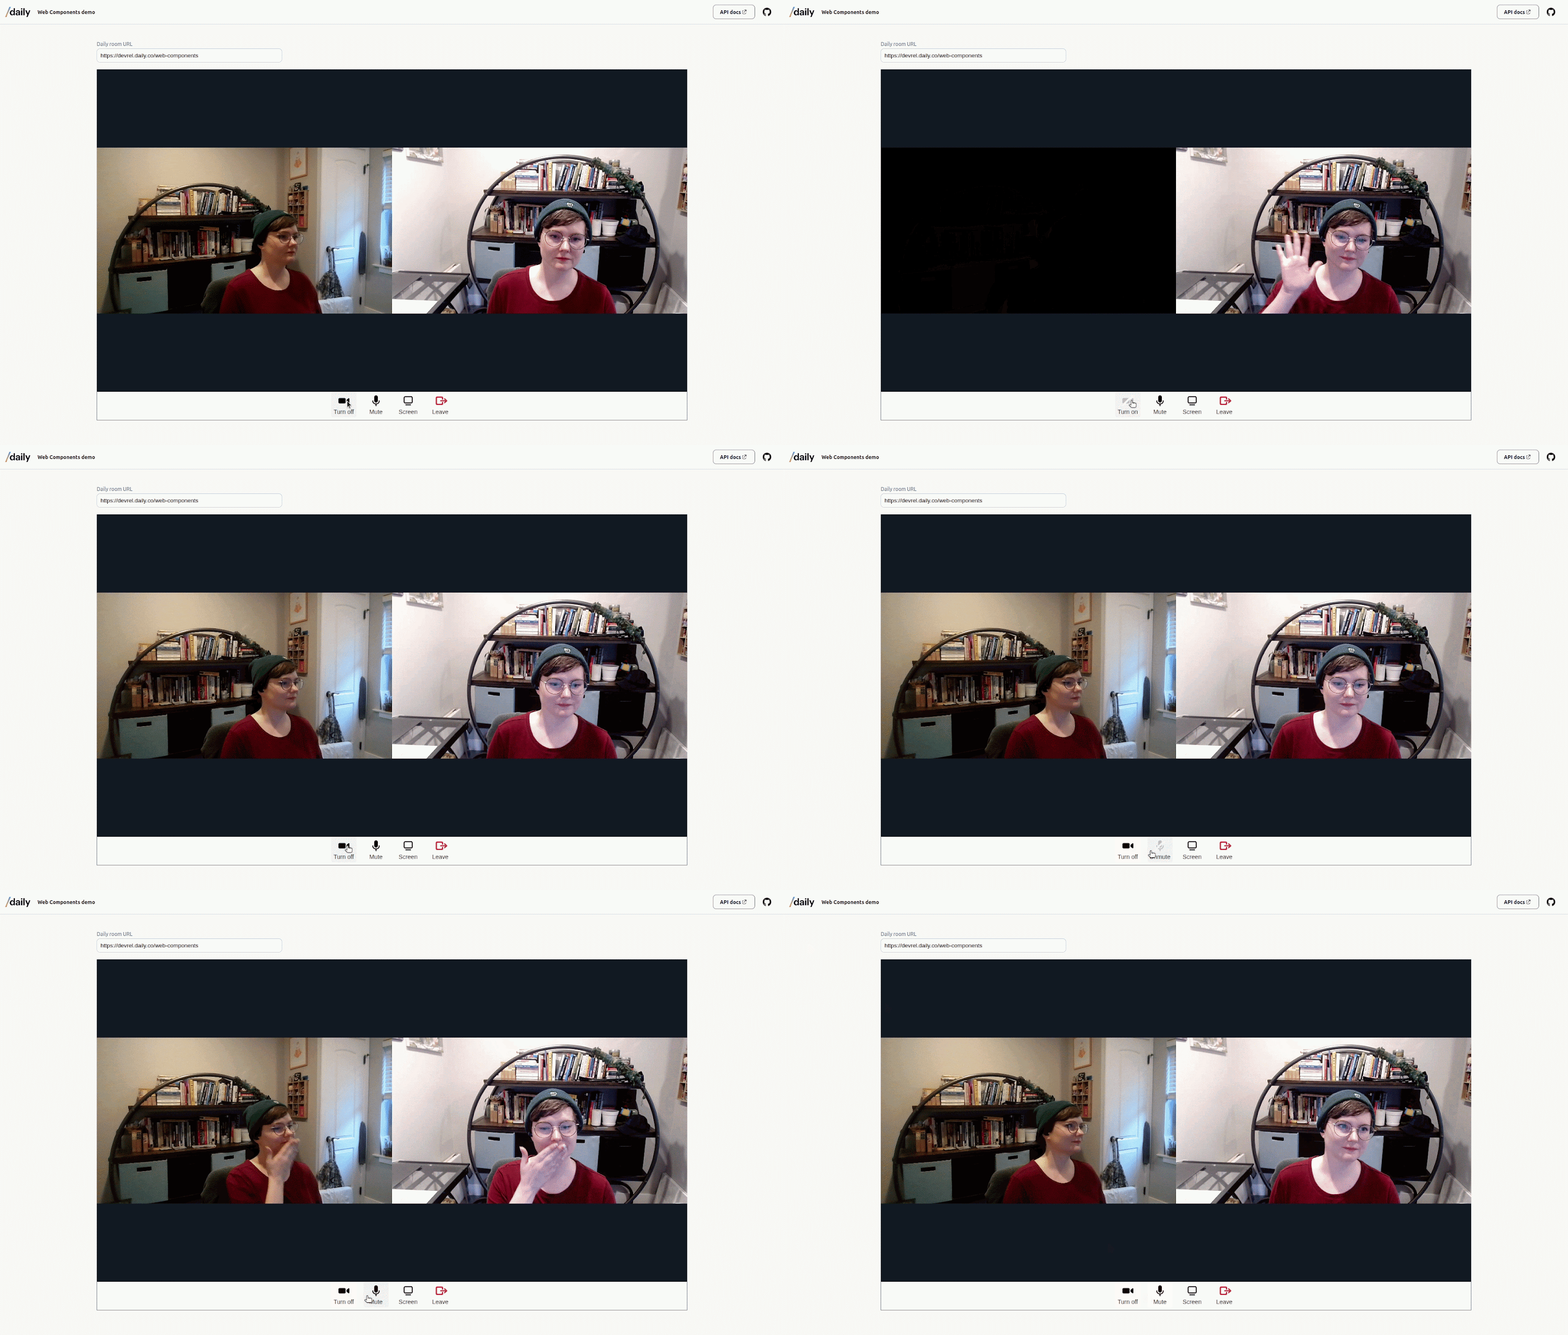
For this tutorial, we will build out a simple video call experience inspired by Daily Prebuilt.

We have pared this demo down to the most essential features of a video call, allowing participants to:
- Join the call with video and audio
- See and hear other folks on the call
- Toggle their own camera and microphone settings (e.g. being able to mute themselves)
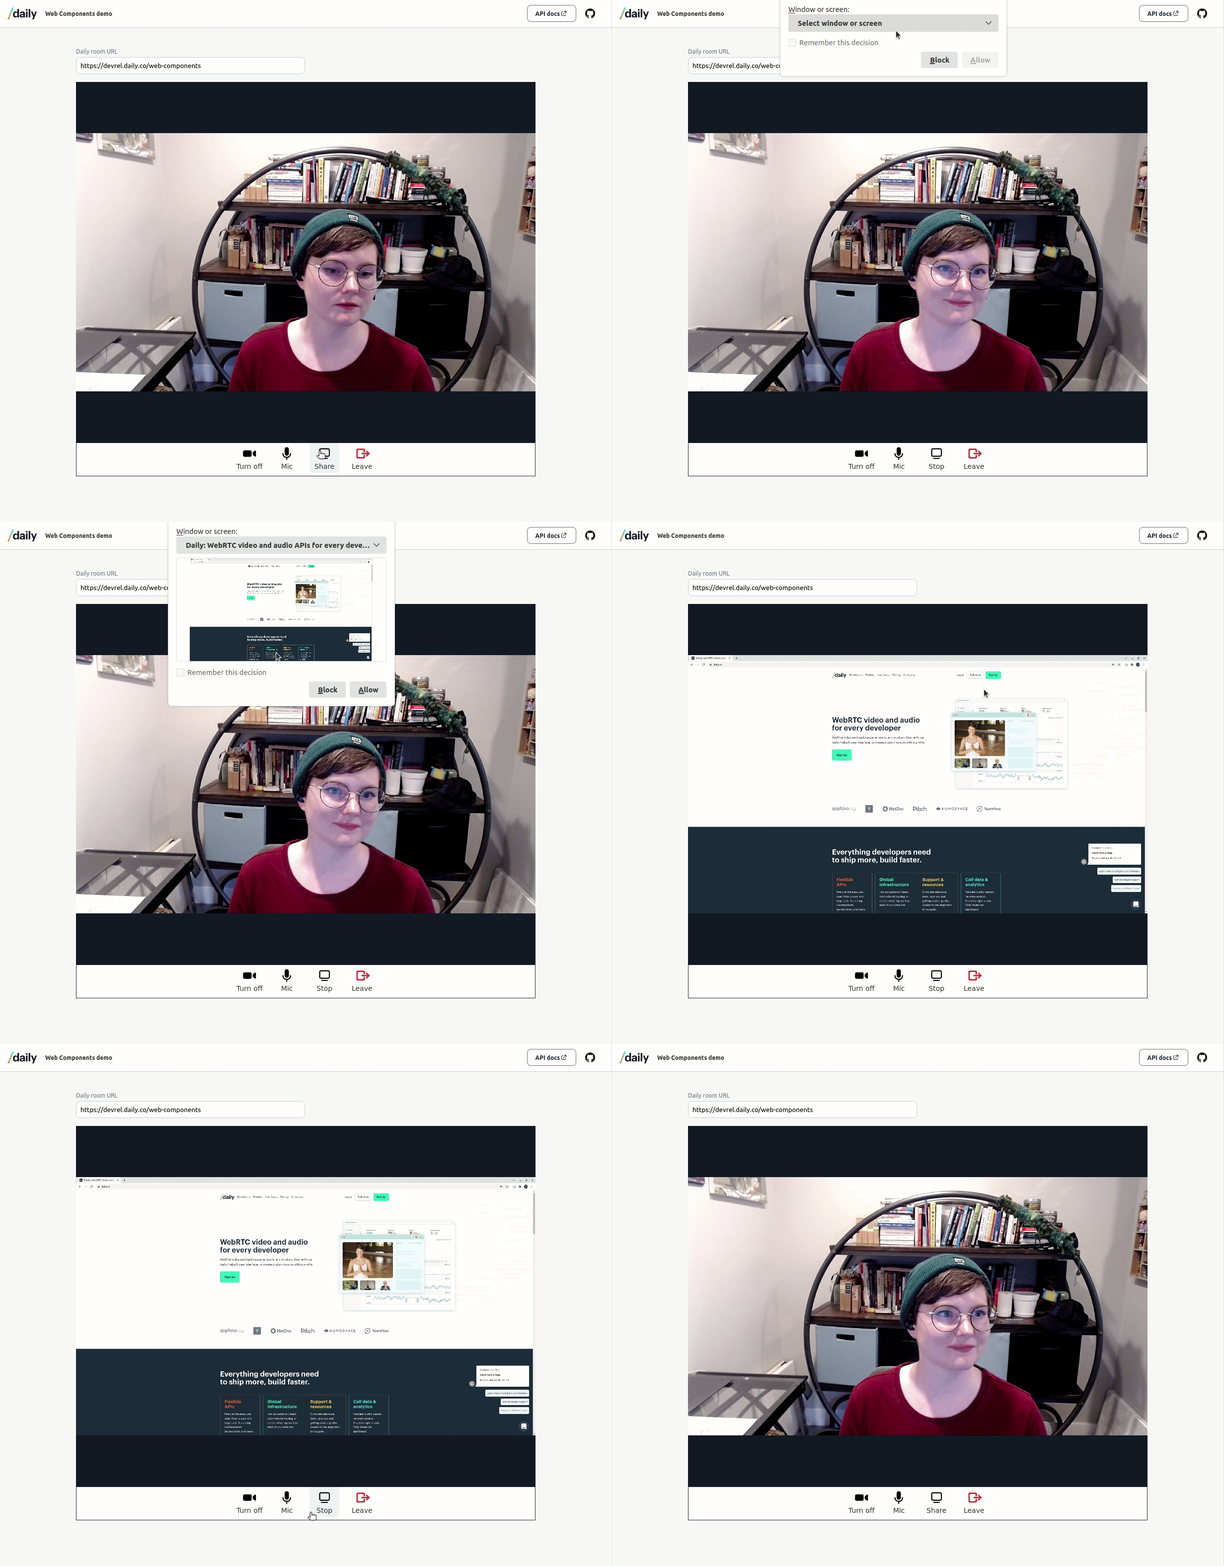
- Share their screen on any browser that supports screen sharing
- Leave the call
After going through this tutorial, you’ll be able to customize these features and add your own.

So what are web components?
Web components help developers create dynamic, custom HTML elements, including styling (with CSS) and scripting (with JavaScript). Web components allow you to create your own HTML tags for use in your app, and they are repeatable and extensible.
Web components are made up of three core technologies largely supported across modern browsers:
- Custom elements: a JavaScript-based API that lets you define and set your own elements.
- HTML templates: new HTML elements with functionality that allows you to design and scale your custom elements to work for different use cases.
- Shadow DOM: a JavaScript-based API that dynamically renders an encapsulated DOM around custom elements, allowing you to script and style them as you like.
We will go into deeper detail on how these technologies work together as we go through the tutorial.
But first, let’s go over how the demo is set up.
Setting up the call
In this demo, all of our web components live in separate .js files in the root /js folder. These components can be separated out like we have done or can all exist in the same file. It’s up to you. Because this is a demo, we decided to keep them separate for readability and making it easier to customize.
The web components are imported at the top of the index.js file in the root directory. This is also where we initialize our Daily call object and perform any necessary error-handling.
Components can also be added to the DOM from other custom elements. We will see examples of both creating the web components on page load using JavaScript and creating them within other components as we go through this tutorial.
As you can already start to see, web components are very flexible! You can integrate them into your application in multiple ways.
To begin, let’s dive into what really happens when you use a web component in your app.
Understanding a single web component
What’s really going on inside of a web component? We’ll use <daily-toggle-camera> as an example.
We will start by leveraging the <template> and <slot> elements to build a guide for how our elements will work. We first set up a template with whatever foundational HTML elements should be part of the element (and if you have none, that’s okay – it can be empty):
const template = document.createElement("template");

template.innerHTML = `
  <slot name="icon"></slot>
  <slot name="text">Camera</slot>
`;
For <daily-toggle-camera>, we want a <slot> that can load an icon and a <slot> that can hold text, so we have named them accordingly. The “icon” <slot> is empty, but you’ll notice that the “text” <slot> starts with a default text of “Camera.” This is optional, so that the element will have some value before any state has been set. In the demo, you can see that “Camera” and “Mic” are in a neutral state until clicked.

If you are managing state using React or another framework, you can send that state into the web component when it is built.
Next, create a new, uniquely-named class for your custom element. This class extends the HTMLElement class. It can also extend other existing native HTML elements and inherit all of their attributes. For example, if you want to borrow style and functionality from the <button> tag, you can use HTMLButton instead of HTMLElement. See more details and ways to extend existing elements in MDN Web Docs’ Using custom elements.
We make a new class like this:
class DailyToggleCamera extends HTMLElement {
// …
}
Inside of the DailyToggleCamera class, we will want to fill out the constructor() definition:
class DailyToggleCamera extends HTMLElement {
  constructor() {
    // super() is always called first-thing in the constructor!
	super();
	this.attachShadow({ mode: "open" }).appendChild(
  	  template.content.cloneNode(true)
	);
	// here's where you can add other JavaScript functions,
	// event listeners, or whatever else you like!
  }
}
this.attachShadow is where we create the Shadow DOM and it allows us to add functionality to the element. As the comment in the above code block points out, you can add any JavaScript to the element in this block and it will fire as soon as the element exists.
Now, just one more part is necessary for our <daily-toggle-camera> web component. We have to define that element. Note that if you are extending an existing HTMLElement, the syntax here will be a little different.
We define the element like this, so our page knows what HTML tag to use:
window.customElements.define("daily-toggle-camera", DailyToggleCamera);And finally, we export this element and use it across our application:
export default { DailyToggleCamera };
One benefit of custom elements is the simplicity of the API, as well as how thoroughly extensible they are, so feel free to play around!
Bringing it all together
Now that we understand how an individual web component works, let’s go through how all of the components work together to create a video call.
After the web components have been added to the page, the HTML structure will look like this:
<daily-call>
  <daily-window></daily-window>
  <daily-tray>
    <daily-toggle-camera></daily-toggle-camera>
    <daily-toggle-mic></daily-toggle-mic>
    <daily-toggle-screen></daily-toggle-screen>
    <daily-leave></daily-leave>
  </daily-tray>
</daily-call>
But we don’t want to build the call right away! That’s why our index.html just includes this:
<div id="daily-call-container">
  <!-- web components get built here after call join -->
</div>
We could load the web components immediately, but we want to set up the Daily call object first. In this demo, we only want web components to appear after a Daily call has been initialized.
Before we add web components to our page, we'll show the call entry form and let daily-js do the work of validating the user's given room URL.
Our initiateCall() function grabs our room URL and calls the Daily factory method createCallObject to create a video call object and attach it to the window.
async function initiateCall() {
  const roomUrl = document.getElementById("roomId").value;
  window.callObject = DailyIframe.createCallObject({ url: roomUrl });
  buildWebComponents();
  await window.callObject.join();
}
If the Daily call object does not receive a valid URL when attempting to join(), it will throw an error and we can react to that by notifying the user.
async function setupCall() {
  clearErrorMsg();
  initiateCall()
      .then(hideJoinButton)
      .catch(handleJoinError);
}
Our form has an event listener for the submit event. This listener initiates the joining of a Daily call and adds our web components to the DOM.
form.addEventListener("submit", (e) => {
  e.preventDefault();
  setupCall();
});
When we successfully join a Daily call, we build the:
- Daily call: a wrapper element that holds the other web components
- Daily window: the space where participants view themselves and others
- Daily tray: where participants can take actions such as toggling their camera and microphones, screen sharing, and leaving the call
function buildWebComponents() {
  const container = document.getElementById("daily-call-container");
  const call = document.createElement("daily-call");
  container.appendChild(call);
  call.appendChild(document.createElement("daily-window"));
  call.appendChild(document.createElement("daily-tray"));
}
Note that we are only building three custom elements here:
- the call wrapper
- the window
- the tray
This is because the <daily-tray> web component builds its child buttons at the point it is added to the DOM.
From within the Daily tray web component, we build the:
- camera toggle button
- microphone toggle button
- screenshare toggle button
- leave call button
Building nested web components is super easy! You can simply add them to the parent template, which will instantiate each other component template automatically.
This is what the template for <daily-tray> looks like (minus the CSS):
template.innerHTML = `
  <daily-toggle-camera>Camera</daily-toggle-camera>
  <daily-toggle-mic>Mic</daily-toggle-mic>
  <daily-toggle-screen></daily-toggle-screen>
  <daily-leave></daily-leave>
  `;
You can experiment with customizing the video call experience by removing the <daily-toggle-screen> within this template, and that component will no longer be built.
Web components + Daily = ❤️
So we have our web components all together and we’ve built our Daily call object. How can we connect these together?
Let’s go back to our <daily-toggle-camera> element and look at its functionality. Remember that while you are building the component, you can add JavaScript functions and act upon them just like you would with plain HTML elements.
For <daily-toggle-camera> and our other elements, all we need to do is add event listeners that use daily-js methods like setLocalVideo to modify the structure of the element. The below snippet toggles the text and icon used in the DailyToggleCamera HTML element based on if local video is on or off.
In the code below, we are able to leverage these daily-js methods because we established the Daily call in index.js as a global variable named callObject. This allows us to access our Daily call object and benefit from all of the daily-js instance methods.
this.addEventListener("click", (_e) => {
    callObject.setLocalVideo(!callObject.localVideo());
    if (callObject.localVideo()) {
      this.shadowRoot
          .querySelector("slot[name='text']")
          .textContent = "Turn on";
      this.shadowRoot
          .querySelector("slot[name='icon']")
          .innerHTML = disabledCamIcon;
    } else {
      this.shadowRoot
          .querySelector("slot[name='text']")
          .textContent = "Turn off";
      this.shadowRoot
          .querySelector("slot[name='icon']")
          .innerHTML = enabledCamIcon;
    }
});
The other web components in this demo have similar functionality built around our many daily-js instance methods.
And that’s it! Simple enough, right? You can continue to build out different components or change the actions and stylings of the video call using the lessons we covered in this tutorial.
Let’s keep building!
We hope this tutorial inspires you to try out customizing your own video call experience with Web Components.
We have plenty of tutorials to get you inspired:
- adding background blur,
- recording your calls,
- having fun with flying emojis, and more!
If you’re building with Daily, we would love to learn about it. Drop us a message or send a pull request to our awesome-daily list.

