

At Daily, we’ve specifically built our video and audio APIs to be frontend framework-agnostic. This is to make sure developers can implement real-time video calls — a big feature in itself — with whichever JavaScript framework they prefer (or no framework at all).
We’ve spent a lot of time discussing React demos and sample code in our blog posts, but React is not your only option for a framework. Vue.js, for example, is another great option that you can use with daily-js.
Recently on the blog, we looked at how to embed Daily Prebuilt in a Vue app. Daily Prebuilt is our plug-and-play option for video calls, which makes it the fastest and most convenient way to add video to your app.
In some cases, however, you may need more control over the video call designs, or you might even be building something more custom like an audio-only call app. In cases like these, using Daily’s custom call object option gives you total control over the video and audio experience, including the video call design and functionality.
In today’s tutorial, we’ll look at building a custom video call app in Vue using Daily’s call object.
Planning our app’s features
In terms of functionality, video call participants will be able to:
- Join the call with video and audio
- Control their own video and microphones while in the call (e.g. to mute themselves)
- Share their screen on any browser that supports screen sharing. We’ll only let one person share at a time to keep things simple for now
- Set their username for the call before joining
- Leave the call whenever they want
- Be notified when device permissions are blocked by the browser, with instructions on how to permit device access
- Communicate via text chat in a custom chat box. (The details for this will be covered in a follow-up post.)

As is required for any app, we also need to manage our feature scope. In this case, we won’t worry about managing large calls in terms of performance optimization or the UI layout. Those are big topics in themselves, as demonstrated by this whole series on them!
Getting set up with Daily
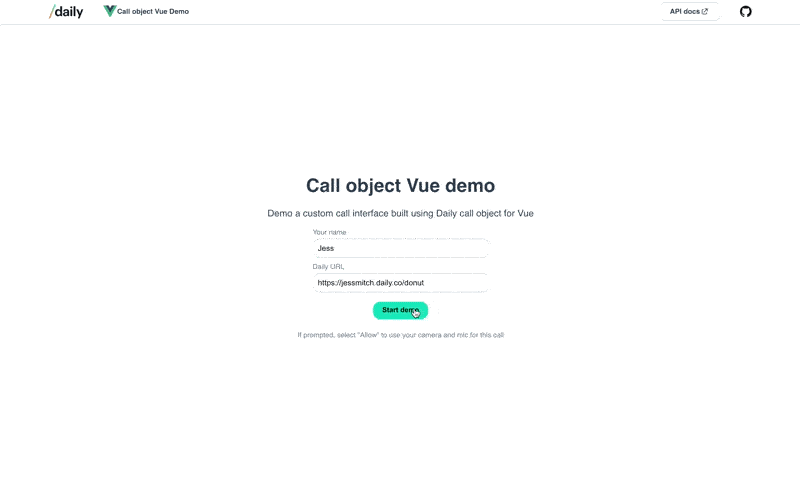
To use this demo, you will need a Daily room to join.
To get your own Daily room URL, you’ll need to create a Daily account.
Once you have an account and are logged into the Daily Dashboard, you can create a new Daily room and copy its URL.
Note: You can also create Daily rooms via the REST API.
Setting up your local dev environment
As always, we’ve already built this app for you, so — if you like spoilers — feel free to clone and use the demo app via Github. To run it locally, enter the following commands in your terminal window:
yarn
yarn start
Open the app at whichever port it’s running, which is likely http://localhost:8080/.
More spoilers: Looking at our component structure
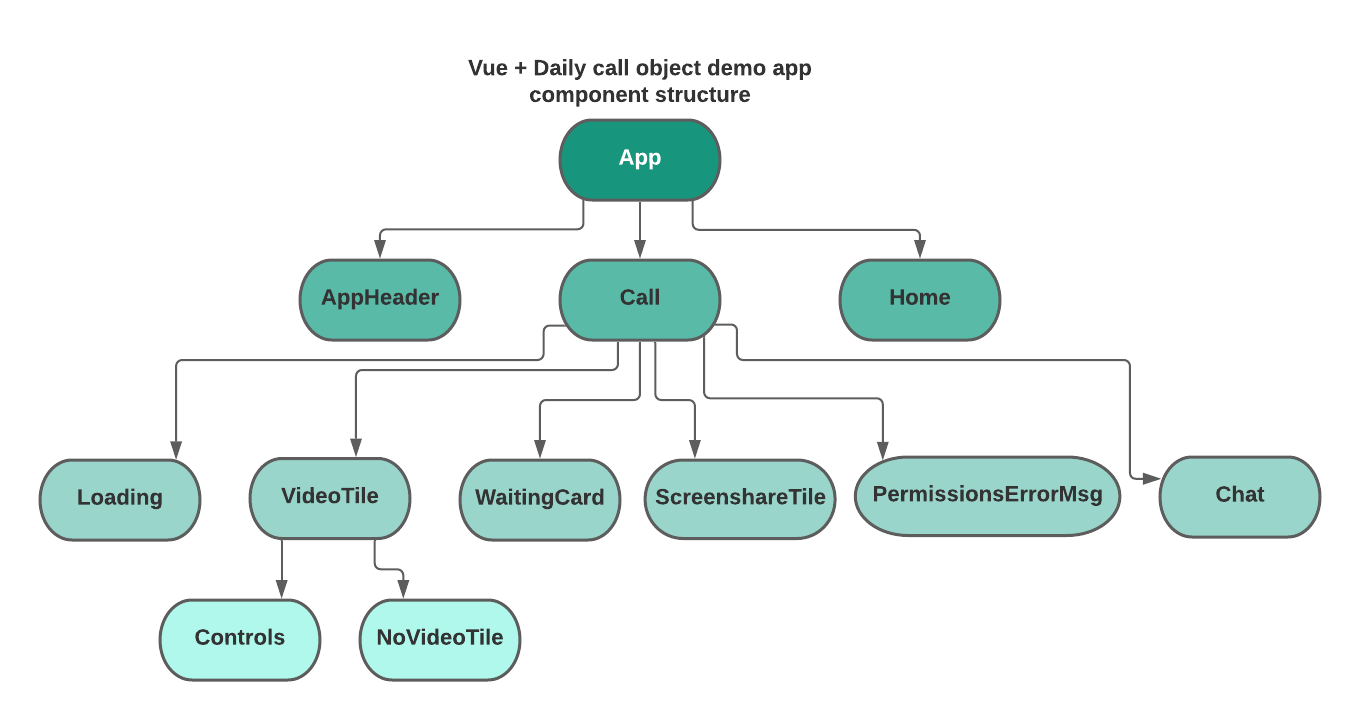
It’s often helpful to know the structure of what we’re going to be building before diving in.
The App component is our entry point for our Vue app. It will always render the AppHeader component and conditionally render either Call or Home, depending on whether the user has joined a call.
Call is where daily-js will be imported, and where all the call’s logic will be defined. It is also the parent component for the rest of the components in the app.
Let’s briefly define what each of these components does:
Loading: This component contains ansvgwith a loading animation. It shows when the user is joining a call, (i.e. in a loading state).VideoTile: This component is rendered for each participant in the call. It will either render a<video>element or aNoVideoTilecomponent depending on whether the participant has their video on. AnWaitingCard: If you are alone in a call, this component is rendered to let you know you are waiting for others to join.ScreenshareTile: When a screen share is started, this component is added for the screen share track.PermissionsErrorMsg: If camera or microphone permissions are blocked locally, this card is rendered instead of the call view so you know to update your browser permissions.Chat: This is where our chat messages will be sent and displayed.
Now let’s see how these actually work.
Taking advantage of Vue’s data object
One thing you might notice looking at the code for this demo is that there’s no state management library or dedicated backend; instead, we rely on Vue’s data object to keep any information handy that needs to be referenced throughout the code base.
As you review each component in the rest of this tutorial, be sure to look at each component’s data method to see which values are being stored.
Okay, get to the code already
Now that we know what we’re building, we can actually start coding it.
The App component: Determining our in-call state
The main conditional we have in App is whether to show our home screen or the call UI.
The home screen is the default view when you visit the demo site. It renders a form to join a specific Daily room. The call UI is everything you see once you submit the form on the home screen to join a Daily room.
In App’s template, we represent this conditional by checking the value of appState, a value on our data object.
<template>
 <app-header />

 <call
   v-else-if="appState === 'incall'"
   :leaveCall="leaveCall"
   :name="name"
   :roomUrl="roomUrl"
 />
 <home v-else :joinCall="joinCall" />
</template>
If appState equals incall, we show our Call component; otherwise, we render our Home component.
Looking at the data object and methods in App, the appState is initially set to idle on render. When you join a call through the home screen’s form, appState gets set to incall. Any time the call is left or refreshed, appState gets reset to idle, bringing the local user back to the home screen.
data() {
   return {
     appState: "idle",
     name: "Guest",
     roomUrl: null,
   };
 },
 methods: {
   joinCall(name, url) {
     this.name = name;
     this.roomUrl = url;
     this.appState = "incall";
   },
   leaveCall() {
     this.appState = "idle";
   },
 },
joinCall gets called in Home and passes the two input values (name and url) as function parameters. These are then set in App’s data object and will get passed as props to Call to be used later by daily-js.
That is really all that happens in App and Home, so let’s jump right to Call to understand how our video call functionality works.
Video call the radio star: Letting participants join with video and audio
When using Daily’s call object like we are in this demo, we need to manually add any elements we want present in our UI. (This is in contrast to Daily Prebuilt, where it’s all done for you.)
That means we’ll need to handle the following in our Call component:
- Creating
<video>and<audio>elements for any call participants who might have video or audio on. (In this demo, that’s everyone who joins.)- If someone turns off their video, we’ll show a placeholder to avoid shifting the layout when video isn’t available.
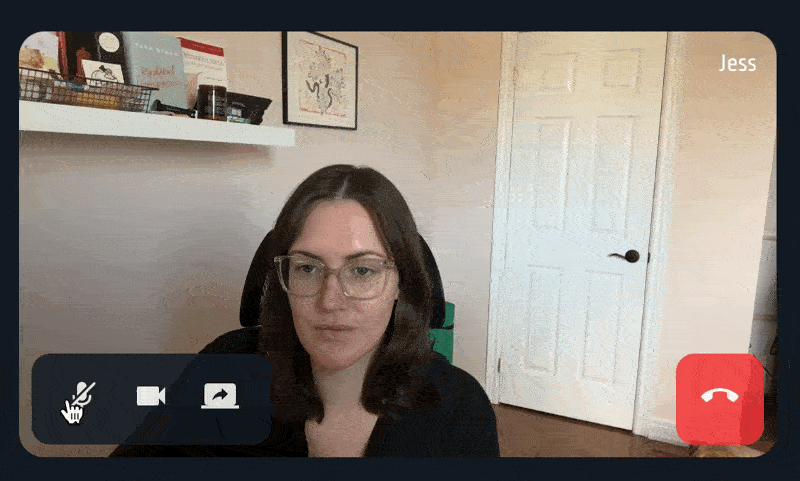
- Creating a
<video>element specifically for screen shares. - Adding a control panel for the local participant to toggle their camera and microphone, share their screen, or leave the call.
- We’ll also add some basic styling for group call layout management, though we’ll prioritize one-on-one calls to keep our CSS styles simpler to start.
The first step in the Call component is to initialize the call instance with daily-js and to join the call, so let’s look at what happens when the Call component is mounted in the mounted() lifecycle method.
data() {
   return {
     callObject: null,
     participants: null,
     count: 0,
     messages: [],
     error: false,
     loading: false,
     showPermissionsError: false,
     screen: null,
   };
 },
 mounted() {
   const option = { url: this.roomUrl };

   // Create instance of Daily call object
   const co = daily.createCallObject(option);
   // Assign in data obj for future reference
   this.callObject = co;

   // Join the call with the name set in the Home.vue form
   co.join({ userName: this.name });

   // Add call and participant event handler
   // Visit https://docs.daily.co/reference/daily-js/events for more event info
   co.on("joining-meeting", this.handleJoiningMeeting)
     .on("joined-meeting", this.updateParticpants)
     .on("participant-joined", this.updateParticpants)
     .on("participant-updated", this.updateParticpants)
     .on("participant-left", this.updateParticpants)
     .on("error", this.handleError)
     // camera-error = device permissions issue
     .on("camera-error", this.handleDeviceError)
     // app-message handles receiving remote chat messages
     .on("app-message", this.updateMessages);
 },
Our three major tasks in the mounted method is to:
-
Initialize a new Daily call object using the Daily URL provided in the home screen form
const option = { url: this.roomUrl };
const co = daily.createCallObject(option); -
Join the Daily call using the username also provided in the home screen form
co.join({ userName: this.name }); -
Add our Daily event listeners to know when to update our call UI.
co.on("joining-meeting", this.handleJoiningMeeting)
...
Daily events and their callbacks
Before moving on, let’s look at each of the callbacks attached to the Daily events mentioned above to understand how they impact our app’s state.
The joining-meeting event
joining-meeting gets called when the local participant is still joining the call. This is like a loading state before being officially in the call.
co.on("joining-meeting", this.handleJoiningMeeting)
handleJoiningMeeting() {
   this.loading = true;
},
In the handleJoiningMeeting callback, we set loading in our data object to true so we know when to show our loading spinner in the UI.
The joined-meeting, participant-joined, participant-updated, participant-left events
In this demo, we keep an array of the current participants in our data object to iterate through in our UI. That means we need to update our participant list whenever the participants have an event that will affect our list.
co.on("joined-meeting", this.updateParticpants)
  .on("participant-joined", this.updateParticpants)
  .on("participant-updated", this.updateParticpants)
  .on("participant-left", this.updateParticpants)
All four of these events are handled by the same callback, updateParticipants(e).
Note: In apps with large meetings, you will likely need to set up separate methods for these events to avoid any unnecessary re-renders.
updateParticpants(e) {
    if (!this.callObject) return;

    const p = this.callObject.participants();
    this.count = Object.values(p).length;
    this.participants = Object.values(p);

    const screen = this.participants.filter((p) => p.screenVideoTrack);

    if (screen?.length && !this.screen) {
        this.screen = screen[0];
	} else if (!screen?.length && this.screen) {
        this.screen = null;
    }
    this.loading = false;
},
Here, we get all the participants from the Daily call object with the participants() method and convert it from an object to an array. We also assign that array to our participants key in the data object for future reference.
If any participants have a screenVideoTrack, it means they are screen sharing. We then set the screen share in our data object to be accessed in our HTML.
Lastly, we make sure we’re not in a loading state, which is technically only necessary the first time this method gets called.
The error event
This is only called if the video call gets stuck in an unrecoverable state. In an ideal world, it would never get called, but like all good programmers, we cover every possibility. 😇
co.on("error", this.handleError)
handleError(e) {
    this.error = e?.errorMsg;
    this.loading = false;
},
Here we set our error data object key to the error message provided by daily-js and make sure we’re not in a loading state.
The camera-error event
For daily-js to access call participants’ devices (like their camera and microphone), it requires that call participants give it explicit browser permissions. Without these permissions (either at the start of a call or mid-call), the camera-error event will get triggered.
co.on("camera-error", this.handleDeviceError)
handleDeviceError() {
    this.showPermissionsError = true;
},
When a camera-error (i.e. device error) happens, we update the data object so that showPermissionError is true. This will let us know when to tell our local participant to update their permission settings.
The app-message event
co.on("app-message", this.updateMessages);
app-message gets called when a participant sends a message in the call via the sendAppMessage() Daily instance method.
updateMessages(e) {
    this.messages.push(e?.data);
},
We’ll discuss how chat works in more detail in a follow-up post, but for now it’s important to know every chat message sent by a call participant is saved to the messages array in the data object. That array can then be iterated over to display our full chat history in the chat box.
How our stored data impacts our rendered Call UI
Each of these values we set in the data object are used to conditionally render different views in our call UI.
To start, let’s look our Call’s template:
<template>
 <main>
   <!-- loading is true when the call is in the "joining-meeting" meeting state -->
   <template v-if="loading">
     <div class="loading-spinner"><loading /></div>
   </template>

   <template v-else>
     <div class="wrapper">
       <template v-if="error">
         <p class="error-text">{{ error }}</p>
         <!-- refreshing will leave the call and reset the app state -->
         <button class="error-button " @click="leaveAndCleanUp">
           Refresh
         </button>
       </template>

       <template v-if="showPermissionsError">
         <permissions-error-msg :reset="leaveAndCleanUp" />
       </template>

       <template v-else>
         <div
           :class="screen ? 'tile-container' : 'tile-container full-height'"
         >
           <template v-if="screen">
             <screenshare-tile :participant="screen" />
           </template>

           <div class="participants-container" v-if="participants">
             <template v-for="p in participants" :key="p.session_id">
               <video-tile
                 :participant="p"
                 :handleVideoClick="handleVideoClick"
                 :handleAudioClick="handleAudioClick"
                 :handleScreenshareClick="handleScreenshareClick"
                 :leaveCall="leaveAndCleanUp"
                 :disableScreenShare="screen && !screen?.local"
               />
             </template>

             <template v-if="count === 1">
               <waiting-card :url="roomUrl" />
             </template>
           </div>
         </div>
       </template>

       <chat :sendMessage="sendMessage" :messages="messages" />
     </div>
   </template>
 </main>
</template>
There are quite a few conditions here, so let’s break it down a bit.
When loading is true, we show a loading spinner, whereas when loading is false, we show the call UI.
<template v-if="loading">
     <div class="loading-spinner"><loading /></div>
</template>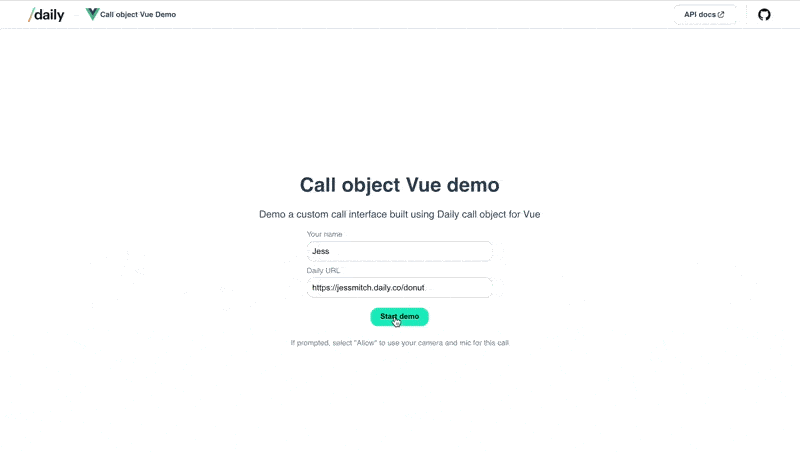
Next, once we’ve officially joined the call, we conditionally show an error message and refresh button when error is truthy. This is so the local participant can refresh the page if something goes wrong. 😬
<template v-if="error">
    <p class="error-text">{{ error }}</p>
	<!-- refreshing will leave the call and reset the app state -->
    <button class="error-button " @click="leaveAndCleanUp">
        Refresh
	</button>
</template><template v-if="error">
<p class="error-text">{{ error }}</p>
<!-- refreshing will leave the call and reset the app state -->
    <button class="error-button " @click="leaveAndCleanUp">
        Refresh
	</button>
</template>Next, we want to show a message in our UI if the device permissions are blocked. In some cases, you may not want to prevent your users from seeing the video call just because their permissions are blocked, but we do because we consider device permissions a requirement to use this app.
<template v-if="showPermissionsError">
     <permissions-error-msg :reset="leaveAndCleanUp" />
</template>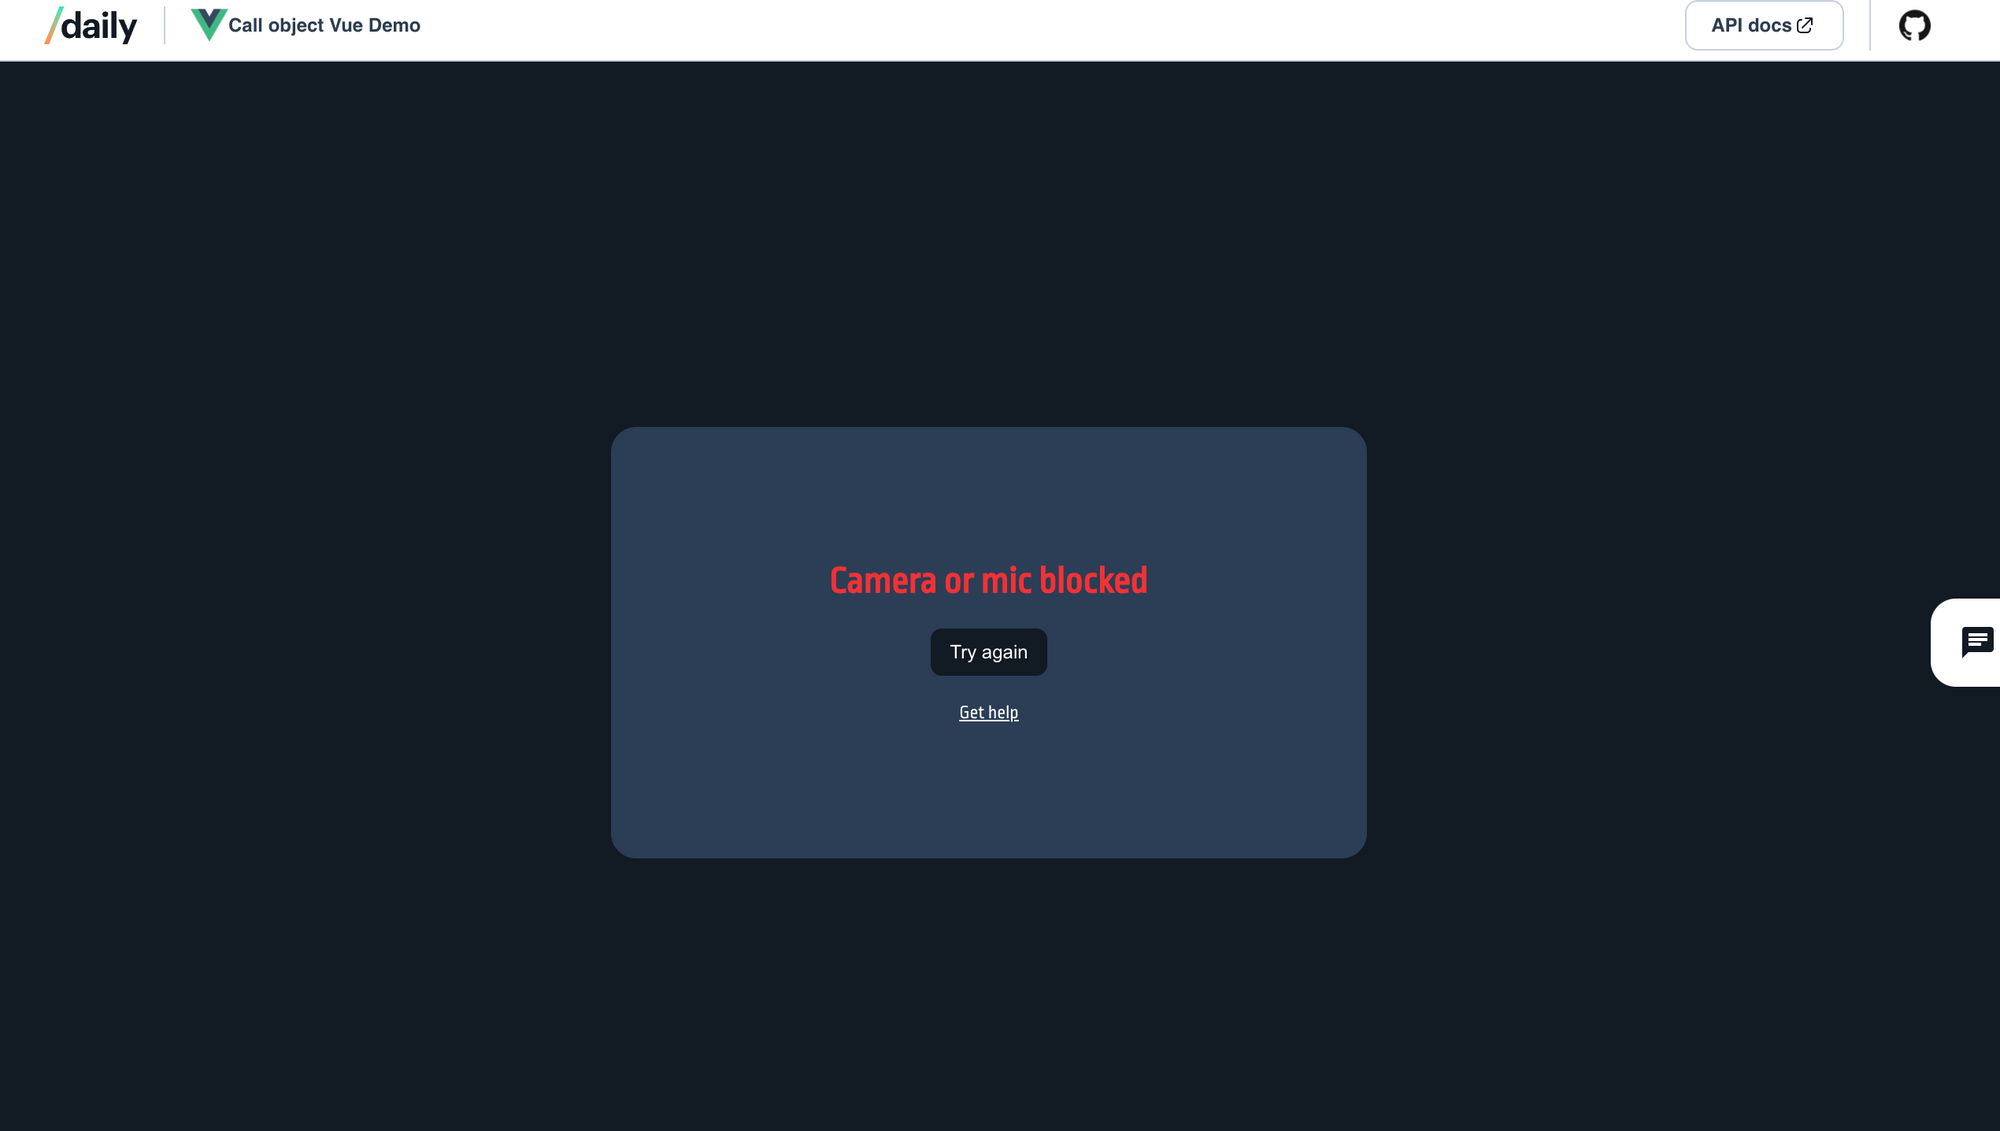
Iterating over our participants array
The next block of elements in our template is where we render actual video tiles:
 <template v-else>
 	<div :class="screen ? 'tile-container' : 'tile-container full-height'">
        <template v-if="screen">
            <screenshare-tile :participant="screen" />
        </template>

     	<div class="participants-container" v-if="participants">
            <template v-for="p in participants" :key="p.session_id">
                <video-tile
                  :participant="p"
                  :handleVideoClick="handleVideoClick"
                  :handleAudioClick="handleAudioClick"
                  :handleScreenshareClick="handleScreenshareClick"
                  :leaveCall="leaveAndCleanUp"
                  :disableScreenShare="screen && !screen?.local"
                />
              </template>

            <template v-if="count === 1">
                <waiting-card :url="roomUrl" />
            </template>
		</div>
	</div>
</template>In the first section here, we render a screen share tile anytime screen is truthy.
<template v-if="screen">
    <screenshare-tile :participant="screen" />
</template>Next, we render a VideoTile component for each participant in our participants array on the data object and pass any relevant information as a prop to be used in that component.
<template v-for="p in participants" :key="p.session_id">
	<video-tile
        :participant="p"
        :handleVideoClick="handleVideoClick"
        :handleAudioClick="handleAudioClick"
        :handleScreenshareClick="handleScreenshareClick"
        :leaveCall="leaveAndCleanUp"
        :disableScreenShare="screen && !screen?.local"
	/>
</template>Lastly, we render an extra card if there’s only one participant so they don’t feel lonely while waiting. 👯
<template v-if="count === 1">
    <waiting-card :url="roomUrl" />
</template>
The very last component that gets rendered in our call UI is the Chat component, which is included whenever you have officially joined the call. It handles sending and displaying chat messages.
<chat :sendMessage="sendMessage" :messages="messages" />

That was a lot to go through, but we now officially have all our call UI included in our app! 💪
Our next steps will be to take a closer look at VideoTile and ScreenshareTile to see how we turn the media tracks provided by daily-js into actual video tiles in our app.
Call me a mason because we’re about to lay some tiles
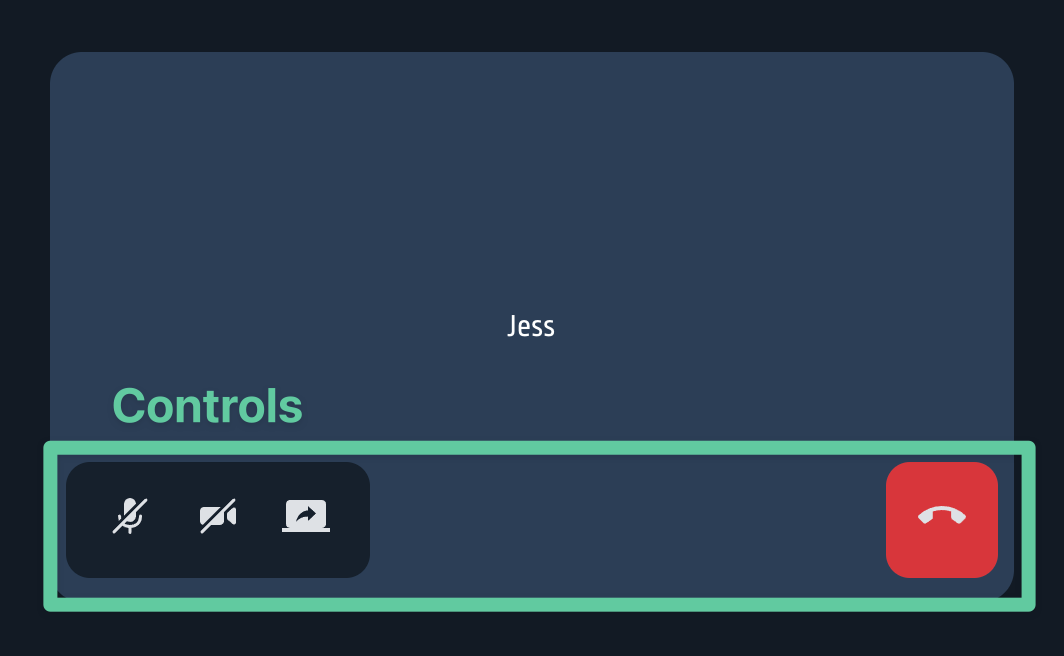
Our VideoTile component is rendered for each participant and includes an <audio> element and a <video> element (or NoVideoTile placeholder component). For the local participant, it also renders the Controls element.
When VideoTile mounts, we do the following:
 data() {
   return {
     videoSource: null,
     audioSource: null,
     username: "Guest",
   };
 },
 mounted() {
   this.username = this.participant?.user_name;
   this.handleVideo(this.participant);
   this.handleAudio(this.participant);
 },
- Set the username in our data object so we can display it in our tile UI
- Handle updating the video and audio elements with the tracks for this tile’s participant
 methods: {
   handleVideo() {
     if (!this.participant?.video) return;
     const videoTrack = this.participant?.tracks?.video?.persistentTrack;
     const source = new MediaStream([videoTrack]);
     this.videoSource = source;
   },
To get the participant’s video playing in the component’s <video> element, we need to create a new MediaStreamby passing the participant’s video persistentTrack and setting that as the <video>’s srcObject.
For the participant’s audio, we do the same thing but with the participant’s audio persistentTrack.
handleAudio() {
    if (this.participant?.local) return;
        if (!this.participant?.tracks?.audio?.persistentTrack) return;
    const audioTrack = this.participant?.tracks?.audio?.persistentTrack;
    const source = new MediaStream([audioTrack]);
    this.audioSource = source;
},
Once that is managed, we can toggle our video and audio using the controls.
Adding a ScreenshareTile
The ScreenshareTile is almost identical to the regular VideoTile, except it uses the screenVideoTrack instead of a persistentTrack.
handleVideo() {
    if (!this.participant?.screen) return;
        const videoTrack = this.participant?.screenVideoTrack;
        const source = new MediaStream([videoTrack]);
    this.videoSource = source;
},

We’ve set up the ScreenshareTile to always show on top of the participants’ tiles, but how you want to style it is completely up to you!
Wrapping up
If you’re wondering about how Chat works, we’ll be sharing a follow up post soon that will do a deeper dive into how to quickly build the custom chat box included in this demo.
And, remember, this demo is just a jumping off point for all the custom UI you can build for video or audio-only apps using Daily’s call object mode. It really can be as creative and custom as you’d like.
If you want to expand on this app even more, you could:
- Add prejoin UI to test devices and see your local video before joining
- Allow users to create rooms via the app UI using Daily's REST API
- Manage meeting permissions via room settings, like making the call a broadcast call. (Time for a webinar, anyone? 😊)
Never miss a story
Get the latest direct to your inbox.