

The Daily JavaScript library gives you several options for adding video calls to your web app. With it, you can:
- Embed a call in your page as an iframe containing pre-built UI that looks and works great out of the box. This is the fastest way to integrate Daily video calls, with only a few lines of code needed.
- Embed an iframe-based call with a bit of custom CSS so that it looks more at home in your app.
- Use call primitives such as video and audio tracks directly to create a fully custom experience directly in your app rather than in an iframe.
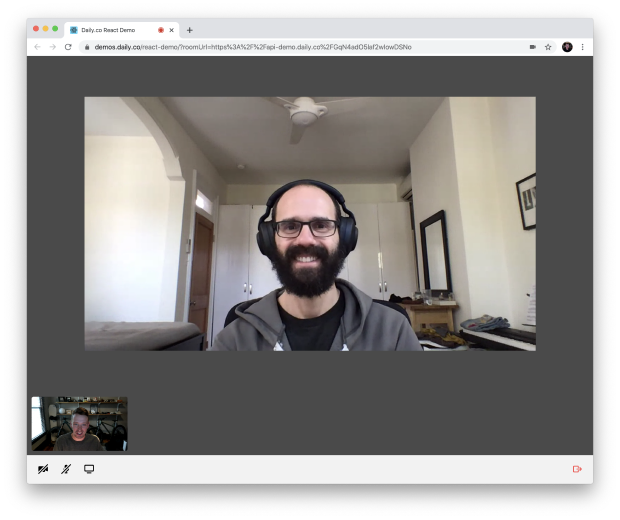
This walkthrough will focus on the 3rd scenario above, the fully custom experience. We'll show you how to build a basic video chat web app using React and the Daily Call Object API.
Before we dive in, let's make note of a few things:
- This walkthrough is by no means exhaustive. We'll go over parts of the code that illustrate important concepts, but we'll skip through "glue" that isn't specific to using Daily. You're invited to download the complete sample code from our demos repo and follow along. You can also build and run the app on your own machine, or play around with the deployed demo.
- A lot of the concepts we'll cover also apply to embedded iframe-based calls, since the Daily Javascript library gives you a fair bit of control over them as well. For example, you can programmatically join or leave calls, and you can listen to events such as people entering the call or muting their mics.
- There's a lot more you can do with the Daily.js JavaScript API than we built into the demo app. If you want to see the complete set of functionality the API offers, please check out our documentation.
Key concepts
Let's go over a few important concepts before we dive into implementation. Understanding these first will help you better understand how best to work with the Daily JavaScript API.
The Call Object
The Call Object is your main interface into Daily functionality. It's the thing that your code will invoke to do anything: start a call, leave a call, listen for participants coming and going, get video and audio to play, etc.
A Call Object can be created with DailyIframe.createCallObject().
Call state
A Daily video call encompasses a ton of complex state. Participants come and go. They toggle their cameras on and off. They mute their microphones. They plug in new hardware. Their network connections waver. The underlying WebRTC network topology even changes.
Fortunately, you don't need to think about most of this complexity! The bookkeeping is all done under the hood of the Call Object. Your job is simply to observe the bits of state that matter to your app, and update your app accordingly. This should sound familiar to anyone accustomed to the React and Redux paradigms.
For our basic video chat app, we only care about two pieces of state, which we'll discuss below. Each piece of state can be pulled from the Call Object, or can be pushed from the Call Object to listener functions that you provide.
State #1: Meeting State
Meeting State represents where the user is in the lifecycle of their participation in a call. A user can:
- Have not joined a call yet
- Be in the process of joining a call
- Be in a call
- Have left a call
- Have been booted out of a call due to an error
This state can be pulled from a Call Object with callObject.meetingState(), which represents the values as "new", "joining-meeting", "joined-meeting", "left-meeting", and "error".
Changes in Meeting State are pushed from a Call Object through the events "joining-meeting", "joined-meeting", "left-meeting", and "error". Listeners can be added with callObject.on().
State #2: Participant State
Participant State describes the current set of participants in the room (including the current user) and the media they're sending.
This state can be pulled from a Call Object with callObject.participants(), which returns a set of participant objects, keyed by an ID (or "local", for the current user). These participant objects are relatively detailed, containing — perhaps most importantly — the raw audio and video tracks and their playable states.
Changes in Participant State are pushed from a Call Object through the events "participant-joined", "participant-left", and "participant-updated". The first two are only sent when other participants join and leave, while the latter is fired on changes — like camera and microphone toggling — to any participant.
Basic implementation: lobby
Without further ado, let's walk through the main steps involved in writing a basic video chat app using React and the Daily Call Object API. We'll start with the functionality you may need in your app's "lobby". It's the code that creates, joins, leaves, and tears down the call, but doesn't actually render the call.
Wire up Meeting State change listeners
The first thing to do is wire up our top-level component to listen to changes in Meeting State, so we can update our UI based on whether the user is currently in or out of a call, or in an error state.
// In App.js

useEffect(() => {
  if (!callObject) return;

  const events = ["joined-meeting", "left-meeting", "error"];

  function handleNewMeetingState(event) {
    event && logDailyEvent(event);
    switch (callObject.meetingState()) {
      case "joined-meeting":
        // update component state to a "joined" state...
        break;
      case "left-meeting":
        callObject.destroy().then(() => {
          // update component state to a "left" state...
        });
        break;
      case "error":
        // update component state to an "error" state...
        break;
      default:
        break;
    }
  }

  // Use initial state
  handleNewMeetingState();

  // Listen for changes in state
  for (const event of events) {
    callObject.on(event, handleNewMeetingState);
  }

  // Stop listening for changes in state
  return function cleanup() {
    for (const event of events) {
      callObject.off(event, handleNewMeetingState);
    }
  };
}, [callObject]);
Note:
- We're calling
destroy()on our Call Object when we detect that we've left the meeting. This ensures that it lets go of any resources that it might've been holding onto, at which point it can't be used again (a new one must be created if you want to participate in another call). This is not required! If you think you'll be joining another call in a bit, it's fine to hold onto one Call Object instance. - We're not explicitly listening for the
"joining-meeting"event. This is because our app assumes we're in a "joining" state as soon as we start joining a room and until we hear otherwise.
Create a room
When the user clicks the "Start Call" button, we'll create a room for that call. In the sample code we use a special demo-only method for creating short-lived rooms.
// In App.js

/**
 * Creates a new call room.
 */
const createCall = useCallback(() => {
  // update component state to a "creating" state...
  return api
    .createRoom()
    .then(room => room.url)
    .catch(error => {
      // update component state to an "error" state...
    });
}, []);
In real production code you'll want to create rooms by calling the Daily REST API from your backend server, to avoid storing API keys in your client-side JavaScript.
Join a room
Once the room has been created, we'll start the process of joining it by invoking the join() method on the Call Object.
// In App.js

/**
 * Starts joining an existing call.
 */
const startJoiningCall = useCallback(url => {
  const callObject = DailyIframe.createCallObject();
  // update component state to a "joining" state...
  callObject.join({ url });
}, []);
Note that, because we invoke destroy() on our Call Object after each call ends (see "Wire up Meeting State change listeners"), we need to create a new Call Object in order to join a room. As described above, this is not necessary — you could hold onto a single Call Object for the lifetime of your app if you so desired.
Leave a room
When the user clicks the "Leave" button, we'll start the process of leaving it by invoking the leave() method on the Call Object.
// In App.js

/**
 * Starts leaving the current call.
 */
const startLeavingCall = useCallback(() => {
  if (!callObject) return;
  // update component state to a "leaving" state...
  callObject.leave();
}, [callObject]);
IMPORTANT: Sequence asynchronous Call Object operations
As you've maybe noticed, various Call Object operations — like join() and leave(), and destroy() — are asynchronous.
To avoid undefined behavior, it's important that you avoid triggering Call Object operations while other operations are pending. A straightforward way to do this is to use Meeting State to update relevant buttons' disabled states so that the user can't start an operation until it's safe. This is what the demo app does.
// In App.js

// The STATE_* consts below are defined in the demo app, and reflect Meeting State

// Only enable "leave" button when we know we're not mid-operation
const enableCallButtons = [STATE_JOINED, STATE_ERROR].includes(appState);

// Only enable "start" button when we know we're not mid-operation
const enableStartButton = appState === STATE_IDLE;
Note that destroy() is also asynchronous, and that DailyIframe.createCallObject() must only be invoked once destroy()'s Promise has resolved.
Basic implementation: call
Now let's look at how to implement the call component itself. This involves keeping tabs on Participant State in order to display the call's participants and their video and audio streams.
Wire up Participant State change listeners
First, let's make sure we respond to changes in Participant State and update our component state accordingly. Participants can either join ("participant-joined"), leave ("participant-left"), or change state ("participant-updated"). Examples of participant state changes are muting and unmuting cameras or microphones, and starting and stopping a screen share.
Whenever one of these events is fired, we simply update our component state from the current Participant State provided by callObject.participants(). In the demo app, we use a reducer to update the component state.
// In Call.js

useEffect(() => {
  if (!callObject) return;

  const events = [
    "participant-joined",
    "participant-updated",
    "participant-left"
  ];

  function handleNewParticipantsState(event) {
    event && logDailyEvent(event);
    dispatch({
      type: PARTICIPANTS_CHANGE,
      participants: callObject.participants()
    });
  }

  // Use initial state
  handleNewParticipantsState();

  // Listen for changes in state
  for (const event of events) {
    callObject.on(event, handleNewParticipantsState);
  }

  // Stop listening for changes in state
  return function cleanup() {
    for (const event of events) {
      callObject && callObject.off(event, handleNewParticipantsState);
    }
  };
}, [callObject]);
Map callObject.participants() to component state
callObject.participants() is chock full of useful information about the current call participants. We may only care about a subset of this information, and we may want to massage it a bit to suit our app's needs.
In our demo app, we want to display each participant (including the current user) as their own "tile" in the app. We also want to display any screen share as its own tile independent of the participant doing the sharing.
So first we'll map callObject.participants() into a set of "call items" — each representing a tile — that looks like the following:
{
    local: {
      videoTrackState: <null>,
      audioTrackState: <null>
    },
    <other-participant-1>: {
      /*...*/
    },
    <other-participant-1>-screen: {
      /*...*/
    },
    /* ... */
}
This mapping is relatively straightforward.
// In callState.js

function getCallItems(participants) {
  let callItems = { ...initialCallState.callItems }; // Ensure we *always* have a local participant
  for (const [id, participant] of Object.entries(participants)) {
    callItems[id] = {
      videoTrackState: participant.tracks.video,
      audioTrackState: participant.tracks.audio,
    };
    if (shouldIncludeScreenCallItem(participant)) {
      callItems[id + '-screen'] = {
        videoTrackState: participant.tracks.screenVideo,
        audioTrackState: participant.tracks.screenAudio,
      };
    }
  }
  return callItems;
}
Then, when we go to render our call component we map each "call item" into a Tile component (which we'll go into next):
// In Call.js

function getTiles() {
    let largeTiles = [];
    let smallTiles = [];
    Object.entries(callState.callItems).forEach(([id, callItem]) => {
      const isLarge =
        isScreenShare(id) ||
        (!isLocal(id) && !containsScreenShare(callState.callItems));
      const tile = (
         <Tile>
          key={id}
          videoTrackState={callItem.videoTrackState}
          audioTrackState={callItem.audioTrackState}
          isLocalPerson={isLocal(id)}
          isLarge={isLarge}
          disableCornerMessage={isScreenShare(id)}
          onClick={
            isLocal(id)
              ? null
              : () => {
                  sendHello(id);
                }
          }
        />
      );
      if (isLarge) {
        largeTiles.push(tile);
      } else {
        smallTiles.push(tile);
      }
    });
    return [largeTiles, smallTiles];
  }
Render tiles
Now it's time to actually render those media tracks we pulled from callObject.participants() above. Each of our Tile components contains either a <video> and/or an <audio> element:
// In Tile.js

// In Tile.js

export default function Tile(props) {
  const videoEl = useRef(null);
  const audioEl = useRef(null);

  // ...

  function getVideoComponent() {
    return videoTrack && <video autoPlay muted playsInline ref={videoEl} />;
  }

  function getAudioComponent() {
    return (
      !props.isLocalPerson &&
      audioTrack && <audio autoPlay playsInline ref={audioEl} />
    );
  }

  // ...

  return (
    <div className={getClassNames()} onClick={props.onClick}>
      <div className="background" />
      // ...
      {getVideoComponent()}
      {getAudioComponent()}
    </div>
  );
}
Note the attributes (e.g. autoPlay muted playsInline). These are the set of attributes that will let your audio and video play automatically on Chrome, Safari, and Firefox.
You may have noticed that we never actually assigned audio or video tracks to the <audio> and video elements above! Good catch. But we did assign references to the actual DOM elements. We did that so we could programmatically set their srcObject properties whenever our media tracks change:
// In Tile.js

  /**
   * When video track changes, update video srcObject
   */
  useEffect(() => {
    videoEl.current &&
      (videoEl.current.srcObject = new MediaStream([videoTrack]));
  }, [videoTrack]);

  /**
   * When audio track changes, update audio srcObject
   */
  useEffect(() => {
    audioEl.current &&
      (audioEl.current.srcObject = new MediaStream([audioTrack]));
  }, [audioTrack]);
Basic implementation: camera, microphone, and screen share Buttons
So far, we've seen how to join and leave a call, and how to render the call video and audio. Now let's look at how to toggle on and off the current user's various inputs into the call: their camera, their microphone, and their screen share.
Wire up participant state change listeners
Yup, you guessed it! Once again we'll use Participant State to determine whether we're actively sharing audio, video, and our screen.
As before, our state will come from callObject.participants() (specifically callObject.participants().local, since we only care about the current user). The only event we care about listening to is "participant-updated", since "participant-joined" and "participant-left" only pertain to other participants.
// In Tray.js

function getStreamStates(callObject) {
  let isCameraMuted,
    isMicMuted,
    isSharingScreen = false;
  if (
    callObject &&
    callObject.participants() &&
    callObject.participants().local
  ) {
    const localParticipant = callObject.participants().local;
    isCameraMuted = !localParticipant.video;
    isMicMuted = !localParticipant.audio;
    isSharingScreen = localParticipant.screen;
  }
  return [isCameraMuted, isMicMuted, isSharingScreen];
}

export default function Tray(props) {

  // ...

  useEffect(() => {
    if (!callObject) return;

    function handleNewParticipantsState(event) {
      event && logDailyEvent(event);
      const [isCameraMuted, isMicMuted, isSharingScreen] = getStreamStates(
        callObject
      );
      setCameraMuted(isCameraMuted);
      setMicMuted(isMicMuted);
      setSharingScreen(isSharingScreen);
    }

    // Use initial state
    handleNewParticipantsState();

    // Listen for changes in state
    callObject.on("participant-updated", handleNewParticipantsState);

    // Stop listening for changes in state
    return function cleanup() {
      callObject.off("participant-updated", handleNewParticipantsState);
    };
  }, [callObject]);

  // ...

}
Toggle camera, microphone, and screen share
Now it's just a matter of wiring up buttons to toggle our call inputs on and off by invoking the appropriate callObject methods.
// In Tray.js

function toggleCamera() {
  callObject.setLocalVideo(isCameraMuted);
}

function toggleMic() {
  callObject.setLocalAudio(isMicMuted);
}

function toggleSharingScreen() {
  isSharingScreen
    ? callObject.stopScreenShare()
    : callObject.startScreenShare();
}
Advanced implementation: edge cases
Congratulations! If you're still reading, then you've looked over the basic building blocks of a complete custom Daily-powered video chat app, and hopefully you're feeling inspired to go make your own amazing app!
But our discussion wouldn't be complete without looking at some gotchas and edge cases you may want to handle.
Handle camera and microphone errors
The Call Object sends an event when there's been an error getting the user's camera or microphone stream. This could happen, for example, if the user has blocked camera access to the site at a browser level or blocked camera access to the browser at an OS level. When this type of error occurs, it could be useful to point the user towards a help page to get them unstuck.
// In Call.js

useEffect(() => {
  if (!callObject) return;

  function handleCameraErrorEvent(event) {
    logDailyEvent(event);
    dispatch({
      type: CAM_OR_MIC_ERROR,
      message: (e && e.errorMsg && e.errorMsg.errorMsg) || "Unknown"
    });
  }

  callObject.on("camera-error", handleCameraErrorEvent);

  return function cleanup() {
    callObject.off("camera-error", handleCameraErrorEvent);
  };
}, [callObject]);
Give users a hint to allow camera and microphone access
The first time a page on your domain attempts to use the user's camera and microphone (or every time, in Safari's case), the browser will prompt the user to allow your site to access those devices. This prompt isn't overwhelming, so it may be unclear to the user why they're not immediately seeing anything on screen.
One way to help them is with a hint (like "Click Allow!") that automatically appears after a few seconds if callObject.participants().local still hasn't loaded an initial audioTrack or videoTrack.
// In Call.js

useEffect(() => {
  const t = setTimeout(() => {
    dispatch({ type: CLICK_ALLOW_TIMEOUT });
  }, 2500);

  return function cleanup() {
    clearTimeout(t);
  };
}, []);
Handle unsupported browsers
Unfortunately there are some folks out there who aren't using a modern browser. At Daily, we'd love to support every browser ever made, but unfortunately there just aren't enough hours in the day to do that while continuing to improve the product. So you'll want to gently tell your users that if they'd like to make video calls through your app, they might want to update their browser. There's a method on DailyIframe to help you out:
// In index.js

ReactDOM.render(
  DailyIframe.supportedBrowser().supported ? <App /> : <BrowserUnsupported />,
  document.getElementById("root")
);
Handle browsers that Daily doesn't support screen sharing from
There are some browsers where Daily supports video and audio sharing but not screen sharing. You can use the same DailyIframe method as above to help you figure out when you need to do something different for people using those browsers.
// In Tray.js

<div className="tray">
    // ...
    {DailyIframe.supportedBrowser().supportsScreenShare && (
      <TrayButton
        type={TYPE_SCREEN}
        // ...
      />
    )}
    // ...
</div>;
Next steps
As you saw, we used only a handful methods and events from the Daily JavaScript API to build a pretty complete video chat app. We also breezed past the backend work of creating and managing rooms, in the interest of focusing on the frontend. To see everything else the Daily JavaScript and REST APIs have to offer, grab a cup of tea and head over to docs.daily.co for some fun evening reading.
Thanks! We can't wait to see what you'll make with the Daily JavaScript API. As always, we'd love to know what you think and how we can better help you to build that next great thing, so please don't hesitate to reach out.