

If you are a virtual service provider–like an ed-tech, virtual events, or even telehealth platform–chances are you have a trove of video content you would like to classify and query. Imagine asking an AI assistant about something that happened at a recorded event and getting an answer back in seconds. This can save considerable time and energy, negating the need to trawl through the video or transcript and dig up information by hand.
Let’s take a look at this important AI application by showing you how to create conversational search functionality for a video content library. In this post and accompanying demo, I’ll show you how to upload your own video meetings or fetch them automatically using Daily’s REST API, and then ask your personal AI librarian questions about what was discussed within those videos.
We’ll do this by building an application that enables users to build and query a vector store using manually-uploaded video files or Daily cloud recordings. This post will cover:
- Core concepts: what even is a vector store?
- How the demo works from an end-user perspective
- Running the demo locally
- The tech stack and architecture
- The core parts of the implementation
But first, let’s brush up on some basic terminology. If you’re already familiar with the concept of vector stores and retrieval-augmented generation (RAG), feel free to skip this next part.
The basics: What is this even?
What is a vector?
For the purposes of this post, a vector is a representation of data in a format that AI can parse and “understand”. In the context of AI applications, we often talk about vector embeddings. Vector embeddings are just a way to capture semantically useful data in vector format.
What is a vector store?
A vector store also known as a vector database, is a place to store vectors. This can be pretty much anything, but for this demo I’ve used Chroma, a leading open-source embedding database that is specifically designed to power AI applications. We like Chroma for several reasons, including:
- The API design is clean and easy to use. This enables streamlined direct usage as well as integration with Retrieval-Augmented Generation (RAG) frameworks like LlamaIndex.
- All of its core functions are flexible and customizable.
What is retrieval-augmented generation (RAG)?
Large language models like GPT-4 make many new kinds of natural language interaction possible. But what if you want to leverage the capabilities of LLMs in conjunction with your own data – in our example today, your video recordings?
Retrieval-augmented generation (RAG, for short) is a strategy for using large language models to search, summarize, and otherwise process new data that wasn’t in the LLM’s training set.
The retrieval in RAG refers to fetching relevant data from a data store. Here we’re using Chroma. The generation in RAG refers to prompting an LLM to generate useful text. The LLM we’re using is GPT-4.
To implement the RAG pattern, we’re using a data framework called LlamaIndex. LLamaIndex provides helper functions and useful abstractions that make it easier to ingest, index, and query data of various kinds.
Now that we know the basics, let’s dig in.
What we’re building
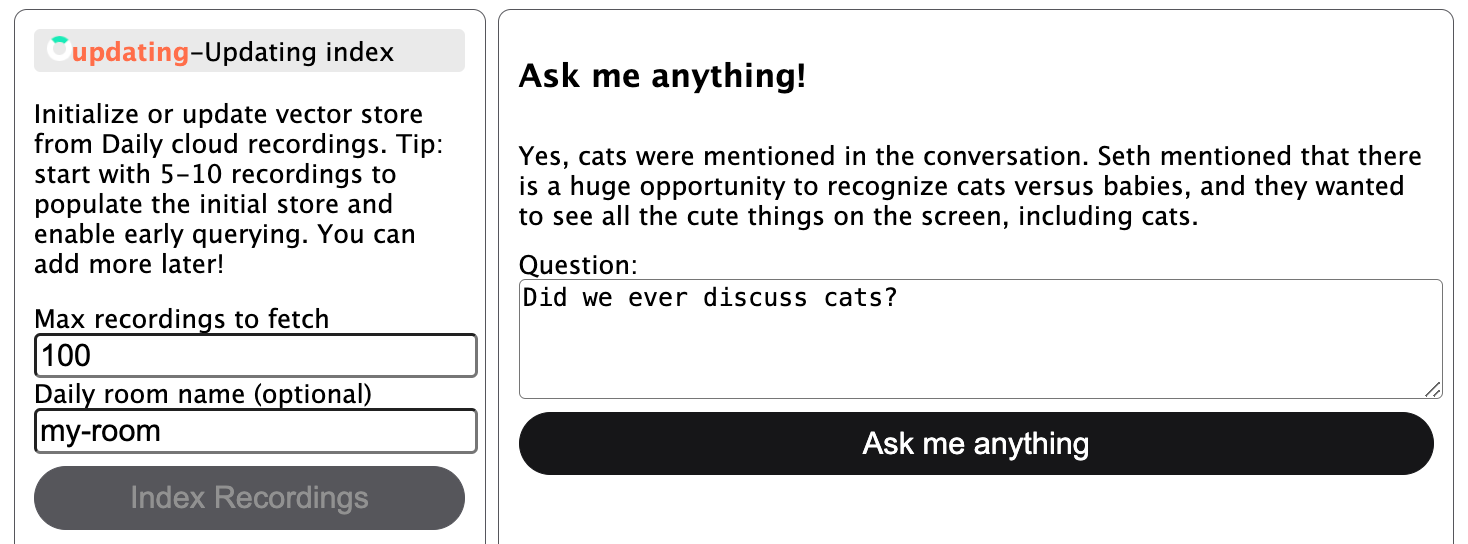
The main interface of the demo is a small front-end component that looks like this:

I’ll focus on the Daily cloud recordings store population flow in this post because I think it’s the most convenient for the user.
When the user opens the app in their browser, they start by creating a vector store in the left-hand column. They specify how many cloud recordings they want to index for this initial store creation and, optionally, a Daily room name for which to pull recordings. If a Daily room name is not specified, the server will pull in recordings from all rooms on the domain. Once index creation has been started, the relevant status will be shown on the client:
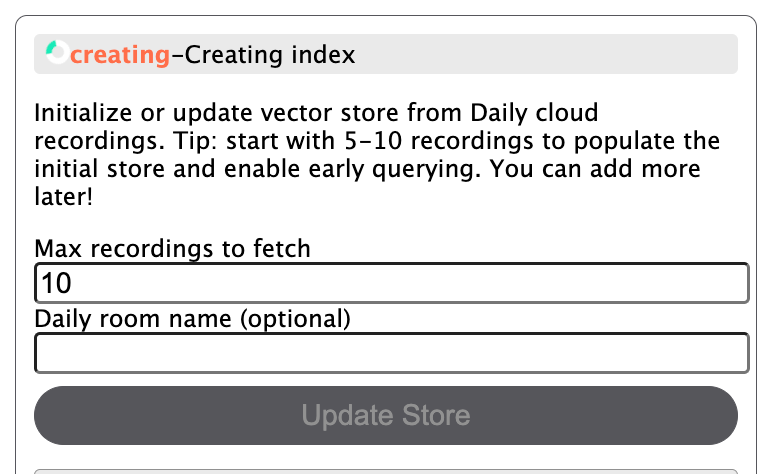
Depending on the size of your recordings, this step can take a while! I suggest starting with 5-10 recordings to begin with if you just want to try the store out quickly. You can update it with more data later!
Once the initial store creation is done, the store status is updated in the UI and the “Ask me anything” button on the right-hand side is enabled:
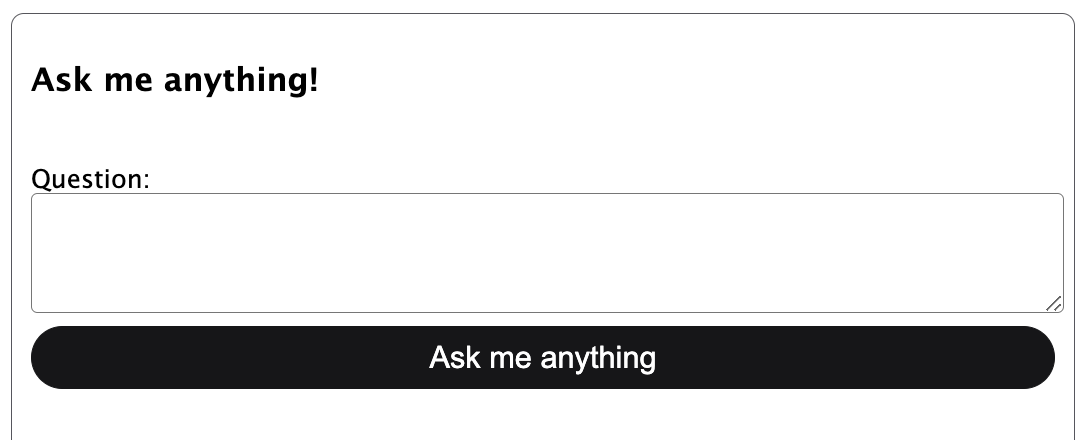
The user can then ask a question about the indexed recordings and, if relevant data exists, see an answer:
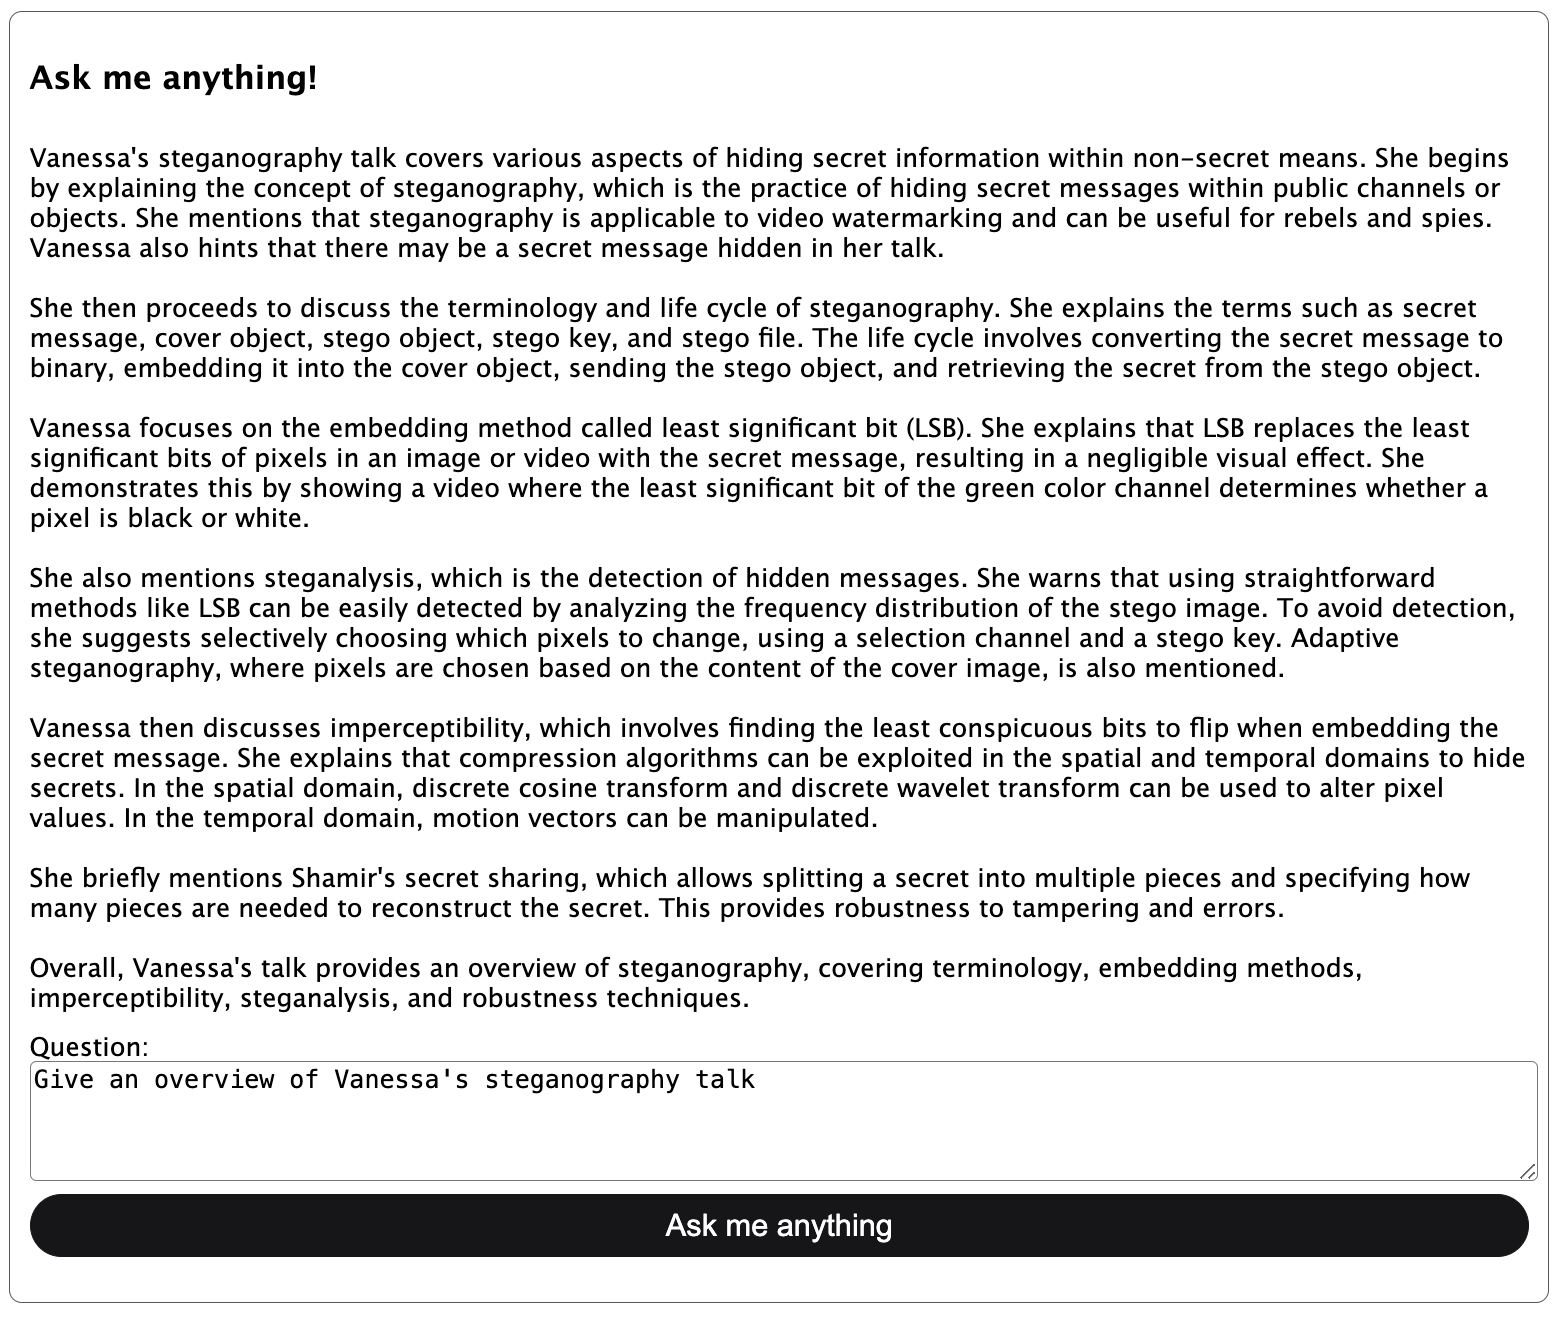
At this point, the user can also choose to index more recordings in the store to build up the collection of usable data. While the store is being updated, it can also be queried:
On the backend, the store is persisted to disk—so you can restart the server and load in your existing store.
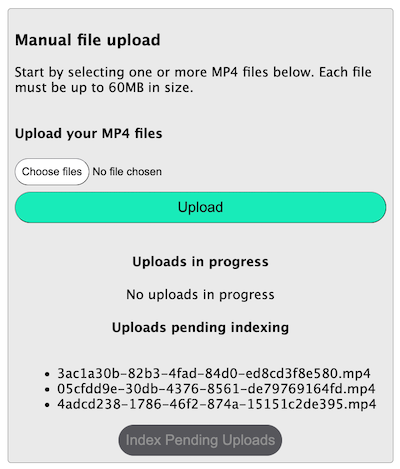
Ok, what about manual uploads?
I’ve configured the server to permit manual uploads of up to 60MB per file for the purposes of this demo. You can configure this if desired, but I suggest sticking with small files if using manual uploads because you’ll have a much more responsive result for demonstration purposes!
The manual upload workflow is in two steps: You first upload the files and then index the files. Once a file is fully uploaded to the server, it will be shown in a file list within the UI. When you click “Index Pending Uploads”, all of those pending files will be indexed in bulk.
Now that we know the usage basics, let’s take a look at how to run the demo locally.
Running the demo locally
Prepare the dependencies
To run the demo locally, be sure to have Python 3.11 and FFmpeg installed. You will also need an OpenAI API key.
Once you’ve got those, run the following commands (replacing the python3 and pip3 commands with your own aliases to Python and pip as needed):
# Clone the git repository
git clone https://github.com/daily-demos/recording-vector-store.git
cd recording-vector-store
git checkout v1.0
# Configure and activate a virtual environment
python3 -m venv venv
source venv/bin/activate
# Install dependencies
pip3 install -r requirements.txt
Configure the environment
Once the requirements are installed, copy .env.sample into an .env file in the root of the repository. Do not submit the .env file to source control!
The only variable you have to set here is OPENAI_API_KEY. The rest are optional, but I really recommend you try this demo out with Daily cloud recording integration and Deepgram transcription by setting the DAILY_API_KEY and DEEPGRAM_API_KEY environment variables.
Start the server and client
Finally, start your server and client by running the following commands in two separate terminals within your virtual environment:
# Start the vector store management server
quart --app server/index.py --debug run
# Serve the front-end
python -m http.server --directory client
Open your web browser of choice (I suggest Chrome) to the localhost address shown in the second terminal window above. It will probably be http://localhost:8000.
Now that we’ve got the app running, let’s see what’s happening under the hood.
The tech stack
- Vanilla JavaScript for the client.
- Python for the server.
- Quart for the processing server (similar to Flask, but designed to play nice with asynchronous programming).
- LlamaIndex with an OpenAI API key for generating and querying a vector store and index.
- Chroma for the database backing the vector index.
- Daily’s REST API to fetch cloud recordings.
- Local Whisper model or Deepgram’s Python SDK for transcription.
moviepyto extract audio from original video files when needed.
Demo architecture
For this post, I’ll focus on the server component of the demo as that is primarily where the fun AI stuff happens. I will briefly cover how this is all tied together on the client at the end, and also encourage you to check out the client-side implementation on GitHub.
API routes
Below are all the routes the client will use to interact with the server.
POST /db/index: Creates a new vector store and initializes a vector index, or updates the existing index with new data.POST /db/query: Queries the existing index with the user’s input and returns an answer.POST /upload: Uploads video files to the server, which can later be used to index the files (note that file upload and indexing are separate operations).GET /status/capabilities: Returns the capabilities of the server, in this case used to determine whether Daily cloud recording indexing is available (i.e., whether the Daily API key has been configured in the server environment).GET /status/db: Returns the status of the vector store (i.e., whether it is initialized, updating, ready for indexing, or in a failure state).
Core components
- The primary workhorse of this demo is the
Storeclass, which handles all vector store operations. - The
Configclass handles all environment configuration (third-party API keys, destination directories for uploads, transcripts, index storage, etc) - The
Transcriberbase class defines some abstract methods that the Deepgram and Whisper transcription classes implement. This also enables you to add your own transcriber. - The
dailymodule handles fetching of Daily recordings. - The
mediamodule handles things like manual file upload and audio extraction.
Store operations
All vector store operations take place in src/server/store.py. They include:
Before I get into the index creation itself, let’s take a look at what data we’re actually going to be basing our vector store on, and how it is obtained.
Data preparation
The raw data we start out with is a video file. The final output that is inserted into the index is a transcript of the discussion for each video. The way this happens is slightly different depending on whether you use Deepgram or a local Whisper model.
Transcribing Daily recordings with Deepgram
Deepgram provides the ability to transcribe a video recording straight from a publicly-retrievable URL. So when indexing Daily cloud recordings with Deepgram, I opted not to download the recording at all for this demo—instead, I fetch the recording’s access link from Daily’s REST API and feed that to Deepgram’s Python SDK for transcription:
def transcribe_from_url(self, api_key: str, recording_url: str) -> str:
    """Transcribers recording from URL."""
    print("transcribing from URL:", recording_url)
    deepgram = Deepgram(api_key)
    source = {'url': recording_url}
    res = deepgram.transcription.sync_prerecorded(
        source, self.get_transcription_options()
    )
    return self.get_transcript(res)
Transcribing Daily recordings with Whisper
If you opt for the local Whisper transcriber, you’ll need the video file to be available locally on the server for transcription. In that case, we’ll also fetch the recording’s access link from Daily’s REST API, but instead of sending it off to a third-party API, we’ll download the file locally.
Once the video file is on the server, I strip the audio into its own WAV file and send that off to my Whisper transcriber.
Transcribing manually-uploaded files
If using manually uploaded files with Deepgram as opposed to Daily cloud recordings, the workflow followed is the same as the Whisper workflow described above.
Once transcripts are created, they are stored in a directory on the server (of course in a production environment you may choose to use another method of storage) and inserted into the vector store.
Creating an index
So—you start with a totally uninitialized vector store and no index to use with it. You go to the front-end and initialize store creation. Now what?
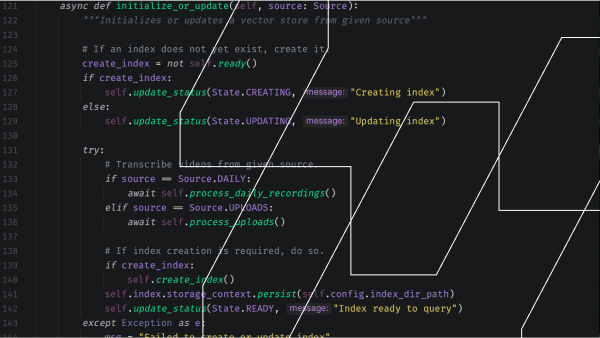
The index creation or update route invokes the following index creation or update method in the Store class:
    async def initialize_or_update(self, source: Source):
        """Initializes or updates a vector store from given source"""

        # If an index does not yet exist, create it.
        create_index = not self.ready()
        if create_index:
            self.update_status(State.CREATING, "Creating index")
        else:
            self.update_status(State.UPDATING, "Updating index")

        try:
            # Transcribe videos from given source.
            if source == Source.DAILY:
                await self.process_daily_recordings()
            elif source == Source.UPLOADS:
                await self.process_uploads()

            # If index creation is required, do so.
            if create_index:
                self.create_index()
            self.index.storage_context.persist(self.config.index_dir_path)
            self.update_status(State.READY, "Index ready to query")
        except Exception as e:
            msg = "Failed to create or update index"
            print(f"{msg}: {e}", file=sys.stderr)
            traceback.print_exc()
            self.update_status(State.ERROR,  msg)
Above, I set a boolean indicating whether I am creating an index or not. create_index will be True if an index does not already exist on the Store instance.
Next, I update the store status appropriately to indicate whether the index is being created or updated.
From there, depending on the given source (Daily recordings or manual uploads), I process the relevant videos. “Processing” here refers to the data preparation I mentioned above: transcribing each relevant video and saving it to a transcripts folder on the server. I suggest checking out this implementation on GitHub, to see how multiple recordings are downloaded (if needed) and transcribed using a ThreadPoolExecutor.
Finally, once all the transcripts are generated, I call self.create_index():
def create_index(self):
    """Creates a new index
     See: https://gpt-index.readthedocs.io/en/latest/examples/vector_stores/ChromaIndexDemo.html
    """
    # Get all documents from the present transcripts
    documents = SimpleDirectoryReader(
        self.config.transcripts_dir_path
    ).load_data()

    vector_store = self.get_vector_store()
    storage_context = StorageContext.from_defaults(
        vector_store=vector_store)
    index = VectorStoreIndex.from_documents(
        documents, storage_context=storage_context
    )
    self.index = index
- Above, I first instantiate a LlamaIndex
SimpleDirectoryReader()with my transcript directory and use it to load all the transcripts as Documents. - I then get a Chroma vector store with
self.get_vector_store()(which I’ll go through shortly). - After retrieving the vector store, I create a storage context and, finally, a vector store index.
Let’s take a quick look at the get_vector_store() method mentioned above:
def get_vector_store(self):
    """Returns vector store with desired Chroma client, collection, and embed model"""
    chroma_client = chromadb.PersistentClient(
        path=self.config.index_dir_path)
    chroma_collection = chroma_client.get_or_create_collection(
        self.collection_name)
    embed_model = HuggingFaceEmbedding(model_name="BAAI/bge-base-en-v1.5")
    vector_store = ChromaVectorStore(
        chroma_collection=chroma_collection, embed_model=embed_model)
    return vector_store
Basically, you create a Chroma client and a collection. You then specify your embed model and, finally, instantiate ChromaVectorStore().
So now that a vector store is created and persisted, how do you query it?
Querying our new vector store
Querying our new index is pretty straightforward. I do this in the query() method on my Store class, which takes a query string as a parameter:
def query(self, query: str) -> Response:
    """Queries the existing index, if one exists."""
    if not self.ready():
        raise Exception("Index not yet initialized. Try again later")
    engine = self.index.as_query_engine()
    response = engine.query(query)
    return response
Above, I take the currently loaded index and retrieve it as a query engine. This is a LlamaIndex interface that lets you ask questions about your stored data. The query value here will be whatever the user’s input was on the frontend.
The return type of engine.query() is Response, which contains the actual answer along with some metadata. For this demo, I am only consuming the Response.response property (i.e., the actual textual answer to the query).
Updating the vector store
The initialize_or_update() method we covered above handles store updates as well. It does so by checking if an index exists after transcribing each recording and invoking index.insert() if so:
def save_and_index_transcript(
        self,
        transcript_file_path: str,
        transcript: str):
    """Save the given transcript and index it if the store is ready"""

    # Save transcript to given file path
    with open(transcript_file_path, 'w+', encoding='utf-8') as f:
        f.write(transcript)
        # If the index has been loaded, go ahead and index this transcript
        if self.ready() is True:
            print("Indexing transcript:", transcript_file_path)
            doc = Document(text=transcript)
            self.index.insert(doc)
So if this step is run during index creation, the transcript will simply be saved to disk (and then all transcripts will be indexed in one go as a final step). If the step is running during index update, the transcript will be indexed right away. Once all transcripts are indexed during an update, the index and underlying Chroma store will be persisted to disk.
Speaking of persistence… What happens when you restart the server?
Loading an existing vector index
The server starts a background task which attempts to load an index as soon as it starts:
config = Config()
config.ensure_dirs()
store = Store(config=config, max_videos=10)

@app.before_serving
async def init():
    """Initialize the index before serving"""
    # Start loading the index right away, in case one exists.
    app.add_background_task(store.load_index)
This load_index() method on the vector store attempts to load the index from our configured index persistence directory:
def load_index(self) -> bool:
    """Attempts to load existing index"""
    self.update_status(State.LOADING, "Loading index")
    try:
        save_dir = self.config.index_dir_path
        vector_store = self.get_vector_store()
        storage_context = StorageContext.from_defaults(
            vector_store=vector_store,
            docstore=SimpleDocumentStore.from_persist_dir(
                persist_dir=save_dir),
            index_store=SimpleIndexStore.from_persist_dir(
                persist_dir=save_dir),
        )
        index = load_index_from_storage(storage_context)
        if index is not None:
            self.index = index
            self.update_status(
                State.READY, "Index loaded and ready to query")
            return True
    except FileNotFoundError:
        print("Existing index not found. Store will not be loaded.")
    except ValueError as e:
        print("Failed to load index; collection likely not found", e)
    self.update_status(State.UNINITIALIZED)
    return False
If the index is loaded successfully above, I update the state to READY, which will permit the client to query the index. Otherwise, I update the state to UNINITIALIZED, indicating that an index has yet to be created.
Phew! That covers our primary server-side operations for creating, querying, updating, and loading a vector index. Now, all the client needs to do is talk to the thing! Let’s do a really quick rundown of client-side operations now.
How the client hooks into all this
The first thing my demo client does is retrieve the capabilities of the server. This will inform the client whether it is allowed to try to index Daily recordings (which will be true if a Daily API key is specified). I really suggest you go this route if you have a Daily domain with some cloud recordings on it as it’s a more streamlined flow.
Next, the client starts polling the server’s vector store status. If the vector store is in “ready” state, querying is enabled. If the vector store is in a relevant state for initialization or update, the “Index Recordings” button is enabled.
The client also polls the server for what uploads are pending indexing and shows them in the UI. This way the user can click “Index Uploads” to index the pending files that were manually uploaded to the server.
And that’s pretty much it! The client can now create a new index, update it, and query it.
Conclusion
In this post, we looked at one approach to conversationally asking questions about the contents of video recordings, including Daily’s cloud recordings and manual uploads. If you have any questions or want to share your feedback, reach out to our support team or head over to our Discord community.
Never miss a story
Get the latest direct to your inbox.