


This post is part one of a series on how to build a custom React video chat app using Daily's real time video and audio APIs, and our new custom React hooks library, Daily React Hooks. You can find part two here.
Introduction
Daily's JavaScript library, daily-js, gives you several options for adding video calls to your web application. In this series, we’ll be focusing on creating a fully custom experience using React, daily-js, and our Daily React Hooks library. Daily React Hooks is a series of React hooks that connect to the Daily JavaScript API. They offer significant advantages for React developers who want to integrate real-time video and audio into their app, or who are already using Daily’s JavaScript API. If you’re curious to learn more, check out this blog post.
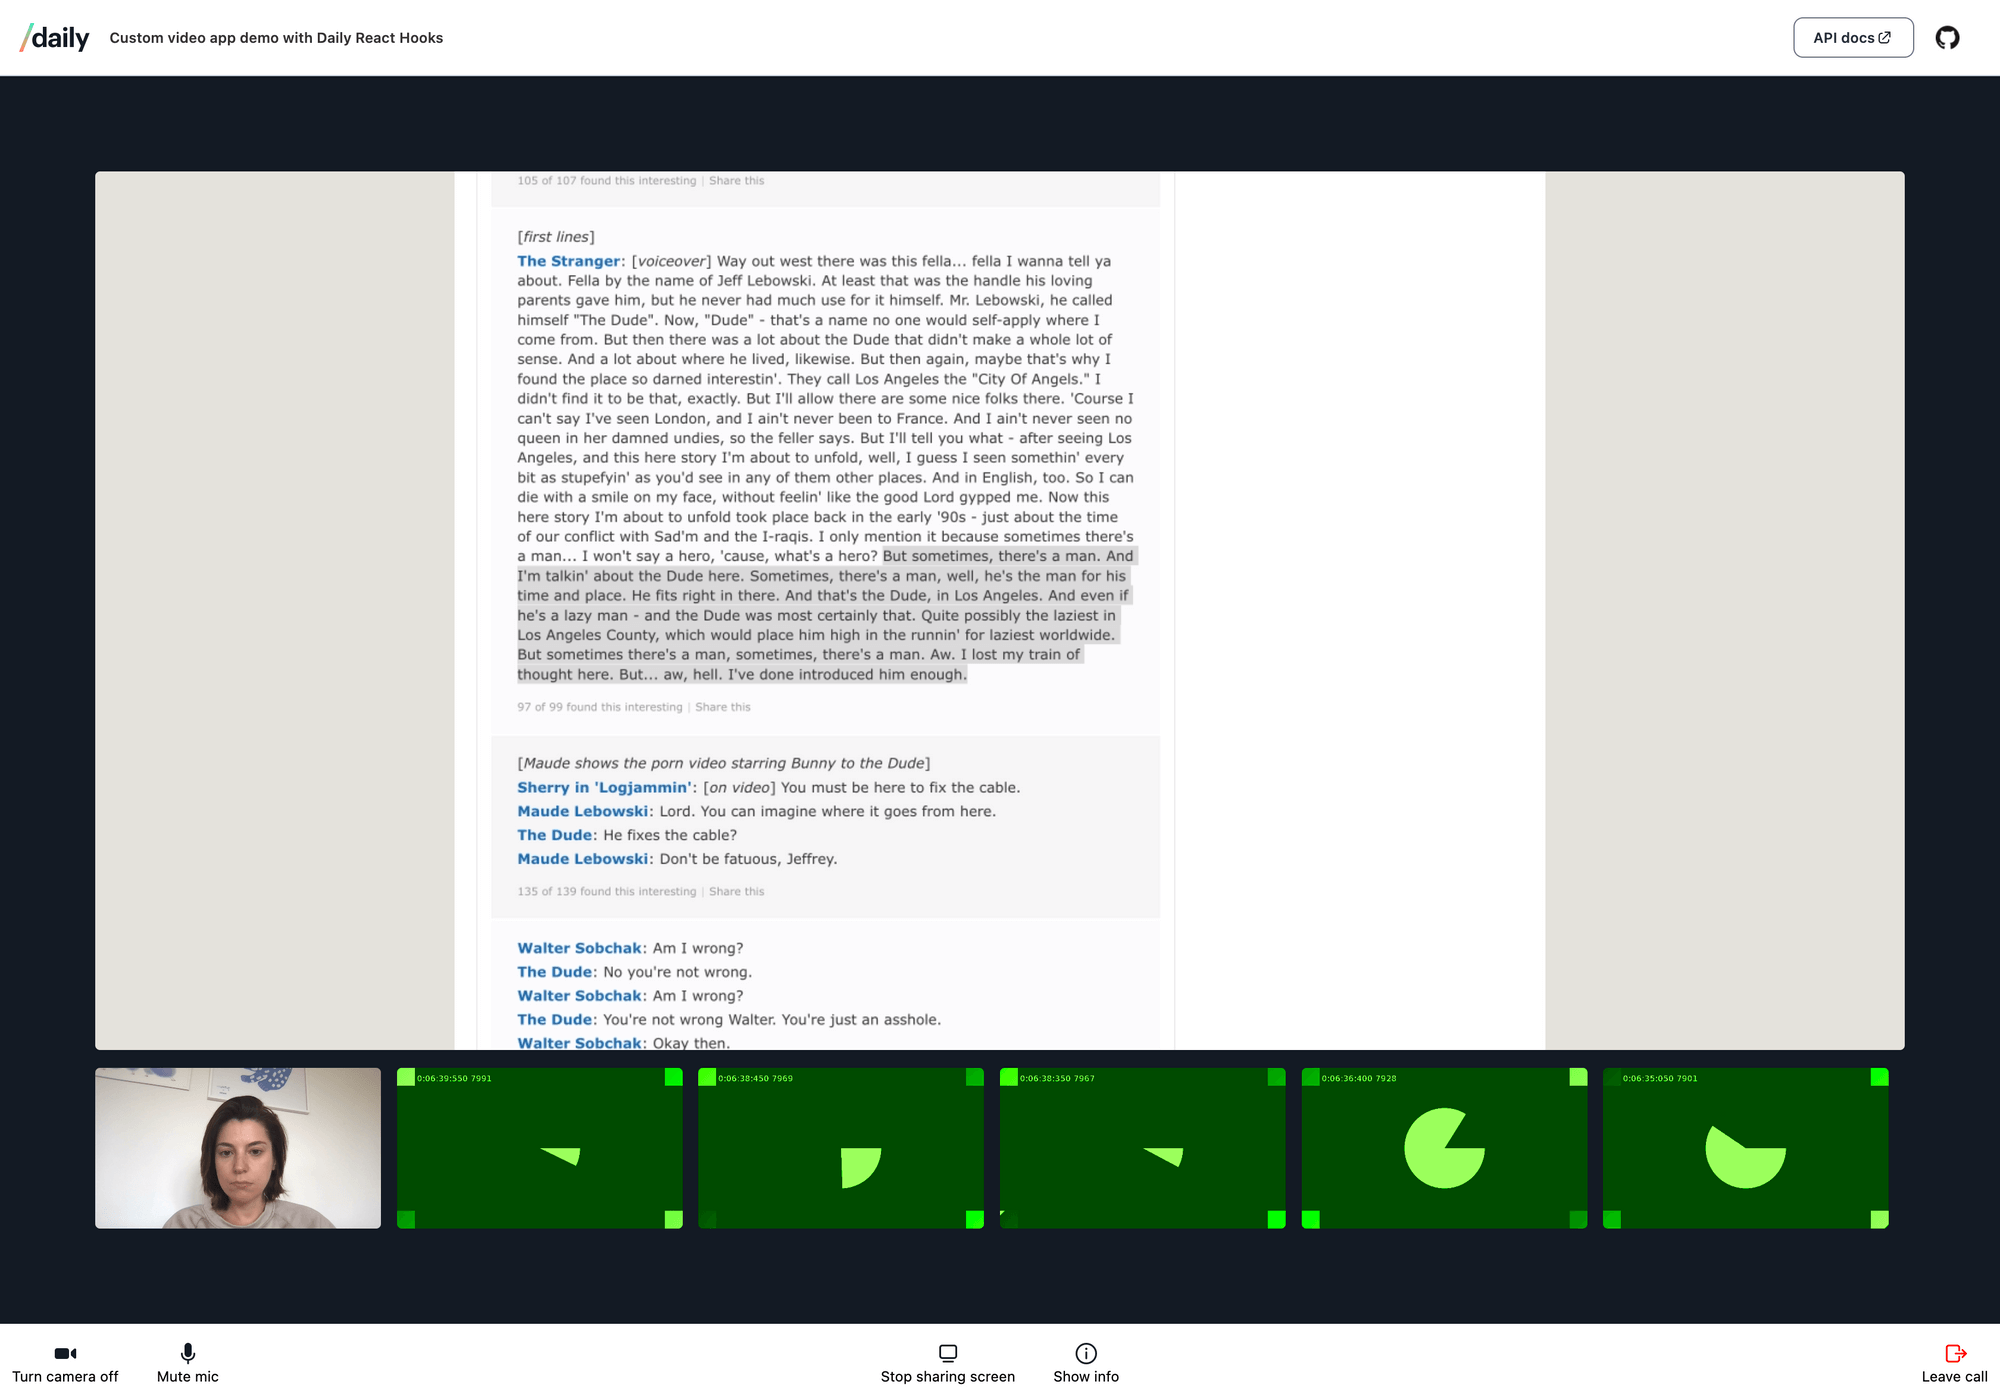
In this hooks series, we’ll create a demo showcasing how to build a custom React video chat application from scratch with daily-js and Daily React Hooks. This is what the final product will look like:
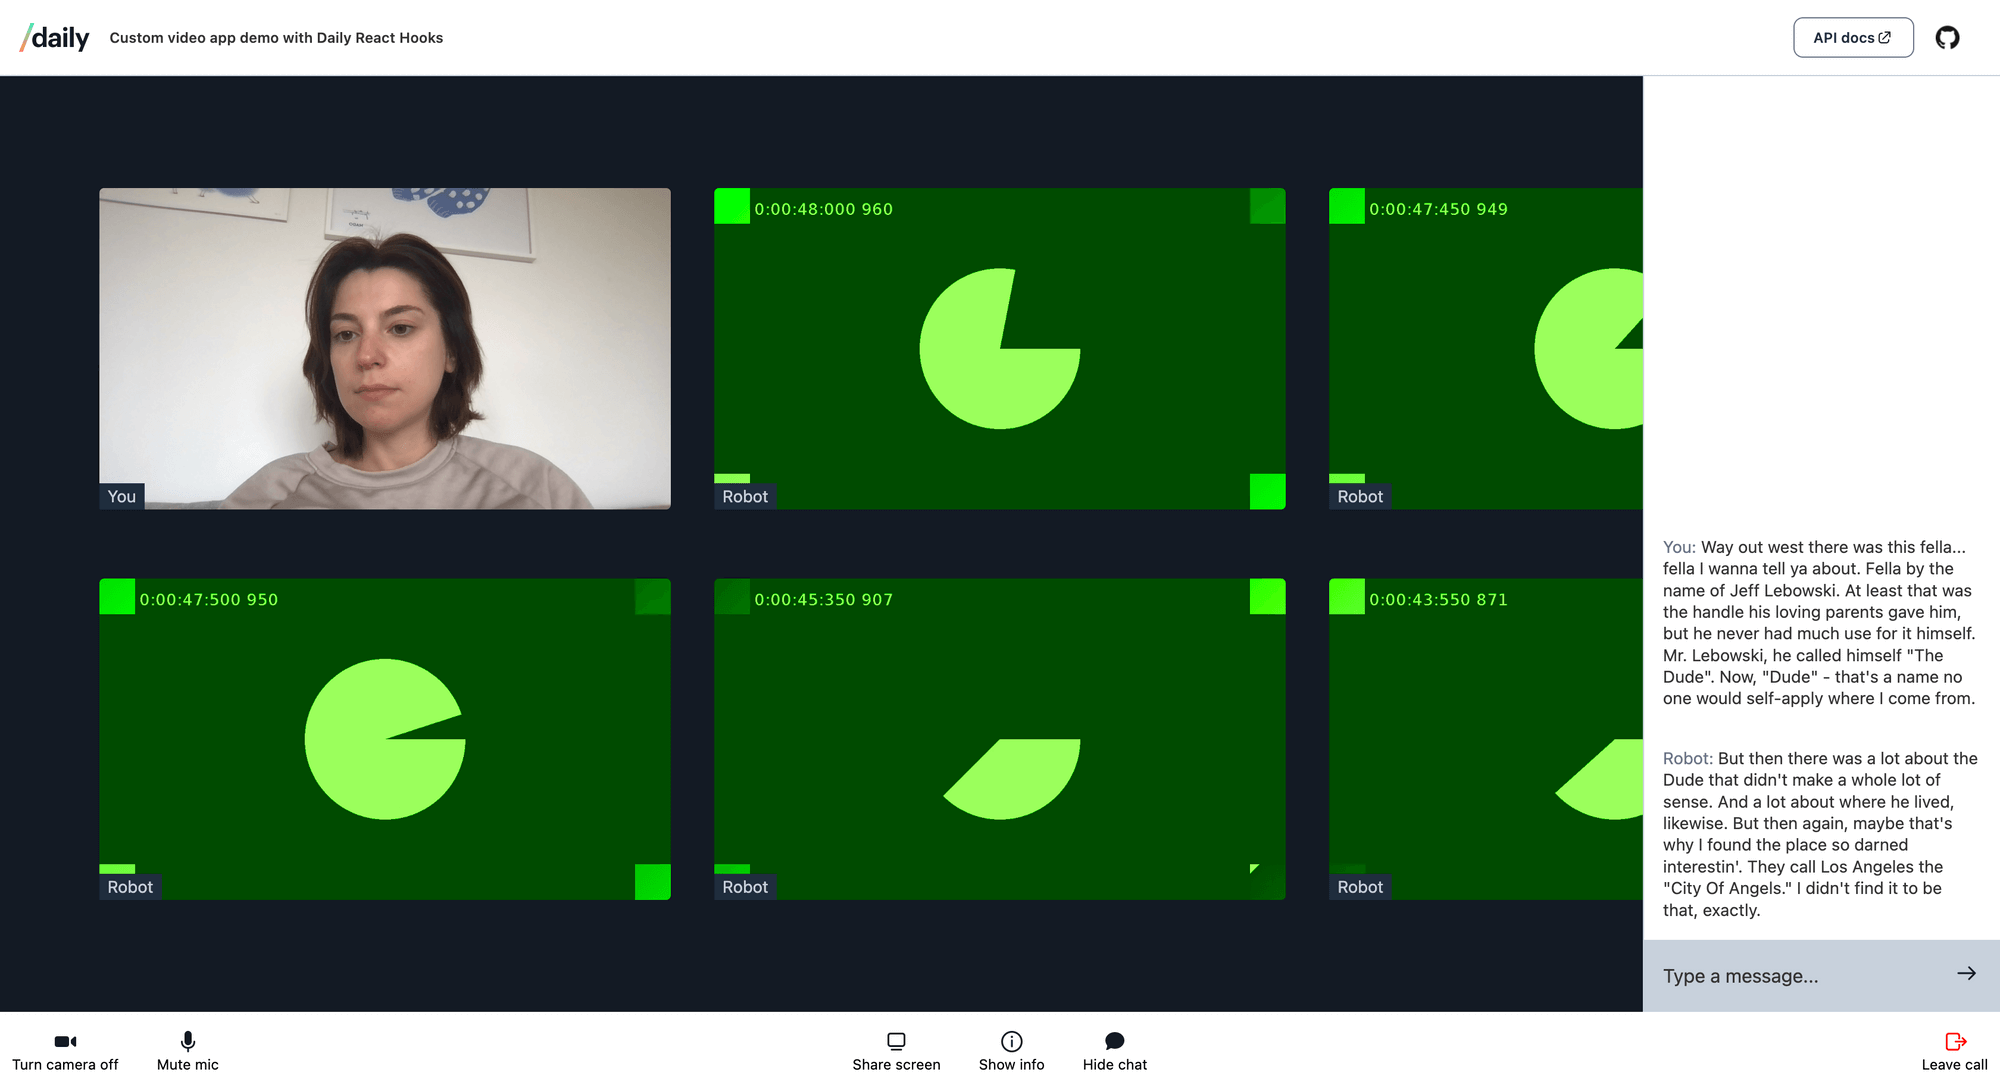
Note: curious about the green screens? Check out this blog post on our robots.
In part one (this post!), we’ll start by building a basic video call application. At this stage, the app will include the ability to create a call, join a call, add participants to a call, and do things like muting yourself and screen sharing. In the coming parts, we’ll add a pre-join UI (a so-called “hair check”) and secure chat messaging between participants. These components will be added later, so you’ll probably see some code additions in the next couple of weeks!
To follow along with this blog post you’ll need some basic knowledge of React and JavaScript. If you’re not looking to build your own fully custom experience, but would like a low-code way to integrate Daily video calls in your website, take a look at Daily Prebuilt.
What's the plan?
Before we dive in, let’s go over what exactly we’re trying to achieve in this first part of the series, and how we can get there.
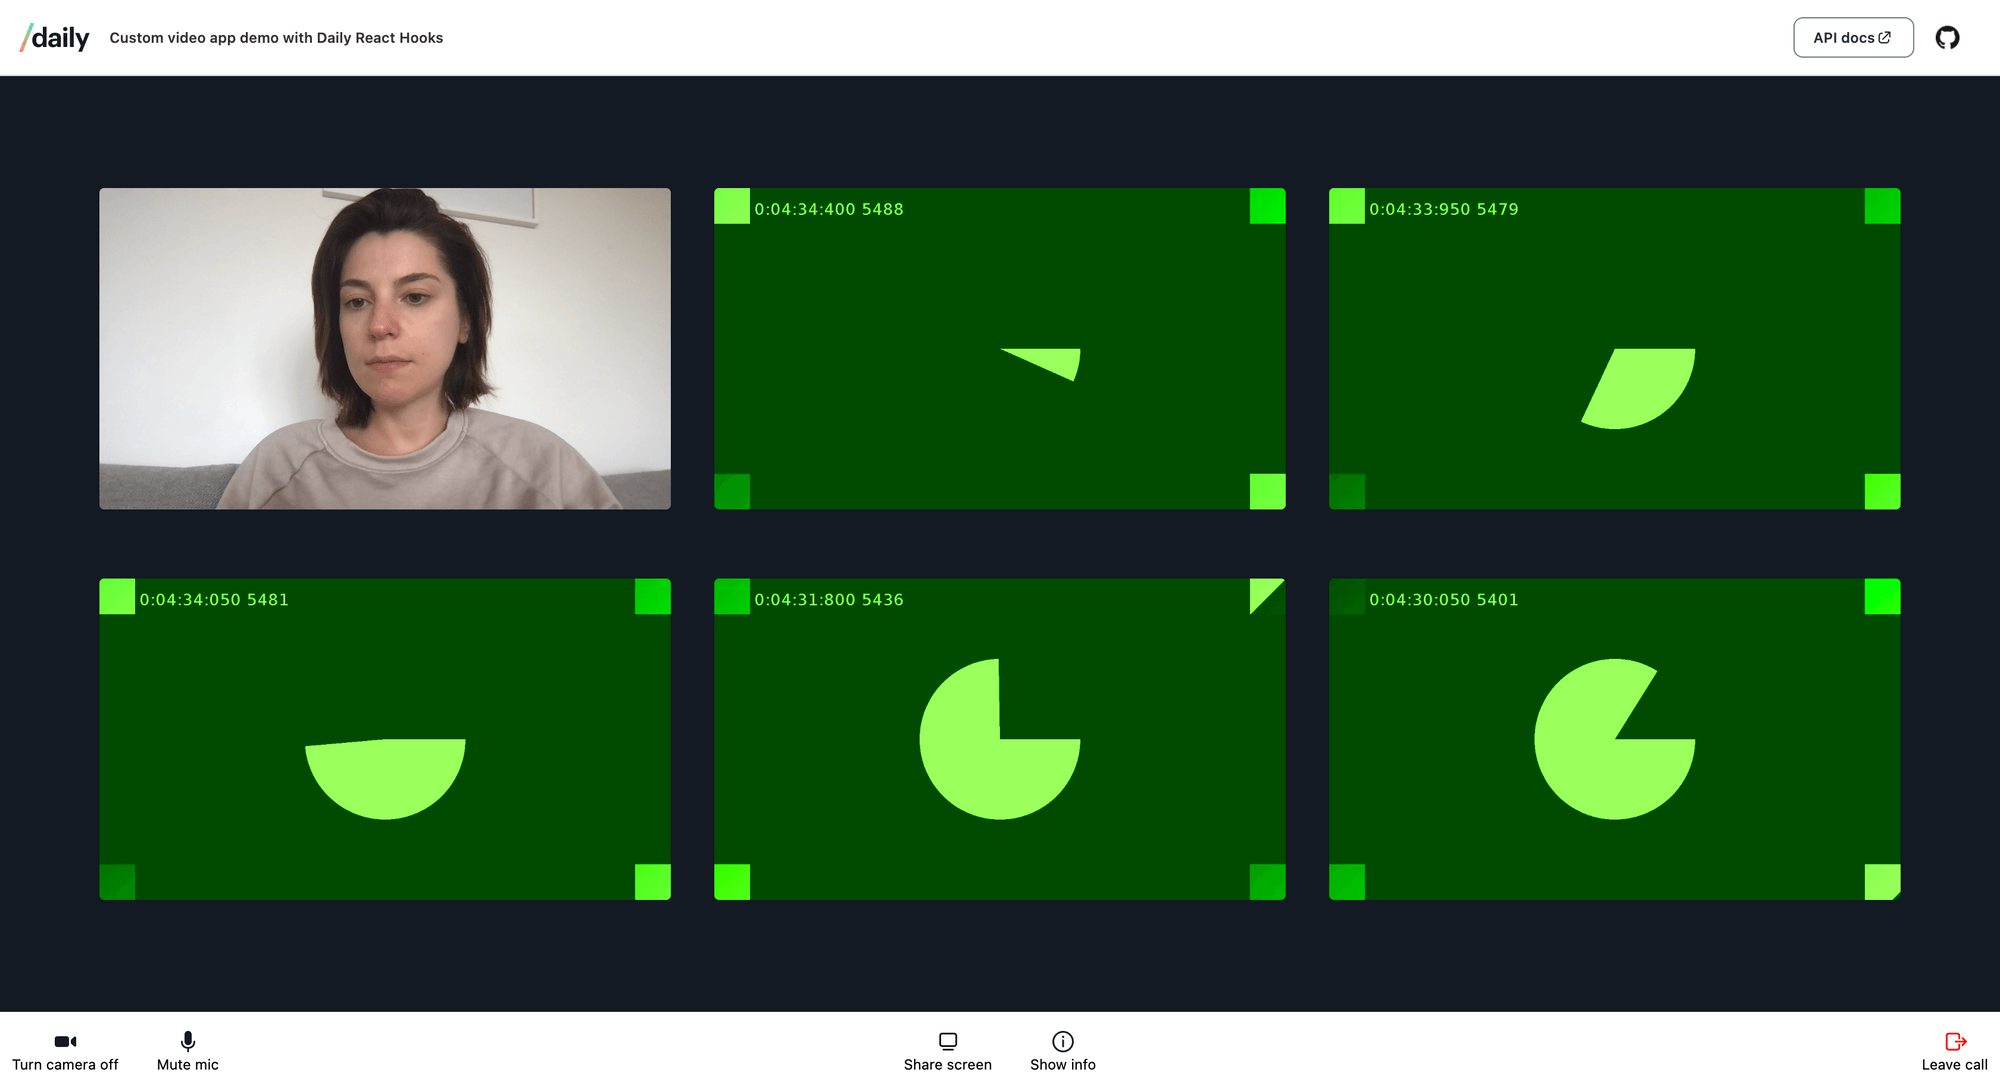
Our goal is to create a custom React application that allows people to make a video call using the Daily API. This is what our app will look like at the end of this post:
To get there, we’ll need to wire up a few things:
- The app’s entry point. This is the code that creates, joins, leaves, and tears down the call, but doesn't actually render the call. When a user navigates to our app, this is the first piece of code they’ll interact with. In this UI, we’ll add a button that allows users to start a call.
- To actually start a call, we’ll need a room for that call. In this demo, we’ll create a short-lived room for each call. Once a room has been created, people can join it. The room is not a separate component, but it is a key concept in understanding how to get everything in place so we can actually make a video call.
- When we have a user or users in our room, we need to have a Call UI component they can interact with. This involves displaying the call's participants along with their video and audio streams. In our demo app, we want to display each participant (including the current user) as their own "tile" in the app. We also want to display any screen share as its own tile independent of the participant doing the sharing.
- We’ll also need a Tray component, where users can mute their devices, start a screen share, toggle meeting information, and leave the call.
- And finally, we’ll take a quick look into handling device permissions errors.
To build all this, we’ll be using the Daily React Hooks library extensively. You don’t need to use this library in order to create a custom React application, but it does make things a lot easier! Using hooks will simplify your code, reduce component re-renders (improving your app’s performance) and abstract away some of the complexity of error handling and state management. This means you can actually focus on the fun parts of building a video app :)
If you’re curious what a video app without hooks looks like, make sure to check out our earlier blog post on building a custom React app with daily-js.
Prerequisites
To walk through this tutorial, you will need to create a Daily account. Once you have an account, you’ll be able to create Daily rooms programmatically with your API key, which you can find in the dashboard.
You’ll also need to have Node >= 14.0 and npm >= 5.6 installed on your machine. We recommend using the latest Node LTS version.
Lastly, you’ll need a code editor and some familiarity with Git.
Setting up the demo
Head on over to the custom-video-daily-react-hooks GitHub repository and clone the repo to follow along with the rest of this post. This repository is tagged: all the code relevant to this blog post can be found in v1.0.
After cloning and navigating to the custom-video-daily-react-hooks folder, install the dependencies:
npm i
And run the dev server:
npm start
Then, open http://localhost:3000 in your browser.
This demo is based on the create-react-app template. We also added Prettier for consistent code formatting.
Connecting with the Daily API
Our app will have two possible views:
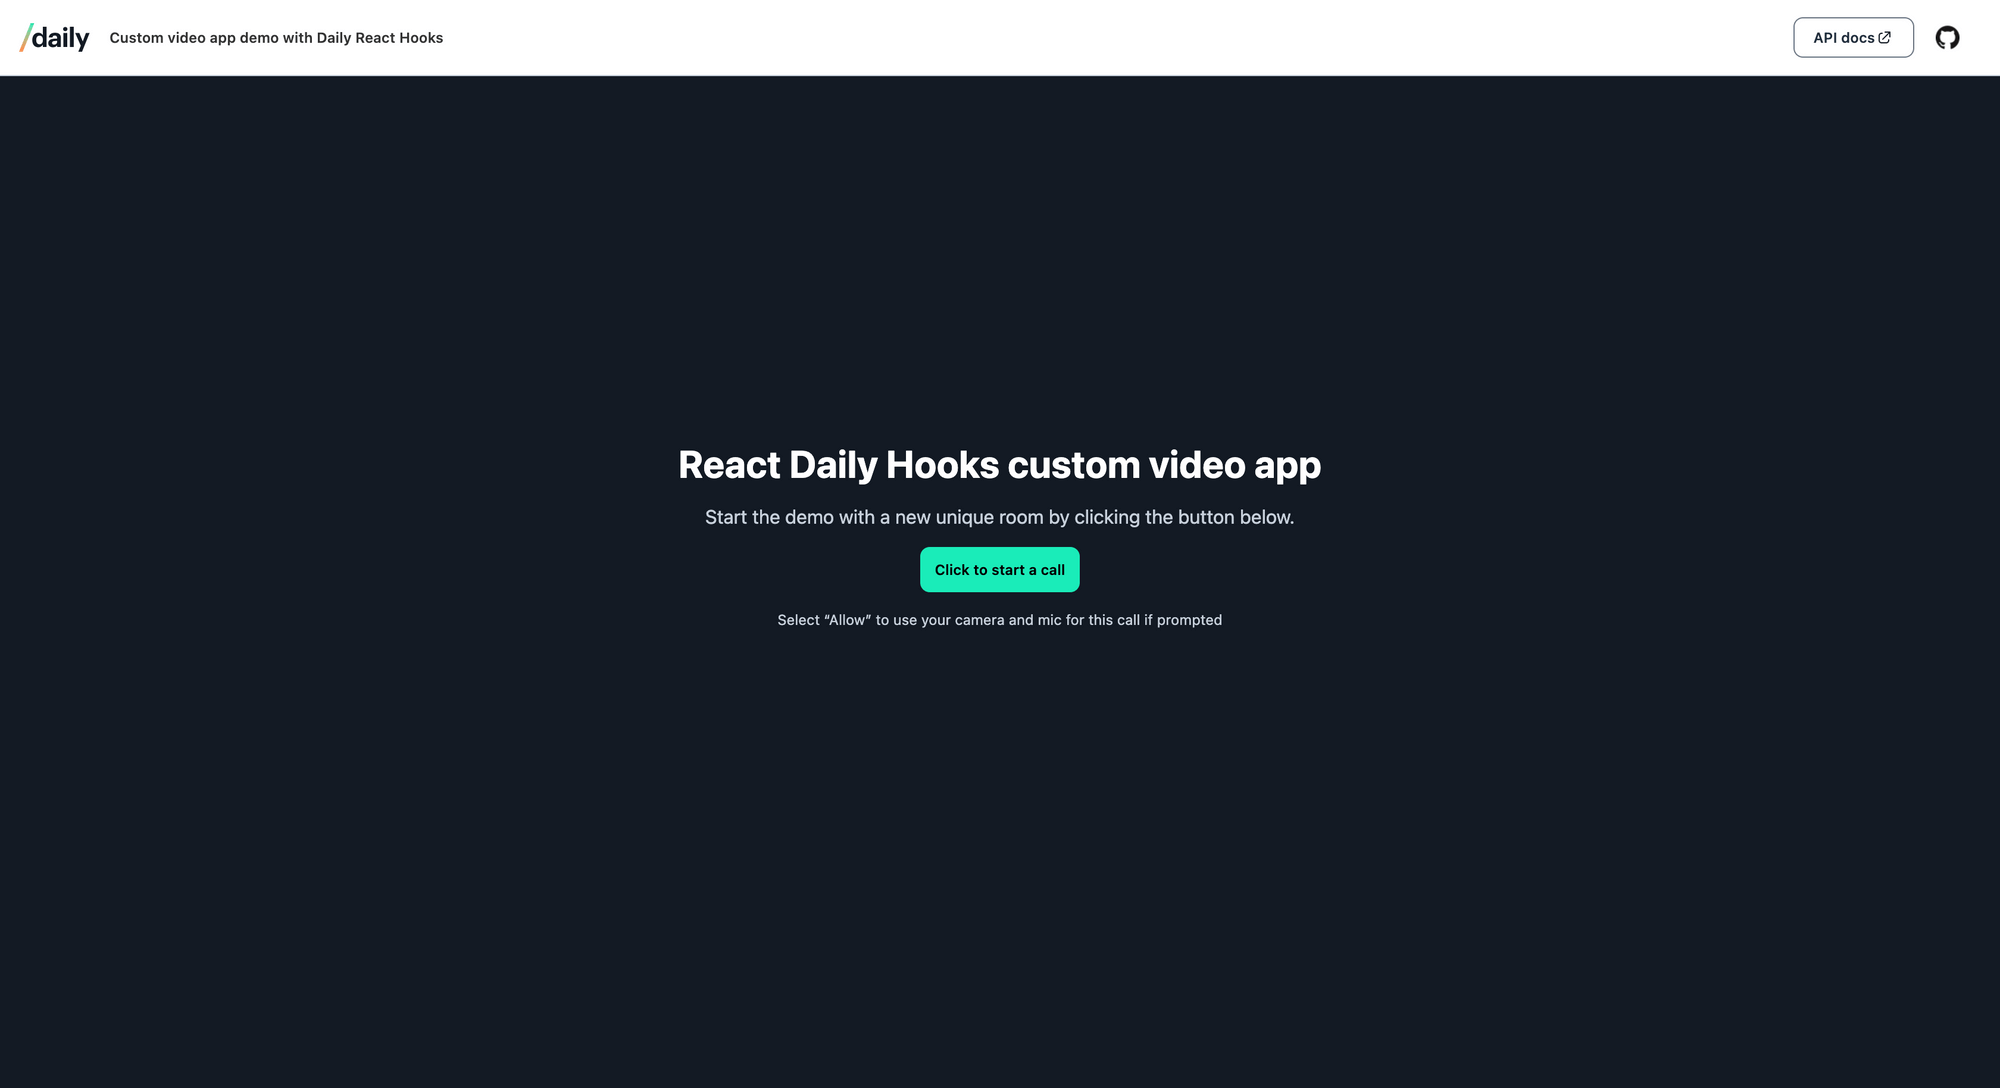
- The home screen, which has a “Start Call” button. Clicking this button will create a room. If there is no room or ongoing call, we’ll display the home screen.
- The call. As soon as the user hits ‘Start Call’, we’ll want to show them the call UI, consisting of two components:
<Call/>, and<Tray/>. Within this UI, users will be able to see each other, mute their audio and video, screen share, and leave the call.
In order to create rooms and have calls, we’ll need to interface with the Daily API using daily-js. All this happens in App.js, so let’s take a closer look at this file. If you look at what the App() function is returning, you’ll see the UI is split up into the two views mentioned above:
<div className="app">
 <Header />
 {showCall ? (
   <DailyProvider callObject={callObject}>
     <Call />
     <Tray leaveCall={startLeavingCall} />
   </DailyProvider>
 ) : (
   <HomeScreen
     createCall={createCall}
     startJoiningCall={startJoiningCall}
   />
 )}
</div>
Note: for clarity, we’ve left out some API error handling code here. Don’t worry if your App.js looks a tad different!
If there is no call ongoing, we’ll see the
If there is a call ongoing, we’re using a DailyProvider to wrap our <Call/> and <Tray/> components together so we can access the Daily call object. The call object is the main interface into Daily functionality. It's the thing that your code will invoke to do anything: start a call, leave a call, listen for participants coming and going, get video and audio to play, and much more.
We can only initialize the call object when we have access to a room. When you click on the ‘Start call’ button, the createRoom() function in api.js is called. This room will be short-lived:
async function createRoom() {
 const exp = Math.round(Date.now() / 1000) + 60 * 30;
 const options = {
   properties: {
     exp,
   },
 };

 const response = await fetch('https://api.daily.co/v1/rooms/', {
   method: 'POST',
   body: JSON.stringify(options),
   headers: {
     'Content-Type': 'application/json',
     Authorization: 'Bearer ' + process.env.REACT_APP_DAILY_API_KEY,
   },
 });

 return await response.json();
}
In order to programatically create a room like we’re doing here you’ll need your Daily API key, which you can get here.
Then, go to your code editor and rename example.env to .env. Paste your Daily API key there:
// don't ever commit this API key to git!
REACT_APP_DAILY_API_KEY=your-secret-key
Now we’re able to talk to the rooms endpoint.
After successfully calling createRoom(), the Daily API returns a room URL. The URL will look like this: https://your-user-name.daily.co/random-string-of-characters.
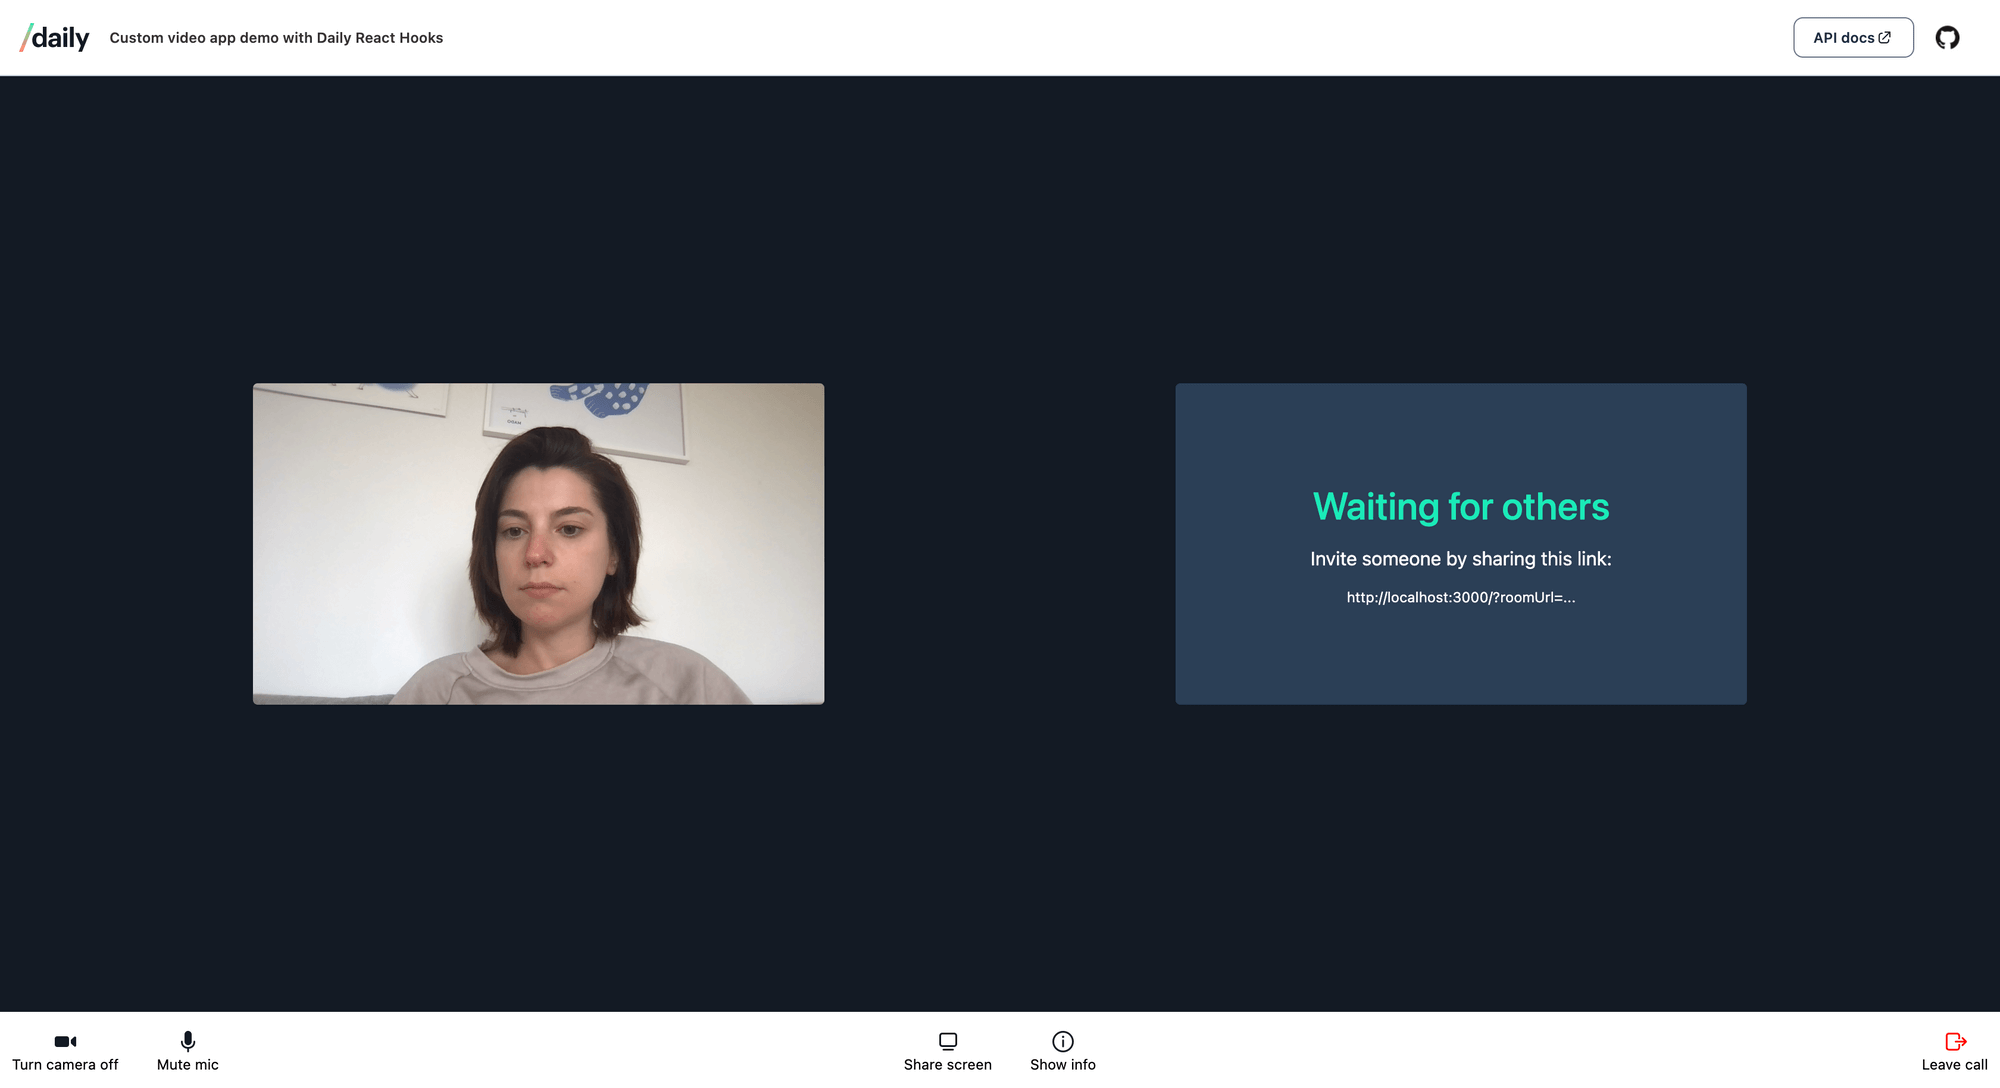
Once the room is created, the app will handle navigating to the room view (more on that below). You can also access the room view directly through this URL, which uses a roomUrl query parameter. You’d use this URL to invite others to your meeting: http://localhost:3000/?roomUrl=https://your-user-name.daily.co/random-string-of-characters.
To add participants to the room, open a new browser tab and navigate to the same URL. You’ll see yourself multiple times, which can be a little confusing, so beware.
With that in hand, we can finally create the call object in App.js:
const startJoiningCall = useCallback((url) => {
 const newCallObject = DailyIframe.createCallObject();
 setRoomUrl(url);
 setCallObject(newCallObject);
 setAppState(STATE_JOINING);
 newCallObject.join({ url });
}, []);
We’re using React’s useState() hook to hold our app’s state: if the call was successfully joined, we’ll set the appState to STATE_JOINING. Based on appState, we decide whether to render the HomeScreen or the call UI.
Now that we have a call object, we can make it available to Daily React Hooks. We’ll do that by passing the call object instance to <DailyProvider/>. Once linked to the <DailyProvider/> component, the call object can be accessed by any child components in our app:
// App.js
 <DailyProvider callObject={callObject}>
   // all child components will have access to the call object
</DailyProvider>
So to quickly recap: in App.js and api.js we set up what we need to “talk” to the Daily API. When we can successfully create rooms via the API, we modify appState to set showCall to true.
Implementing the call UI
So far, we haven’t actually used any of the hooks from the Daily React Hooks library. This is because we can’t access the hooks outside the <DailyProvider/> component context, which we’ve only just set up. Because the call component is a child of <DailyProvider/>, we’re now ready to make full use of the hooks.
Meeting information component
Before we dive into the video UI, let’s take a quick look at how we can interact with the call object in <MeetingInformation/>. This component will display information about our meeting, room, its participant(s), and your network.
To learn more about the meeting state, we need to access the call object. We can do that with the useDaily() hook:
import { useDaily } from '@daily-co/daily-react-hooks';

export default function MeetingInformation() {
  const callObject = useDaily();
  return (
   <p>Meeting state: {callObject?.meetingState() ?? 'unknown'}</p>
 )
}
There are tons of methods we can directly access now that we have the call object in our <MeetingInformation/> component.
Daily React Hooks wraps some of these methods in useful, easily accessible hooks that we can leverage in our application. Using our hooks, we no longer need to directly access callObject, greatly simplifying our app's logic.
Let’s say we want to render the IDs of the participants in the current meeting. Previously in code not using Daily React Hooks, we would have had to access the call object and call Daily’s participants() instance method. Instead we can now retrieve a list of participantIds using the useParticipantIds() hook:
import {
  useDaily,
  useParticipantIds
} from '@daily-co/daily-react-hooks';

export default function MeetingInformation() {
  const callObject = useDaily();
  const allParticipants = useParticipantIds()?.toString();

  return (
    <ul>
      <li>
        Meeting state:
        {callObject?.meetingState() ?? 'unknown'}
      </li>
      <li>Participant IDs: {allParticipants}</li>
    </ul>
  );
}
This is not only simpler, it can also help avoid re-renders. A dependency like callObject will change often, and when we use hooks to access it we won’t have to worry about that.
Make sure to have a full look at <MeetingInformation/> for other hooks we can use to display information about the meeting!
Call component
We’ve arrived at the most important part of our app: the <Call/> component. This component gathers information about the meeting’s participants and passes that onto <Tile/>, which renders all video and audio HTML.
Displaying the local participant
Let’s start with displaying a video of ourselves: the localParticipant. What we need for that is the local participant’s ID and their video track. We don’t need an audio track, because it’s just a self view. With the useLocalParticipant() and the useVideoTrack() hooks, we can gather all the information we need:
const localParticipant = useLocalParticipant();
const videoTrack = useVideoTrack(localParticipant?.session_id);
const localVideoElement = useRef(null);

useEffect(() => {
if (!localParticipantVideoTrack.persistentTrack) return;
localVideoElement?.current &&
  (localVideoElement.current.srcObject =
    localParticipantVideoTrack.persistentTrack &&
    new MediaStream([localParticipantVideoTrack?.persistentTrack]));
}, [localParticipantVideoTrack.persistentTrack]);

export default function Call() {
 return (
    <div className="self-view">
        <video autoPlay muted playsInline ref={localVideoElement} />
    </div>
  )
}
Let’s walk through this together. The first thing we do is get the local participant object. That’s just a participant object where the local property is set to true.
Then, we can grab the local participant’s session_id and pass that to the useVideoTrack() hook. This will return the MediaTrackState of the video track. As long as we’ve properly given the browser permission to access our camera, we have a running video track of, well, ourselves.
To render a video on screen, we’ll use a <video> HTML element. We’ll use React’s useRef() hook to pass the video source to the HTML element once it’s available. persistentTrack is a MediaStreamTrack that exists and may or may not be ready to be played.
Displaying remote participants and screen shares
Essentially, all we need to display remote participants are their IDs. With the useParticipantIds() hook, we can easily do that. This hook takes in optional parameters. What we need to get an array of remote participant IDs is to use the filter option, like so:
const remoteParticipantIds = useParticipantIds({ filter: 'remote' });
We want to render a <Tile/> component in our video grid for each participant. We can use the JavaScript map() function to do that:
{remoteParticipantIds.map((id) => (
 <Tile key={id} id={id} />
))}
For screen shares, we’ll do the same. We can get all active screen shares by using the useScreenShare() hook:
const { screens } = useScreenShare();
Then we’ll map over them in the same way as we did with remote participants:
{screens.map((screen) => (
 <Tile
   key={screen.screenId}
   id={screen.session_id}
   isScreenShare
 />
))}
We’re passing an optional isScreenShare prop here, because our CSS will change depending on whether a remote stream is a screen share or not. If it is, we’d like to display it as big as possible:
If a stream is “just” a human and not a screen share, we want a regular grid like so:

In <Tile/>, we’ll render video and audio very similarly to what we just did in <Call/>: we’ll use a hook to get the MediaStreamTracks of the remote participants and a useRef() hook to pass the video and audio tracks to their respective <video> and <audio> HTML elements.
If you look closely, you’ll notice that in <Tile/>, we’re using useMediaTrack(), and not the useVideoTrack() hook we used in the self-view. If a remote stream is a screen share, we’ll need to pass the screenVideo type to the hook, but if it’s a regular video, we need to pass it the video type:
const videoTrack = useMediaTrack(id,
  isScreenShare ? 'screenVideo' : 'video'
);
This way, we can be sure we’ll retrieve the correct tracks object no matter if a remote track is a screen share or not.
Our <Call/> component is now done. We can display ourselves, remote participants, and screen shares. Next up is the <Tray/> component, where we’ll add controls to the UI that allow us to mute ourselves, to share our screen, and to leave the current call.
Implementing the tray UI
With hooks, keeping track of and manipulating a participant’s state is a lot easier than without. Let’s take a quick look at how to get a participant’s audio and video state without using hooks:
const localParticipant = callObject?.participants()?.local;

if (!localParticipant) return;

const isCameraMuted = !localParticipant.video;
const isMicMuted = !localParticipant.audio;
We need to access the participants() method on the callObject instance directly. We also need to make sure it exists, which is why we’re returning early if it doesn't. While there’s nothing wrong with this code, it will ultimately also require us to listen to Daily event emitters to handle updates to the participant’s state. If the local participant’s audio updates, we won’t know about it unless we explicitly listen to the ”participant-updated” event on the call object:
callObject.on("participant-updated", handleStateUpdate);
Using hooks, we only have to do this:
// Tray.js
const callObject = useDaily();
const localParticipant = useLocalParticipant();

const localVideo = useVideoTrack(localParticipant?.session_id);
const localAudio = useAudioTrack(localParticipant?.session_id);

const mutedVideo = localVideo.isOff;
const mutedAudio = localAudio.isOff;
And to toggle the audio and video on or off, we can do this:
const toggleVideo = useCallback(() => {
 callObject.setLocalVideo(mutedVideo);
}, [callObject, mutedVideo]);

const toggleAudio = useCallback(() => {
 callObject.setLocalAudio(mutedAudio);
}, [callObject, mutedAudio]);
There’s no need for us to listen to any ”participant-updated” events – the hooks will handle this for us 🥳
Event listeners and error handling
Hooks abstract away a lot of state and event handling logic for us. But sometimes, we do need to hook into events that are emitted by the call object to update our UI. For example, if you want your call UI to display a big blinking message when a new user joins, you’ll need to listen for ”participant-joined” events.
Let’s use the useDailyEvent() hook to handle getUserMedia() errors. These are pretty common in video calls (we even have a whole guide dedicated to handling device permissions).
When a user denies access to their webcam (either by accident or not), the Daily API will emit a ”camera-error” event. In <App/>, we can listen for events using useDailyEvent() because we’re inside <DailyProvider/>, and thus have full access to anything the call object throws at us. This is what the call view will look like when a camera error event is emitted:

First, inside <Call/>, let’s wire up some React state to keep track of whether there’s a getUserMedia() error or not:
const [getUserMediaError, setGetUserMediaError] = useState(false);
Now let’s listen for ”camera-error” events:
useDailyEvent(
 'camera-error',
 useCallback((ev) => {
   setGetUserMediaError(true);
 }, []),
);
As soon as a ”camera-error” event is emitted by the call object, getUserMediaError will be set to true, and we can display an error message in the Call UI based on that.
You’ll notice we’re using useCallback inside the event hook. This is because the callback parameter has to be a memoized – it has to be a stable reference that won’t change. Otherwise, a console error might be thrown indicating a potential re-render loop.
What’s really awesome about using this hook to listen for events is that we don’t have to worry about clean-up. When the call ends or the <Call/> component unmounts, the hook automagically removes the event callback. This helps us avoid memory leaks!
Wrapping up
That was a lot! In this first post you’ve seen all the building blocks of creating a custom React video application using the Daily API and Daily React Hooks. A little recap of what we did:
- First, we accessed the
daily-js's core API and interacted with this API using the Daily React Hooks library. - Then we built a home screen, where folks can start calls, and a call UI, including the media tracks of the call’s participants.
- We also built a control tray, where we can mute audio and video, share our screens, and leave the call.
- And last but not least, we made sure
getUserMedia()errors are handled in the UI.
What’s next?
In the upcoming two posts, we’ll be using Daily React Hooks to build the following features on top of the app we just created:
- A pre-join UI, also referred to as "hair check". Before entering a call, we want to make sure people have the ability to check if their audio device and camera are working properly. We’ll be using the
useDevices()hook for that. - Chat for call participants. The
useAppMessage()hook conveniently wraps thesendAppMessage()method, which is going to allow us to implement chat in our app 🥳
Stay tuned!
Never miss a story
Get the latest direct to your inbox.