

At Daily, we’re often telling people all the things you can do with our video and audio APIs. Video calls, audio-only calls, prebuilt UIs, live streaming, dashboards, and metrics. Let's just say it’s a long and growing list. 😉
We like to keep ourselves humble, though — can’t you tell from those opening sentences? — and do our best to keep track of any features customers are looking for, such as integrating with existing third-party APIs they’re already using.
One example of this is using third-party chat integrations. We should mention: all Daily video integrations already include text-based chat options, whether it be Daily Prebuilt’s chat sidebar or the sendAppMessage() Daily method, which can be used to build custom chat options. Despite this, some customers already have a chat API they’re happy with.
Twilio, for example, offers Flex, a contact center platform, which is useful for managing customer support conversations. To complement this, they also offer Flex WebChat, a chat widget that can be embedded into any website.
So, although you might be thinking, “Isn’t Twilio a Daily competitor? 🤔 Wouldn’t I choose one provider or the other?”, you don’t actually have to choose! Sometimes you have to pick the best tool for the job.

Daily, for example, offers a complete ready-to-use prebuilt video embed option with recording, active speaker mode, a lobby, and more. (We'll be using Daily Prebuilt in this tutorial if you're curious to see how it works.) In contrast, Twilio currently does not have a prebuilt video call option.
Additionally, in terms of scaling calls, we support up to 15,000 participant calls and are working on increasing that number even more. You can view Twilio’s participant limit, which is currently 50, here.
With Daily, developers can also build efficiently for specific use cases, such as telehealth. We offer HIPAA compliance with a signed BAA to get up and running quickly at a small fraction of competitor costs.
So, even if you're happy with Twilio for chat, it might not cover all your needs for video. With all that being said, let’s get to the code to see how these APIs can happily work together.🤓
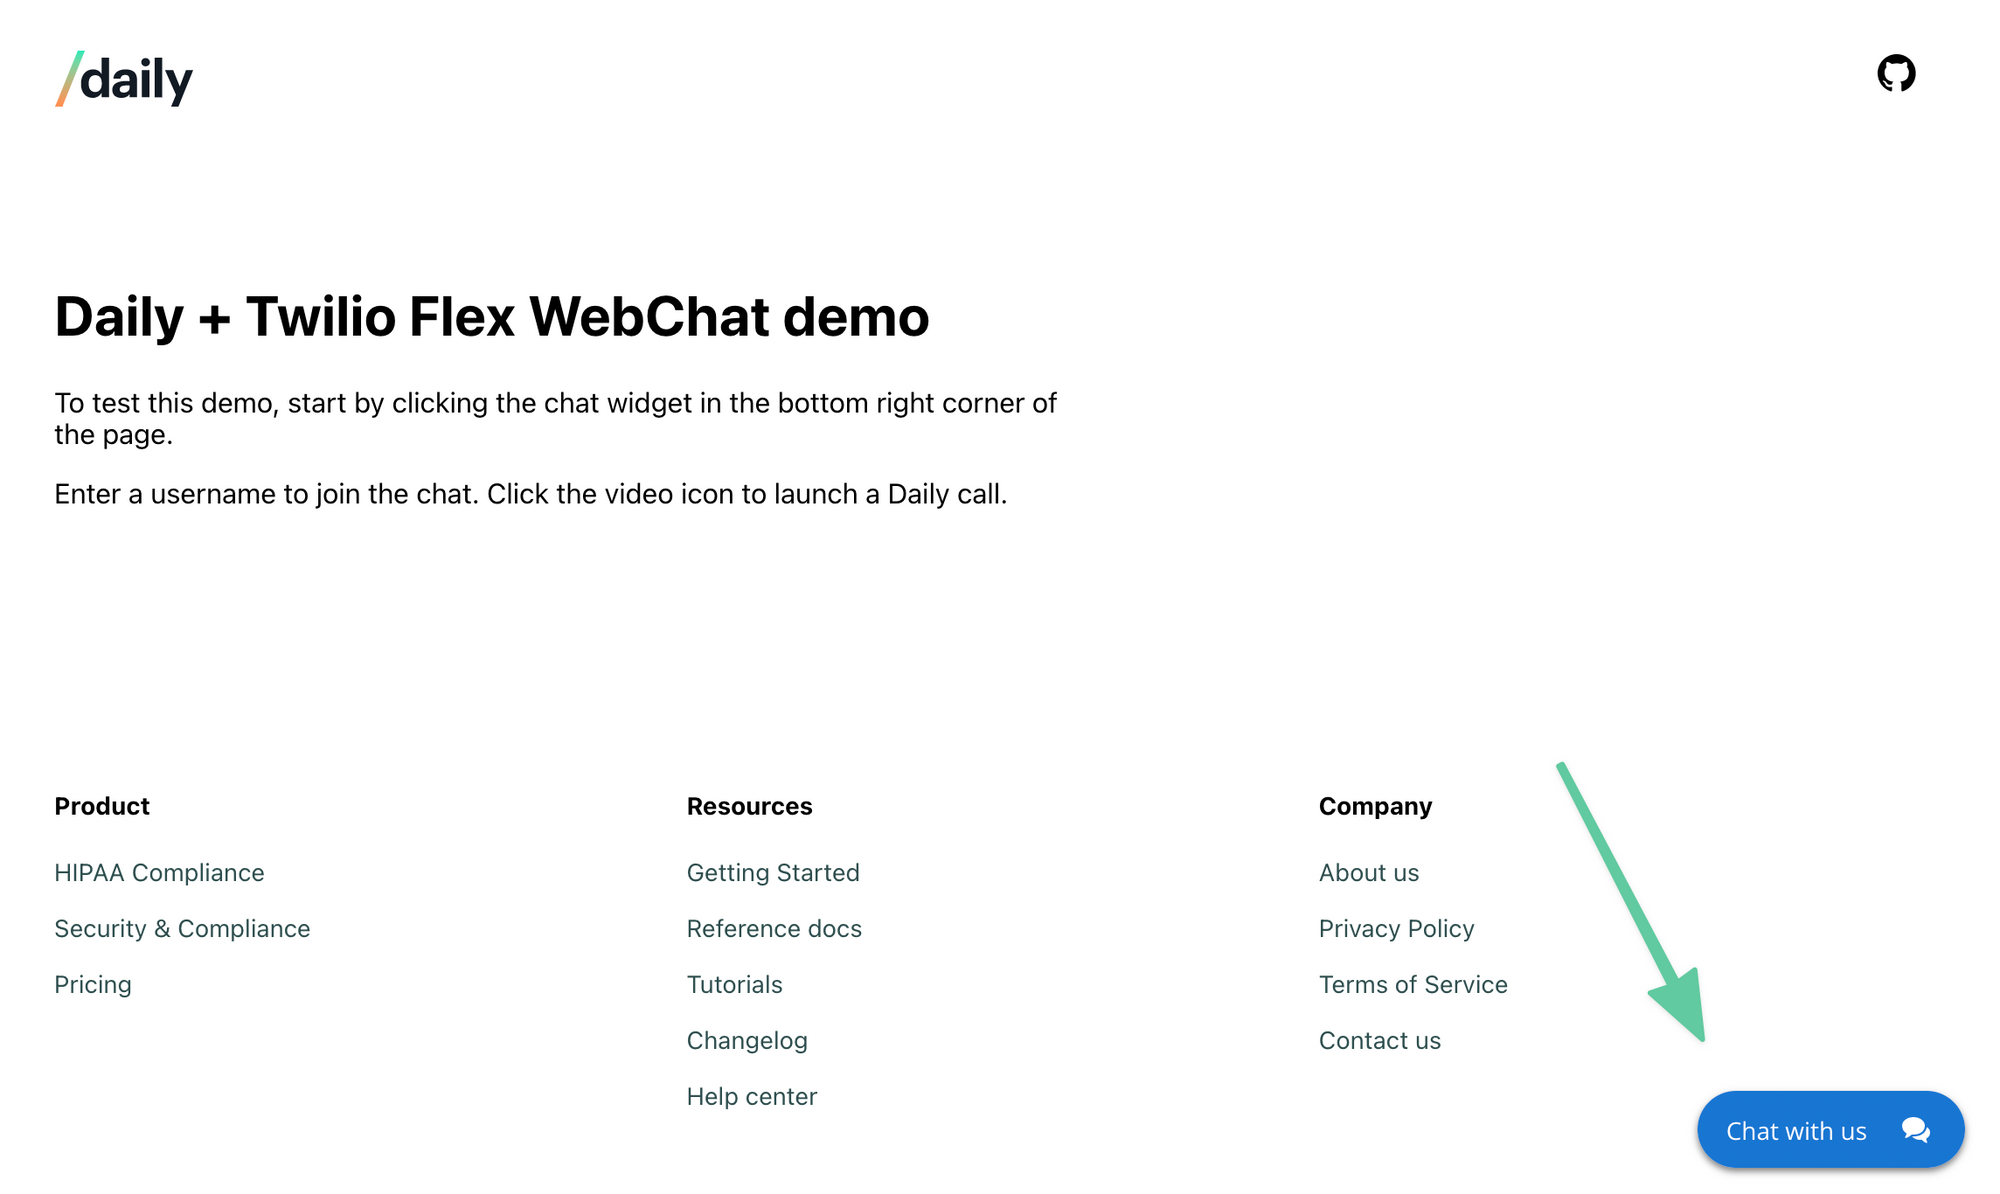
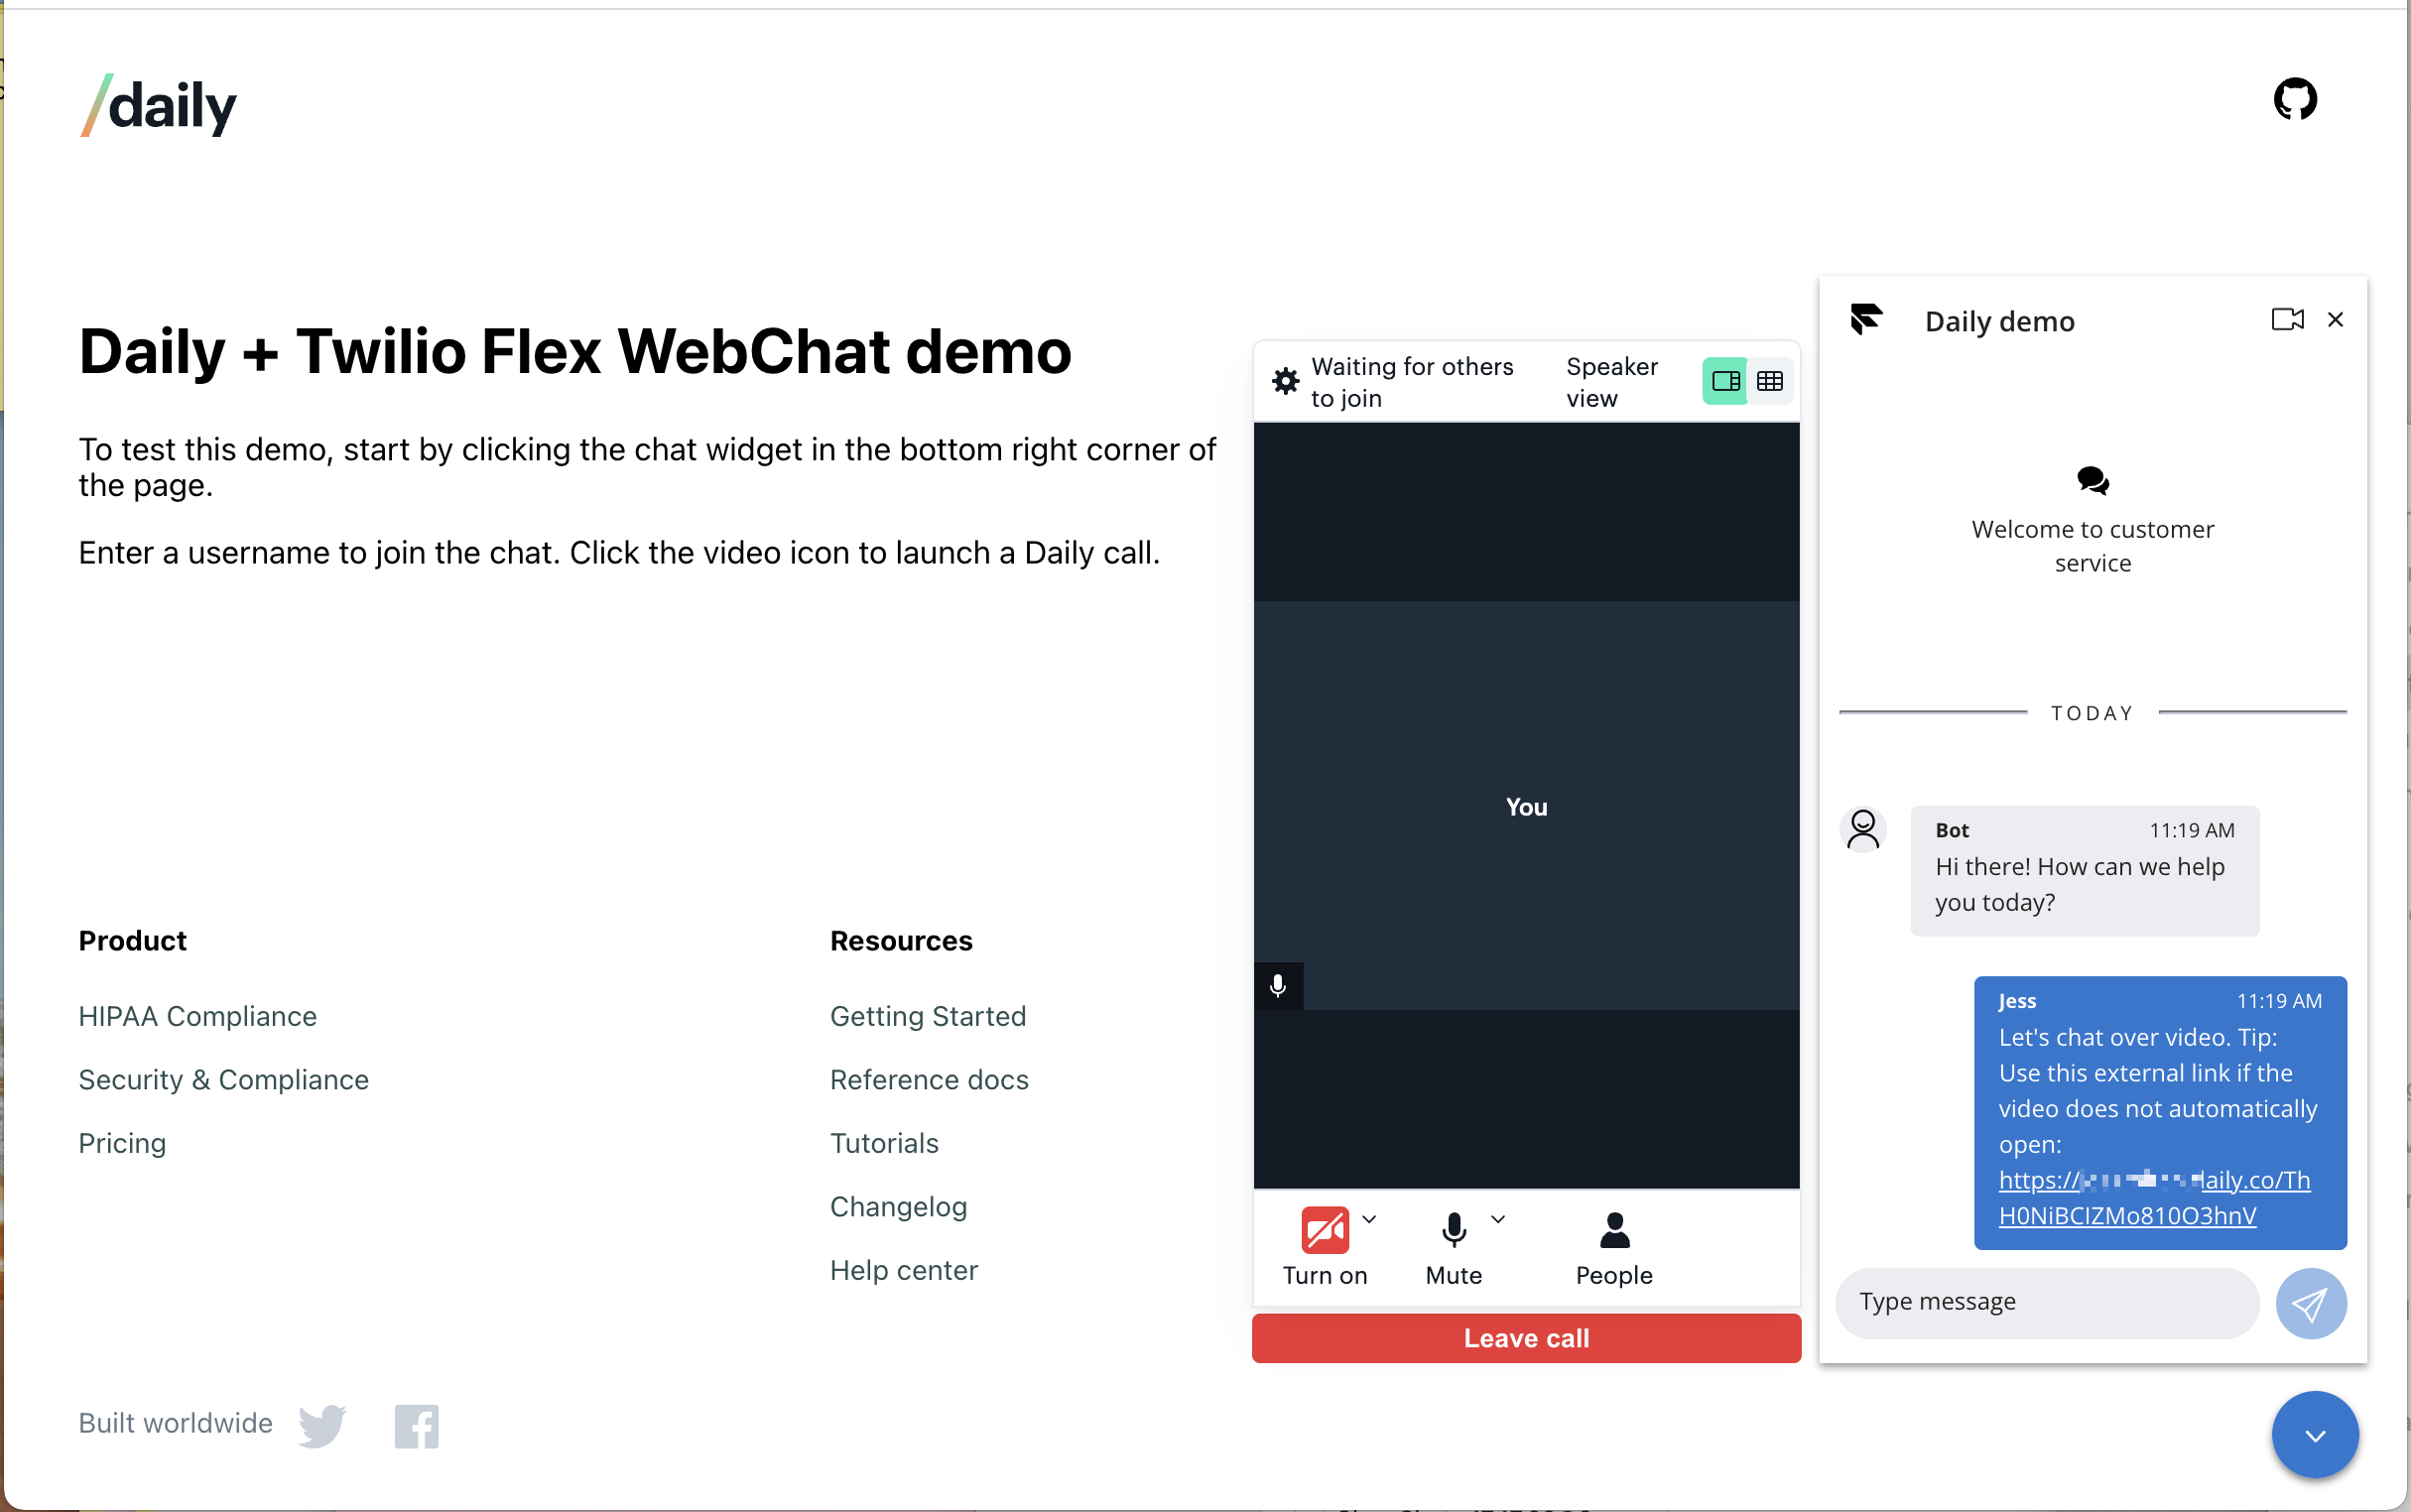
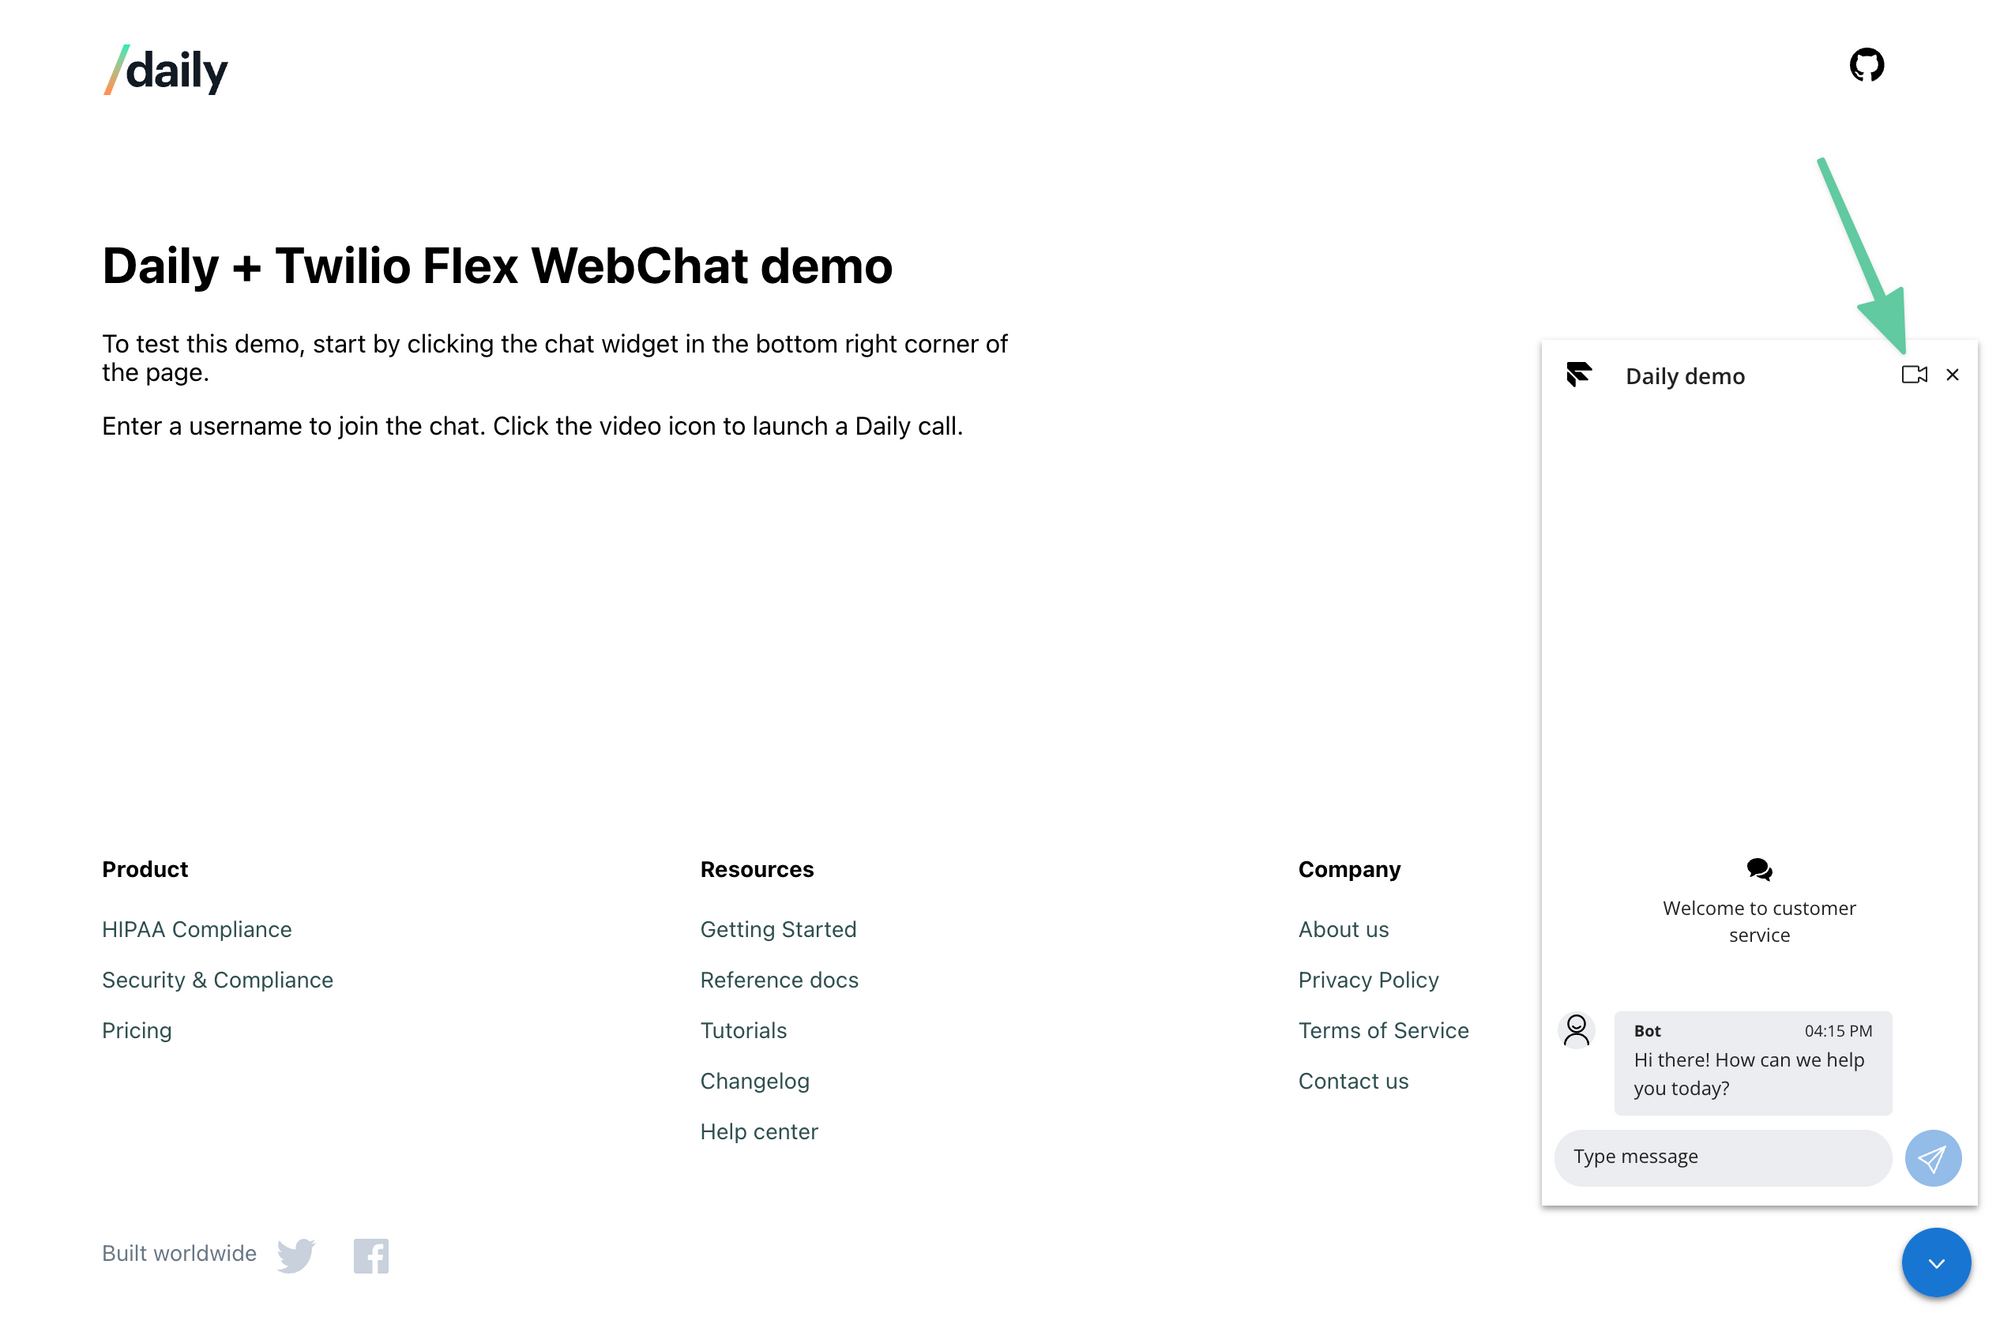
In today’s tutorial, we’ll be extending Twilio’s Flex WebChat UI to offer in-chat video calls. This feature can be extremely useful during chat conversations if the participants decide it would be easier to jump in a video call to speak.
Defining our feature set
To build this demo app, we’ll:
- Use React (
create-react-app) - Create a single landing page with some static content, since this demo is really about the chat widget
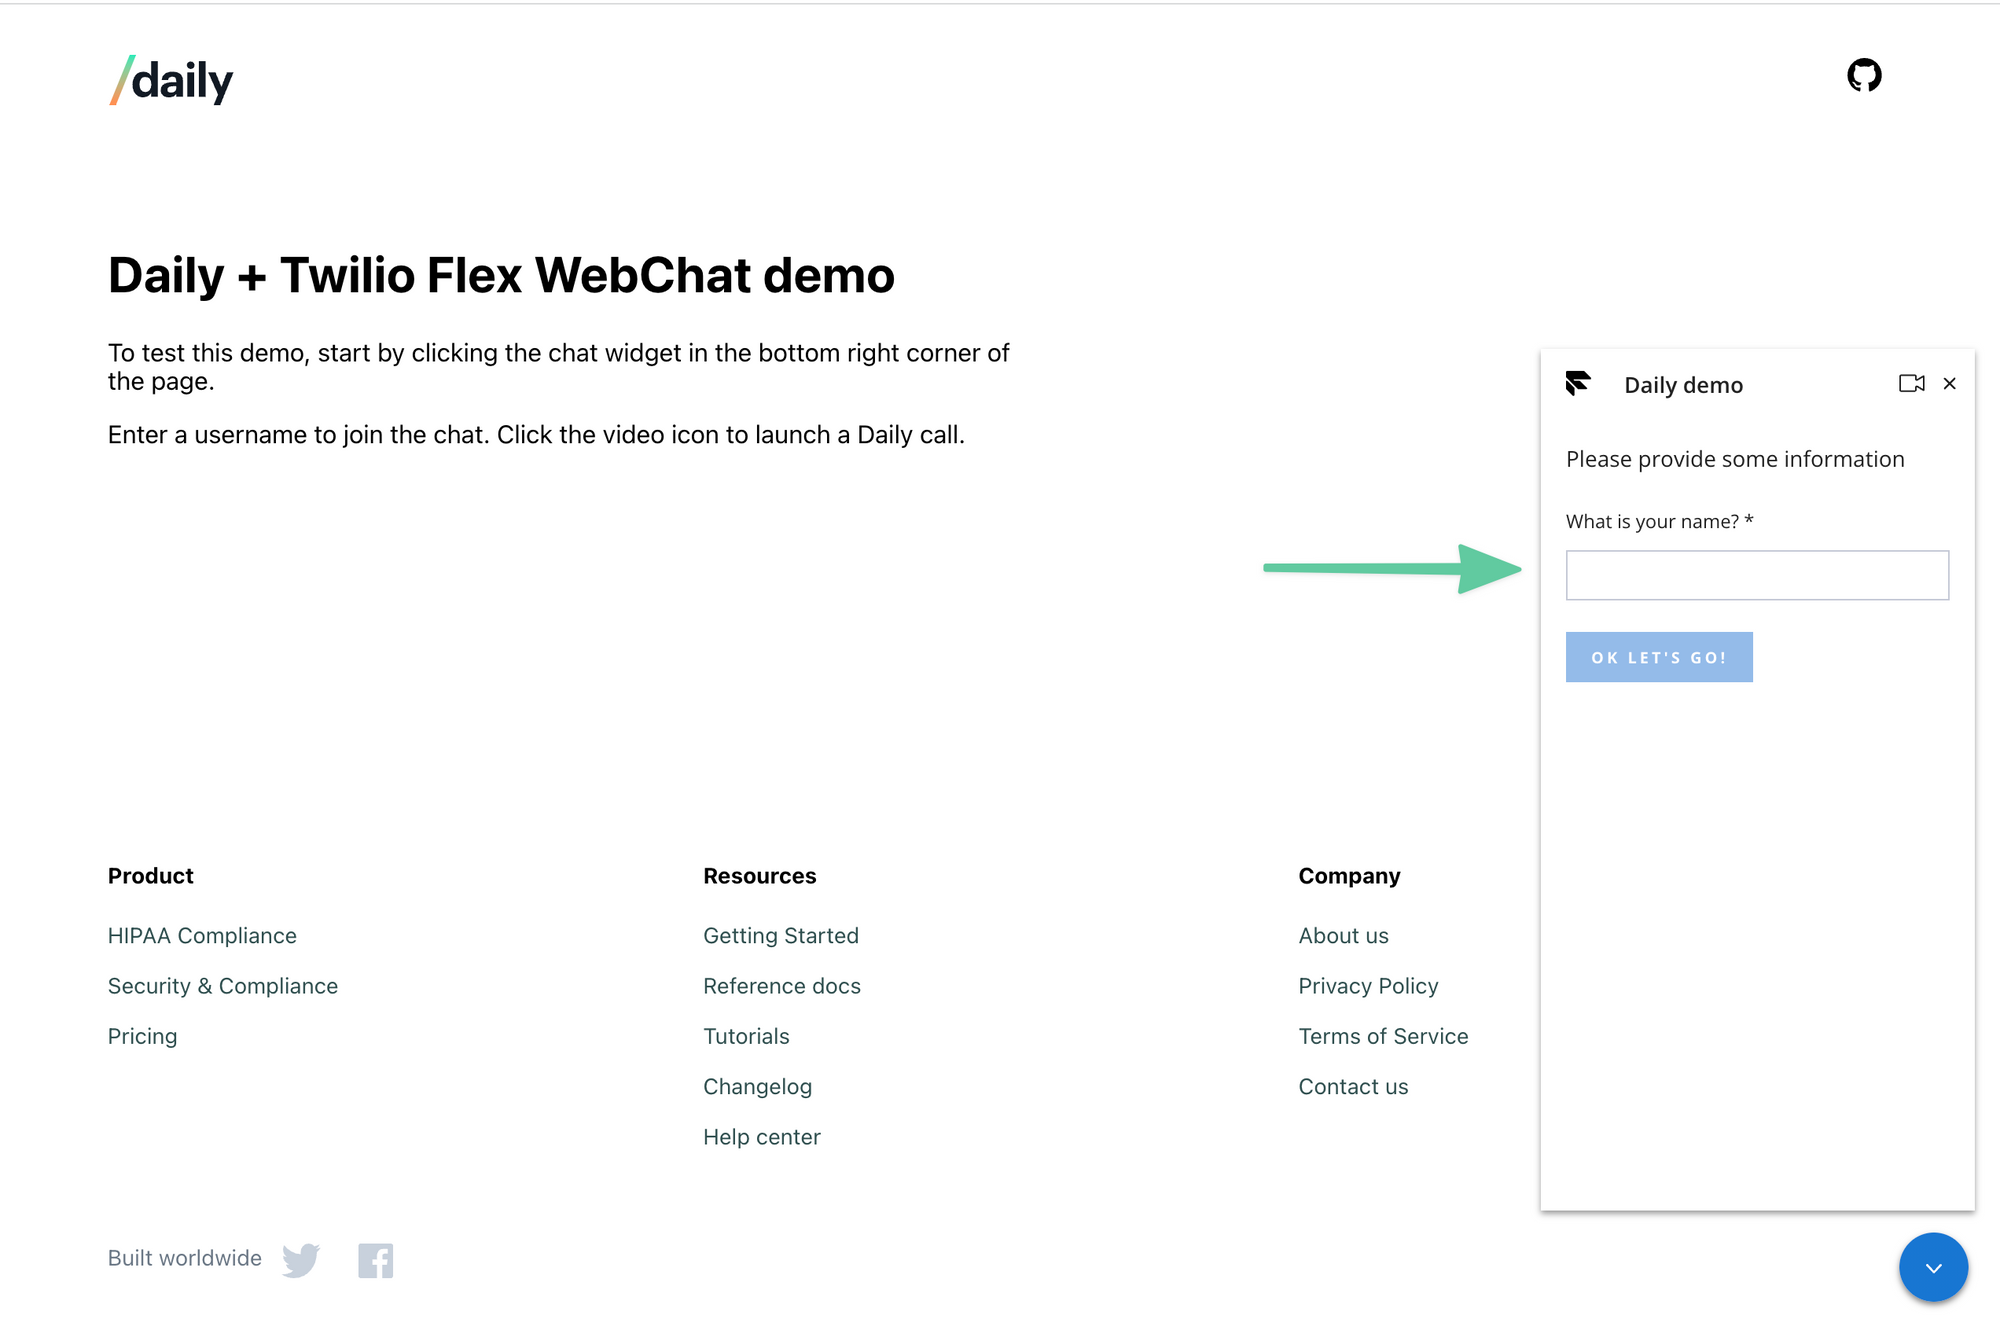
- Embed Twilio’s Flex WebChat UI and use their “pre-engagement” form to get the user’s name
- Add a button to the chat’s main header. It will be a video icon that opens a Daily video call on click
- Use Daily Prebuilt for our video call, though you could build a custom video option with Daily’s call object mode
- Send the Daily call link in the chat for the Flex agent (the person they’re chatting with) to join the call, too
- Add a custom button to leave the current Daily call
And that’s it. 💥
Running this demo locally
To see and follow along with the completed version of this demo, clone the Github repo.
Copy the .env.sample file and remove .sample so it’s just an .env file with the following values:
REACT_APP_TWILIO_ACCOUNT_SID="your-Twilio-account-sid"
REACT_APP_TWILIO_FLEX_FLOW_SID="your-Twilio-flex-flow-sid"
REACT_APP_DAILY_API_KEY="your-Daily-API-key"
You’ll need a Daily and Twilio account to get these values. Let’s review where they can be found.
Creating a Daily account
To get a Daily API key, you will need to sign up for a Daily account. Navigate to the Developers page in the Daily Dashboard to get your API key and add in to your .env variables above (REACT_APP_DAILY_API_KEY).
Creating a Twilio account
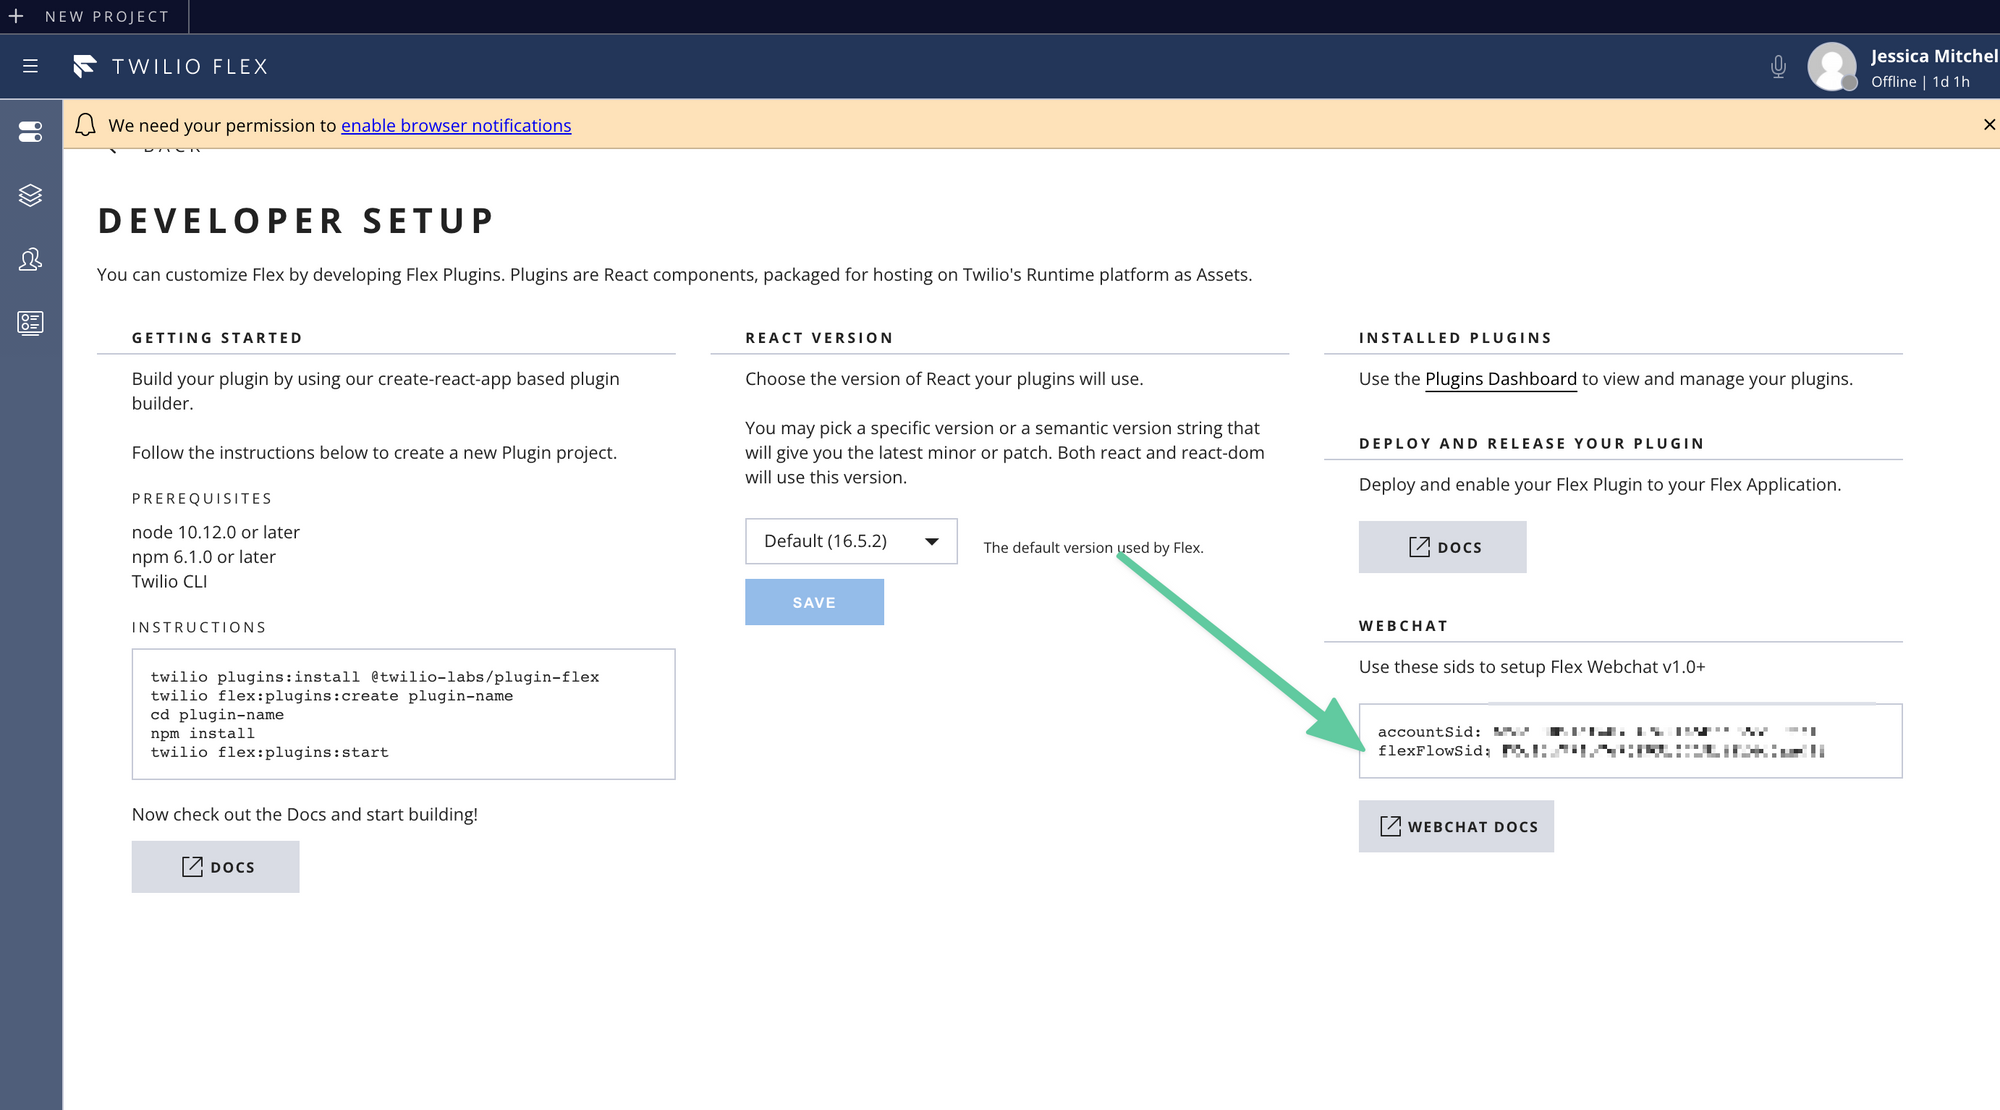
To get your Account SID and Flex Flow SID from Twilio, you’ll first need to sign up for a Twilio account.
Next, you’ll need to go to the console homepage to get your account SID.
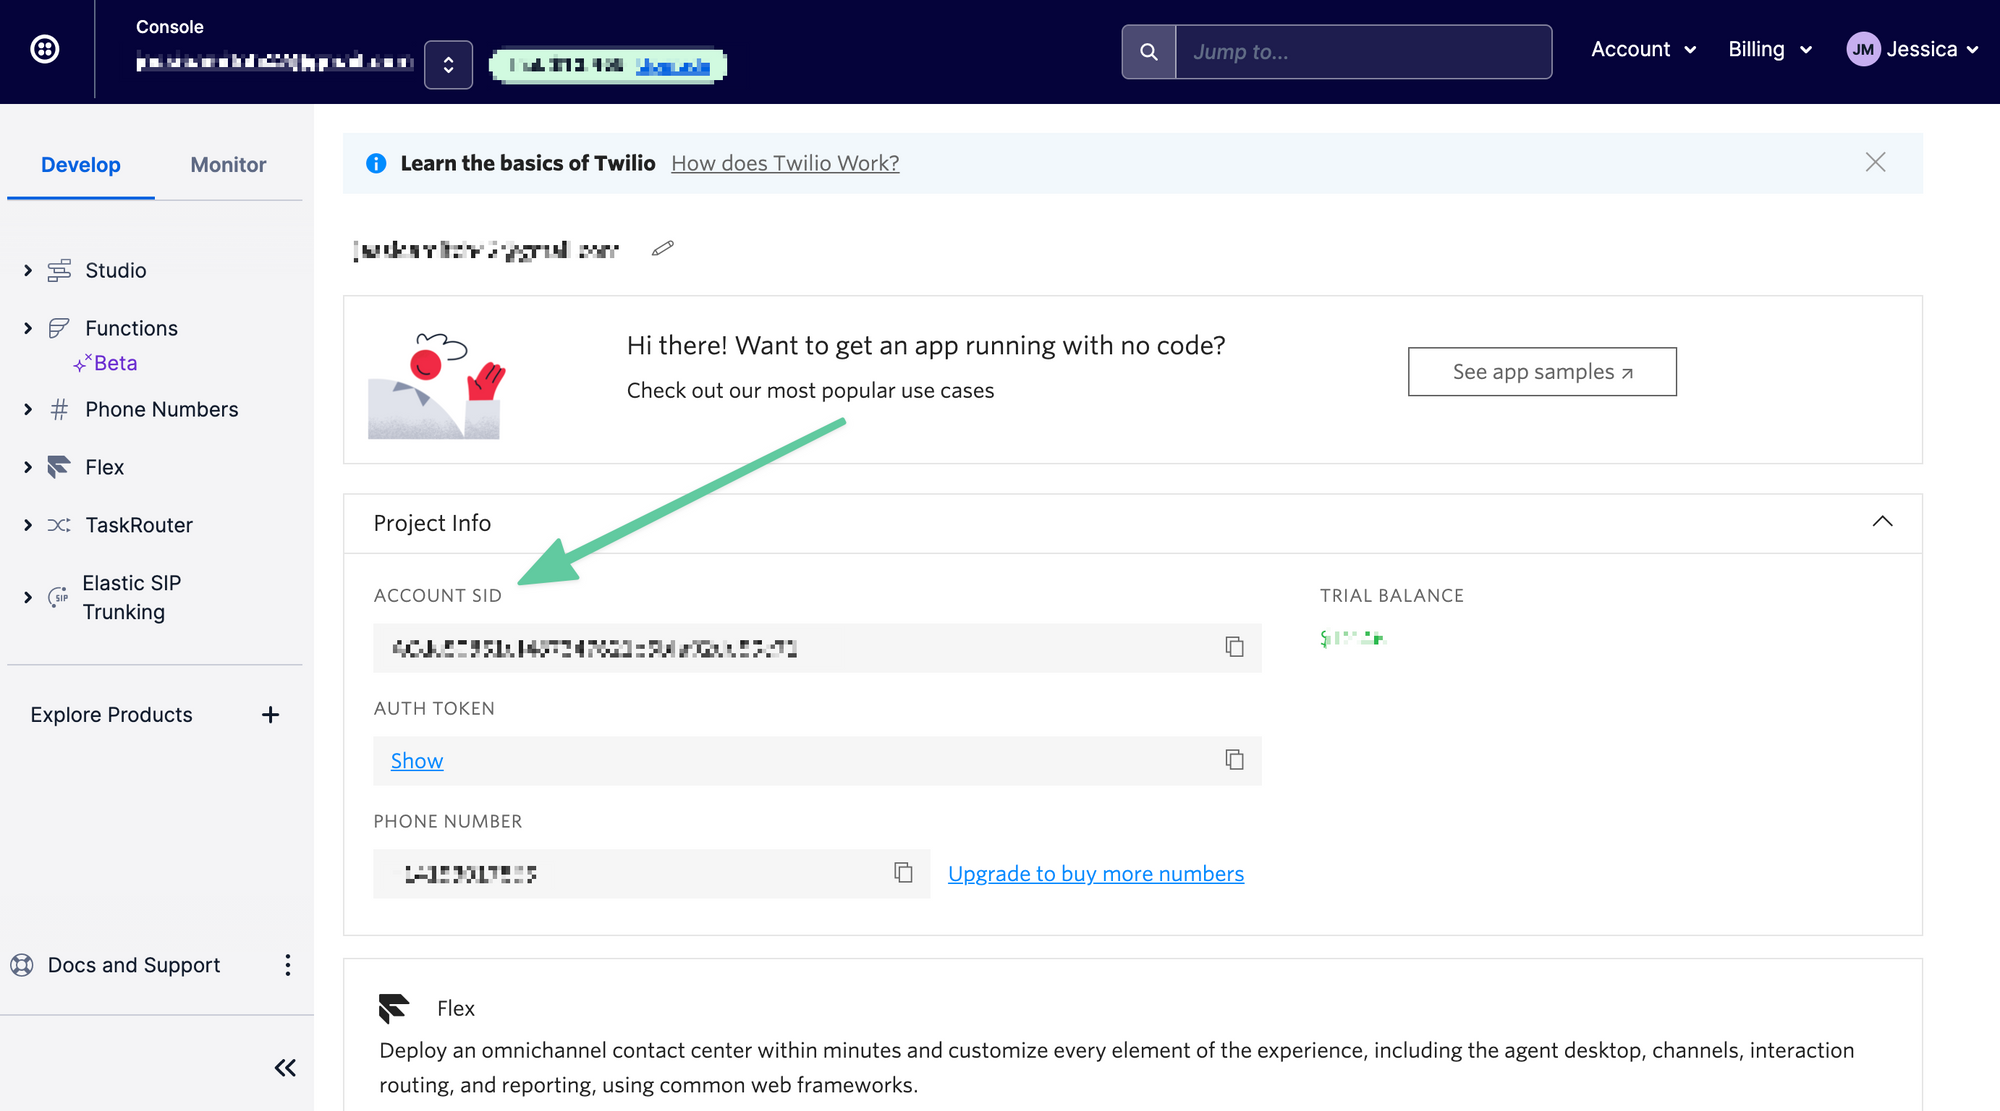
You’ll then need to visit the Flex console for your Flex Flow SID. (Your account SID is available here too, if that's easier.)
Once your .env file is updated with these three values, run the following commands in a terminal window:
cd twilio-flex-webchat
yarn
yarn start
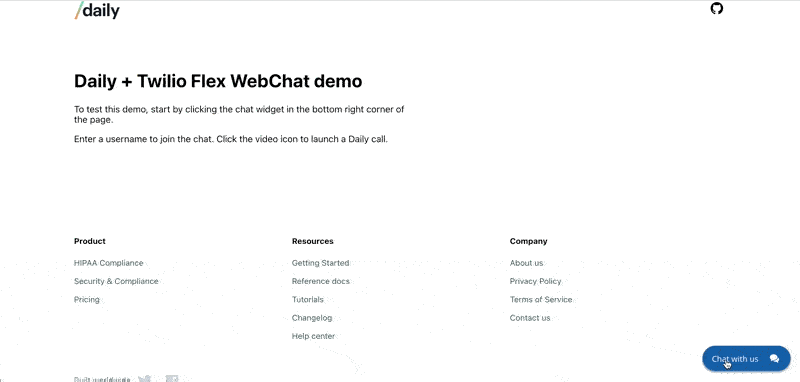
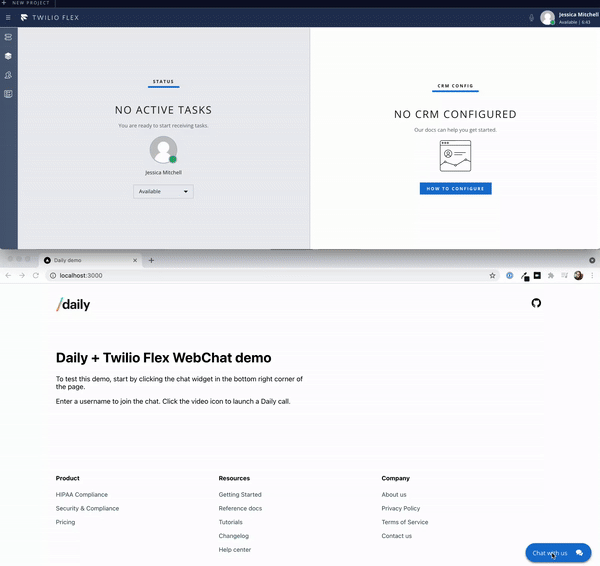
Visit http://localhost:8080 to view the demo app and test it out.
Reviewing this project’s component structure
This demo is different than most because the actual website is inconsequential for our current focus. We have a basic React site with a header, main content, and footer, all made up of static content.
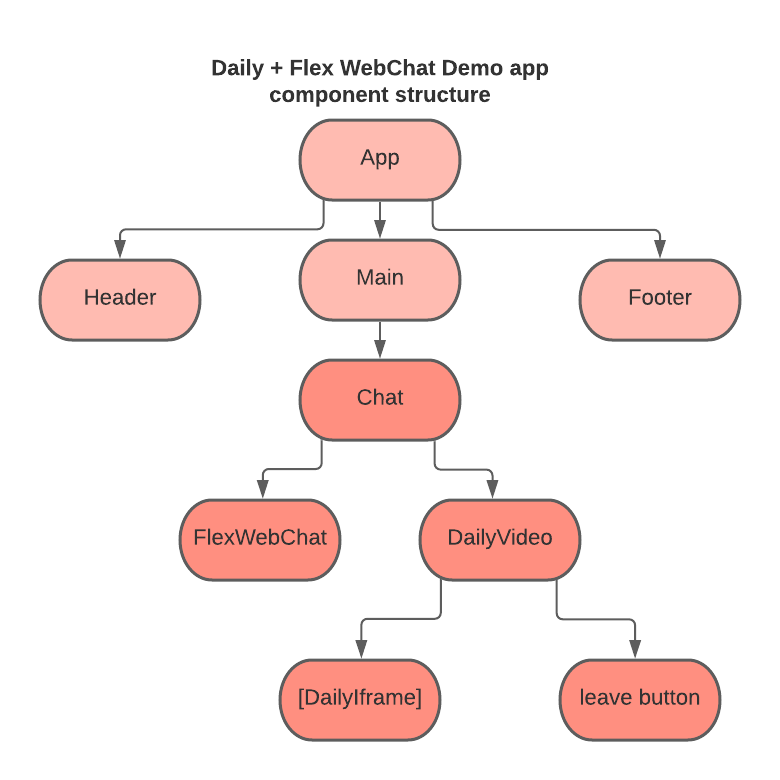
Our main focus is the Chat component, which embeds Twilio’s Flex WebChat widget. As you can see in the chart above, the Chat component is also what embeds the Daily iframe when a video call is started. The DailyVideo component, a child component of Chat, contains the iframe and the custom “leave” button we’ll add to the UI to end a video call.
We’ll skip right to the Chat component in this tutorial to go through how this all works.
Setting up our chat configuration options
The first step for creating our Chat component is deciding on our Flex WebChat configuration options.
const config = {
 disableLocalStorage: true,
 accountSid: process.env.REACT_APP_TWILIO_ACCOUNT_SID,
 flexFlowSid: process.env.REACT_APP_TWILIO_FLEX_FLOW_SID,
 startEngagementOnInit: false,
 preEngagementConfig: {
   description: "Please provide some information",
   fields: [
     {
       label: "What is your name?",
       type: "InputItem",
       attributes: {
         name: "friendlyName",
         type: "text",
         required: true,
       },
     },
   ],
   submitLabel: "Ok Let's Go!",
 },
 componentProps: {
   MainHeader: {
     titleText: "Daily demo",
   },
 },
};
twilioConfig.js
This is where we use our Account SID and Flex Flow SID values that we set in our .env file to connect the chat widget to our Twilio account. The preEngagementConfig object sets our form inputs, which allows us to get the user’s name before joining the chat.
You can set a lot more options here, but we’ll keep it simple to start.
Next, let’s look at how to build the Chat component.
Breaking down the parent Chat component
Our parent Chat component contains everything related to chat in our app:
- Twilio’s Flex WebChat widget
- The Daily video call, using Daily Prebuilt, and its custom leave button
Let’s look at how the code for this component is organized:
function Chat() {
const [chat, setChat] = useState({});
const [showVideo, setShowVideo] = useState(false);
const [username, setUsername] = useState(null);
/**
* Click handler for video icon button added to Flex WebChat UI header
*/
const onVideoClick = () => {
setShowVideo(true);
};
/**
* Add Flex WebChat widget to page
*/
useEffect(() => {
if (chat?.manager?.store) return;
FlexWebChat.Manager.create(config)
.then((manager) => {
FlexWebChat.MainHeader.Content.add(
<VideoButton key="video-icon" onClick={onVideoClick} />,
{ sortOrder: -1, align: "end" }
);
// Set username in state after user fills out form
FlexWebChat.Actions.addListener("afterStartEngagement", (payload) => {
const { friendlyName } = payload.formData;
setUsername(friendlyName);
});
setChat({ manager });
})
.catch((error) => setChat({ error }));
}, [chat]);
/** Turn off video if they haven't entered a name yet */
useEffect(() => {
if (showVideo && !username) {
setShowVideo(false);
}
}, [showVideo, username]);
/** Share the Daily link in the chat */
const sendDailyLink = useCallback(
(url) => {
const { channelSid } = chat.manager.store.getState().flex.session;
chat.manager.chatClient.getChannelBySid(channelSid).then((channel) => {
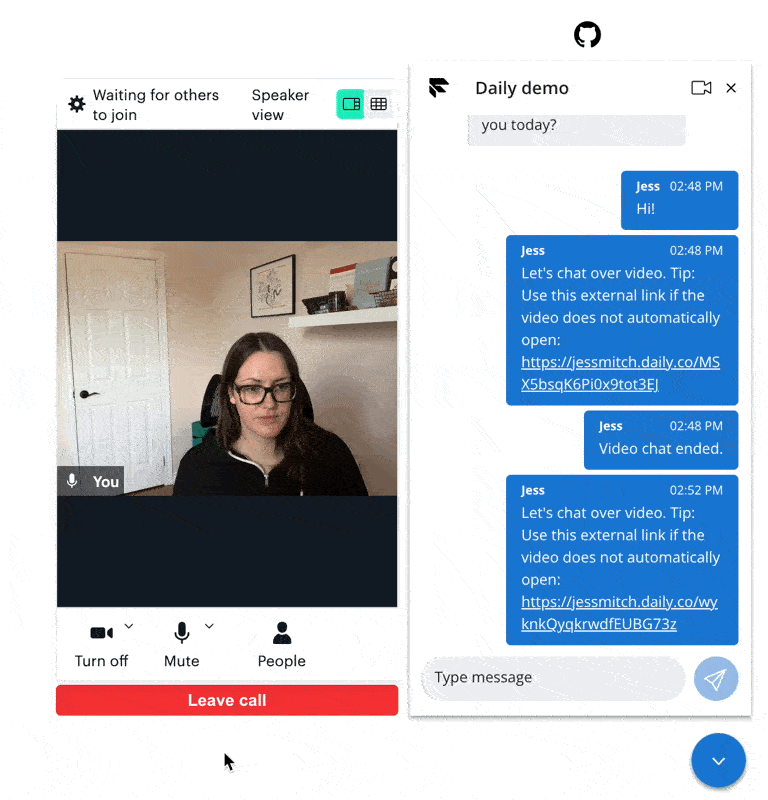
const message = `Let's chat over video. Tip: Use this external link if the video does not automatically open: ${url}`;
channel.sendMessage(message);
});
},
[chat]
);
/** Share the Daily link in the chat */
const sendLeaveMessage = useCallback(() => {
const { channelSid } = chat.manager.store.getState().flex.session;
chat.manager.chatClient.getChannelBySid(channelSid).then((channel) => {
const message = "Video chat ended.";
channel.sendMessage(message);
});
}, [chat]);
return (
<div className="chat-container">
{showVideo && username && (
<DailyVideo
username={username}
setShowVideo={setShowVideo}
sendDailyLink={sendDailyLink}
sendLeaveMessage={sendLeaveMessage}
/>
)}
{chat?.manager && (
<div>
<FlexWebChat.ContextProvider manager={chat?.manager} isEntryPointExpanded>
<FlexWebChat.RootContainer />
</FlexWebChat.ContextProvider>
</div>
)}
{chat?.error && <p className="error-msg">{chat?.error.toString()}</p>}
</div>
);
}
Chat.jsx
There’s quite a bit going on here so we’ll step through this in blocks. Let’s start with what will actually be rendered:
return (
   <div className="chat-container">
     {showVideo && username && (
       <DailyVideo
         username={username}
         setShowVideo={setShowVideo}
         sendDailyLink={sendDailyLink}
         sendLeaveMessage={sendLeaveMessage}
       />
     )}
     {chat?.manager && (
       <div>
         <FlexWebChat.ContextProvider manager={chat?.manager} isEntryPointExpanded>
           <FlexWebChat.RootContainer />
         </FlexWebChat.ContextProvider>
       </div>
     )}
   </div>
)
Chat.jsx
There are two elements to be aware of here:
- The
DailyVideocomponent conditionally renders only ifshowVideois true and there’s ausernameset in our local state. - The
FlexWebChatcontext andRootContainerhandle all the chat widget UI and functionality for us so that part is as simple as rendering it when themanageris set. (See below for more information on what that means. 👀)
Now that we know what we’re rendering, let’s look at how to initially load the Flex WebChat widget.
 useEffect(() => {
   if (chat?.manager?.store) return;
   FlexWebChat.Manager.create(config)
     .then((manager) => {
       FlexWebChat.MainHeader.Content.add(
         <VideoButton key="video-icon" onClick={onVideoClick} />,
         { sortOrder: -1, align: "end" }
       );
       // Set username in state after user fills out form
       FlexWebChat.Actions.addListener("afterStartEngagement", (payload) => {
         const { friendlyName } = payload.formData;
         setUsername(friendlyName);
       });
       setChat({ manager });
     })
     .catch((error) => setChat({ error }));
 }, [chat]);
Chat.jsx
First, we check to see if the chat has already been added to our state and only add it if it hasn’t.
Next, we use the FlexWebChat module (imported at the top of the file import * as FlexWebChat from "@twilio/flex-webchat-ui";) to create the chat “manager”, or an instance of the WebChat.
Since the manager’s create() function is a Promise, we wait for it to resolve and .then() do a few more things:
- We add the custom video button to the chat widget’s main header. There’s an
onClickevent handler added to this button that will setshowVideoto true when it’s clicked. As mentioned before, whenshowVideois true, the Daily video gets rendered and the call can be joined.
FlexWebChat.MainHeader.Content.add(
   <VideoButton key="video-icon" onClick={onVideoClick} />,
   { sortOrder: -1, align: "end" }
);
- We add an event listener to the chat widget for
afterStartEngagement(a.k.a. after the name form has been submitted in the chat widget). We want to keep that name available so it can be set in the Daily video call later on.
 FlexWebChat.Actions.addListener("afterStartEngagement", (payload) => {
    const { friendlyName } = payload.formData;
    setUsername(friendlyName);
 });
Chat.jsx
- Once all of that is done, we set the chat manager in local storage to avoid reloading it if our state changes.
setChat({ manager });
Programmatically sending messages in Flex WebChat
Before we move on to the video call, let’s look at how message sending works. Flex WebChat offers the ability to send chat messages programmatically, so we will take advantage of this to share the Daily video link with the chat agent.
const sendDailyLink = useCallback(
   (url) => {
     const { channelSid } = chat.manager.store.getState().flex.session;
     chat.manager.chatClient.getChannelBySid(channelSid).then((channel) => {
       const message = `Let's chat over video. Tip: Use this external link if the video does not automatically open: ${url}`;
       channel.sendMessage(message);
     });
   },
   [chat]
 );
Chat.jsx
Here, we’re getting our channel ID from the manager’s store and then using the sendMessage() method to send our Daily room URL. The URL isn’t available until the room has actually been created—we create a unique room for each call that is initialized— so the URL will be passed as a parameter.
We also send a message when the local chat participant leaves the Daily call. This is completely optional and just gives some visual feedback that they left successfully, so we won’t worry about that action for now.
Displaying a Daily video: Creating rooms, tokens, and embedding Daily Prebuilt
Next, let’s look at our DailyVideo component. We’ll render a div where the Daily Prebuilt iframe will be embedded, and a button to leave the Daily call, as well as reset the call state.
Since the DailyVideo component will only show after the video icon button is clicked, we know we should immediately create a video call on render:
useEffect(() => {
   if (!username || callFrame) return;

   createAndJoinCall();
 }, [username, callFrame, createAndJoinCall]);
createAndJoinCall() does exactly what it sounds like: it creates a new Daily room to have a call in and joins the local participant, using the username set by the chat widget’s “pre-engagement” form.
const createAndJoinCall = useCallback(async () => {
   const room = await api.createDailyRoom();
   if (!room.name) {
     setError("Could not create Daily room");
     return;
   }
   setRoomName(room.name);

   const { token } = await api.createDailyToken(room.name, username);
   if (!token) {
     setError("Could not create Daily token");
     return;
   }

   const newCallFrame = DailyIframe.createFrame(
     callRef?.current,
     CALL_OPTIONS
   );

   newCallFrame.join({ url: room.url, token });
   sendDailyLink(room.url);

   setCallFrame(newCallFrame);
 }, [setCallFrame, username, sendDailyLink]);
We won’t get into the nitty gritty of the Daily REST API endpoints being used here (see api.js) since they really should be moved to a backend server for security purposes. (See our previous blog post on deploying a backend server for more information.)
So, suffice it to say, the steps in createAndJoinCall() are:
- Create a new Daily room for this specific chat user using the
/roomsPOST endpoint. - Show an error if there is an issue creating the room. Otherwise, set the newly created room's name in the component’s local state and continue.
- Create a Daily meeting token for the new room and pass the username, as well. (This allows us to skip Daily Prebuilt’s built-in name form.)
- Show an error if the meeting token creation fails.
- Create the Daily iframe, which gets embedded into the parent
divsupplied tocreateFrame(). - Join the call by passing the Daily room URL and token.
- Send the Daily room URL in the chat programmatically with the
sendDailyLink()method we wrote in theChatcomponent, which gets passed as a prop toDailyVideo. - Set the Daily room URL and call frame in local state for later reference.
Once these steps are completed, you’re officially in a Daily call! The last step is for the person you’re chatting with to click the Daily link on their end to join the video call with you. 👯
Time to go: Leaving your Daily call
If you recall from earlier, we are specifically adding a custom “Leave call” button instead of using Daily Prebuilt’s built-in leave button option. We’re doing this because we want leaving the call to have a few side effects:
- Leave the call and destroy the call frame (a “clean up” action)
- Reset our
Chatcomponent’sshowVideostate - Send a “participant left” message in the chat for some visual feedback
- Delete the Daily room. This is optional but will help avoid hitting your room limit since these rooms are meant for one-time use
Let’s look at the event handler we use to achieve this:
const leaveCall = useCallback(async () => {
   if (callFrame) {
     callFrame.leave();
     callFrame.destroy();
     setShowVideo(false);
   }
   sendLeaveMessage();
   await api.deleteDailyRoom(roomName);
   /* You may want to show an error if the delete fails
    * but, in our case, it's not important for the user
    */
 }, [callFrame, setShowVideo, roomName, sendLeaveMessage]);
This event handler is added to the leave button’s click event, which means clicking the leave button effectively resets our Chat component for future use.
Wrapping up
As mentioned, this is a basic implementation to extend Twilio’s Flex WebChat UI with Daily Prebuilt for video chat. To customize this even further, you could build a custom Daily video UI, which we’ve described in a previous Daily post.
You could also take advantage of Daily’s video recording option, which would allow you to have a recorded copy of any custom support videos that happen through your app.
Never miss a story
Get the latest direct to your inbox.